


Overcoming Technical and Policy Challenges in Serverless Adoption
WhatsApp is the most popular messaging platform in the world. It has approximately 2 billion users across the globe. Almost everyone you know is likely to be found on WhatsApp. But it was only until recently WhatsApp opened its doors to the commercial world into its system through WhatsApp Business API. This allows businesses to leverage whatsApp’s platform to offer better service for their customers. This gave rise to WhatsApp chatbots, which helps huge businesses to serve their customers. In this post, I’ll walk you through how to build a WhatsApp chatbot on AWS using one of Facebook’s official WhatsApp partner’s API.
Step 1
The very first thing we’d be needing is a WhatsApp Business Account. There are a whole set of procedures for this set by facebook. You can read more about this here.
Step 2
Once you have your WhatsApp business Account, the next important thing is to either setup the whatsApp client API on your own or to go via a Facebook approved partner using their API. The latter is the easiest option as they have already taken care of the heavy task of setting up an API for whatsApp. Here we’ll be using Gupshup’s API for our job.
Step 3
Sign-up to Gupshup. Gupshup has a sandbox mode, which is a demo environment that can be used to test your app. Create an app > Provide a unique name > Next > Go to the Dashboard. Click on the app you just created. Scroll down to the bottom and click on the “Callback URL”. This is where the endpoint for the lambda function that will be responsible for deciding the replies to be sent should be entered.
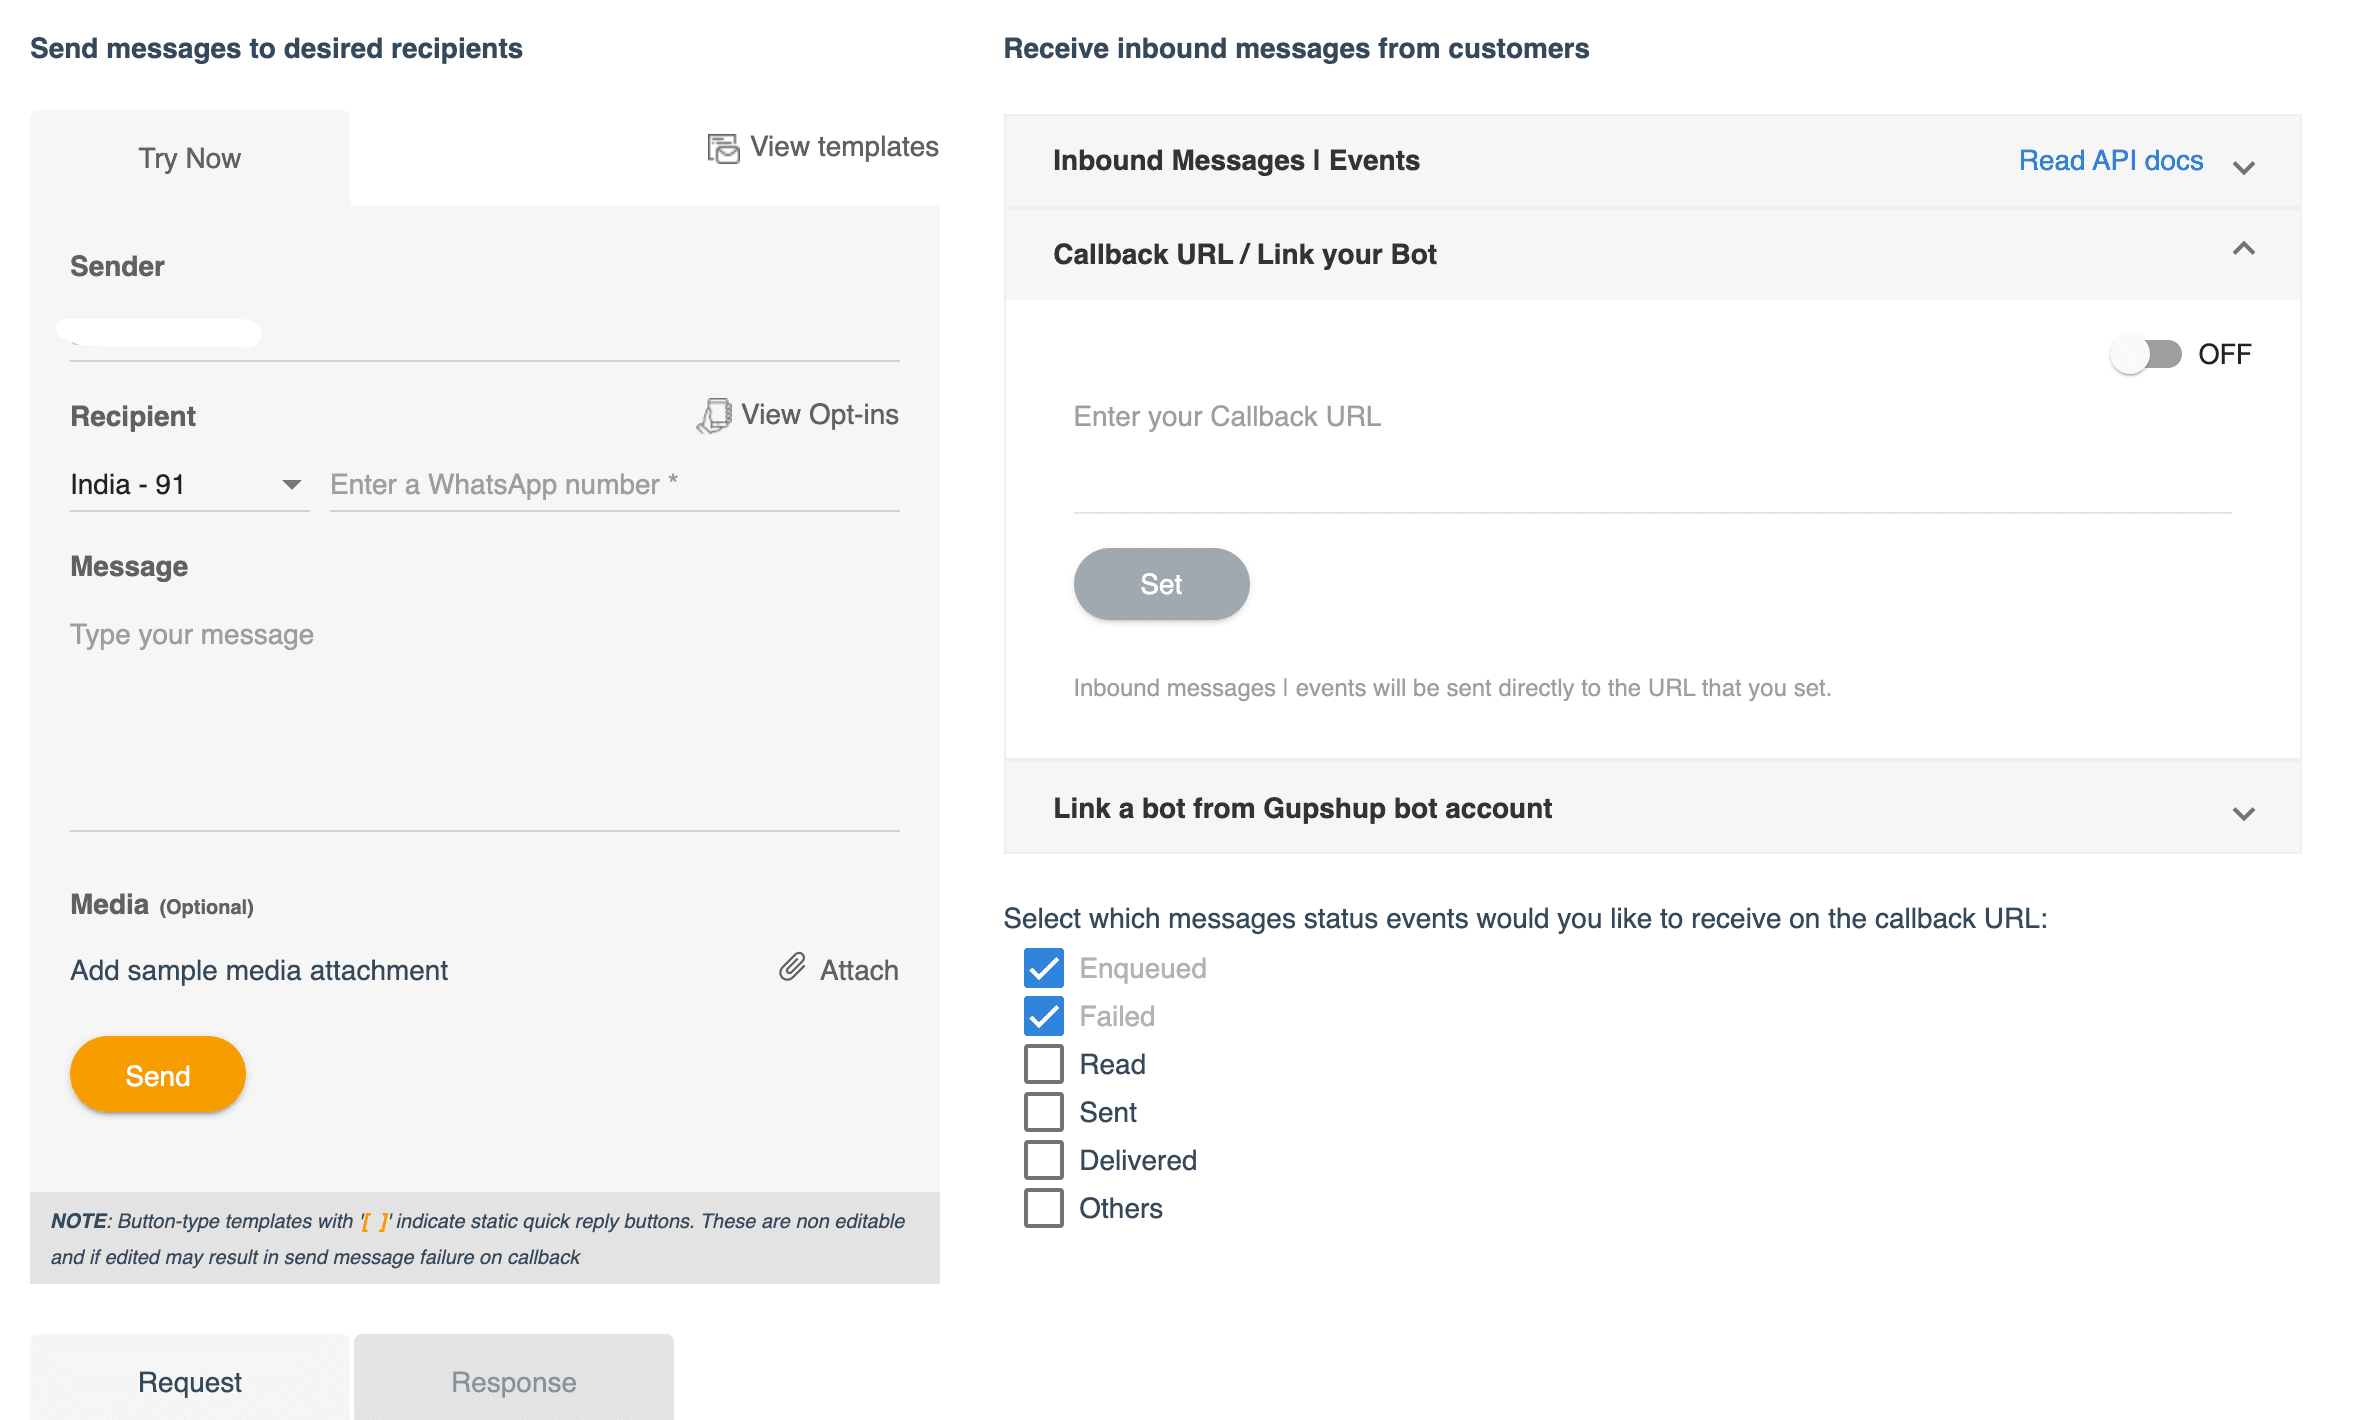
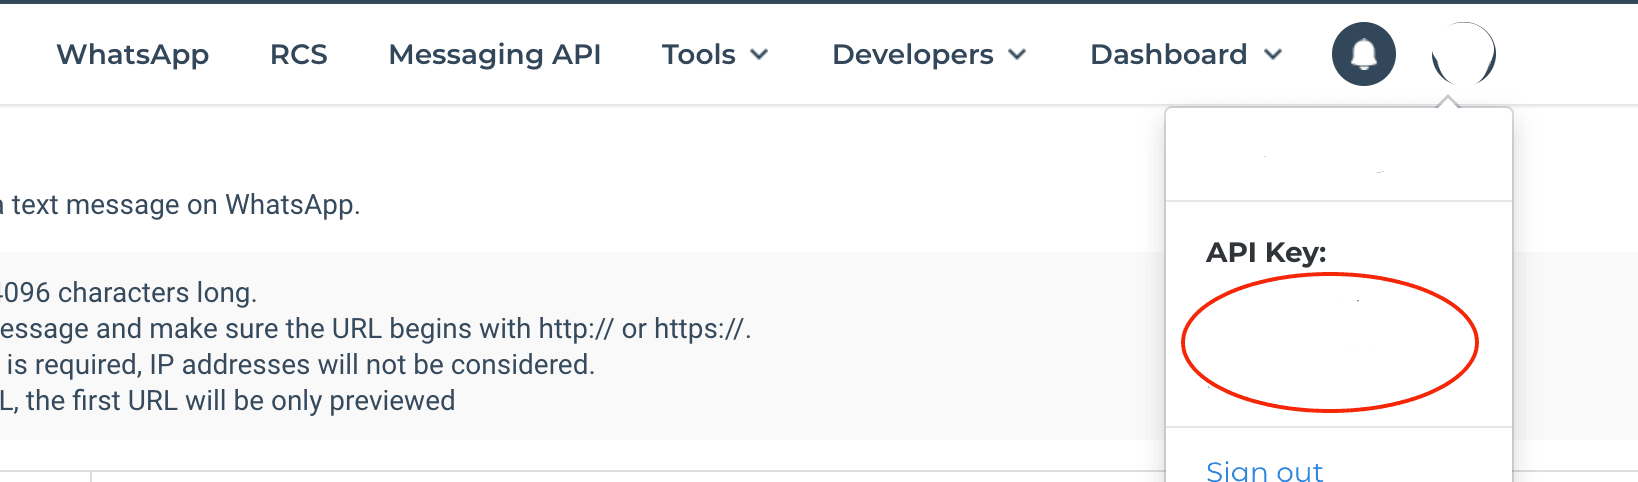
Make sure you note down your Gupshup api_key. You can see it by clicking on the profile pic at the top right corner of your dashboard.
Step 4
Now since everything else is done, it’s time to work on our AWS resources. For this project we’d be using AWS’ Lambda, API Gateway, DynamoDB for the backend and Amplify to host our react dashboard which will display the chat conversations.
Packages we’ll be using,
- aws-sdk
- express: web framework for node,
- serverless-http: This module allows you to ‘wrap’ your API for serverless use.
- Axios : Promise based HTTP client for the browser and node.js
- query-string: Parse and stringify URL query strings
- Cors : Provides a Connect/Express middleware that can be used to enable CORS with various options.
Overview of the Architecture
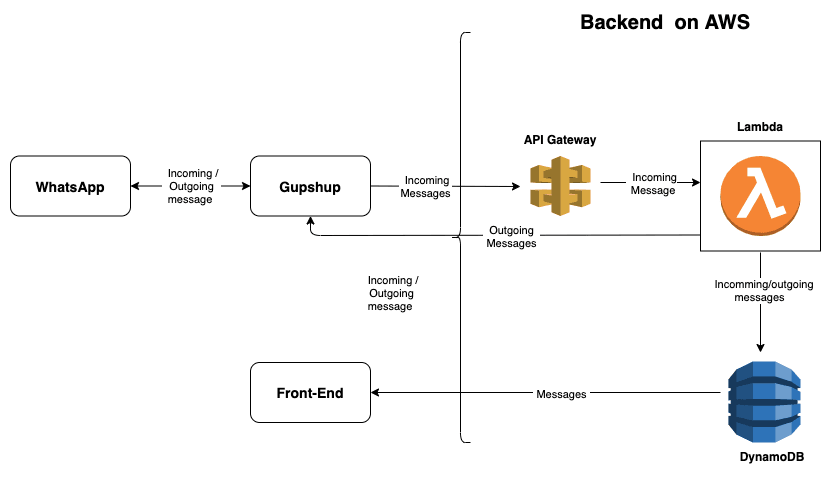
1. We’d be using serverless framework to make our jobs easier. We’ll start off by writing the serverless yml file which will setup all the necessary AWS resources that’ll be required for our application.
2. Once our AWS resources are setup and checked they are linked and working well together, we are good to write our logic into the lambda function. But before we begin that, let’s look at the input we’d be receiving at our API Gateway from Gupshup’s API.
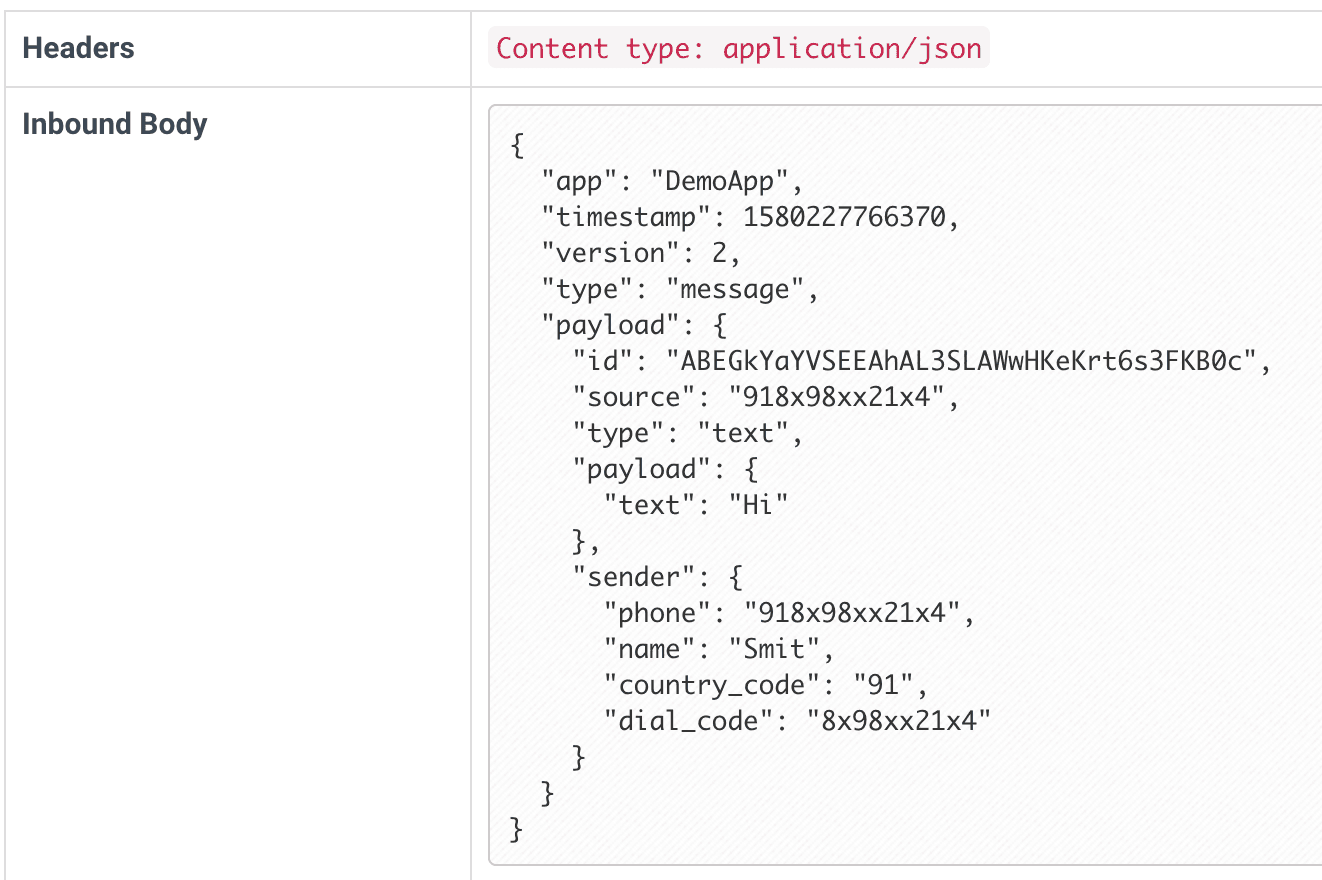
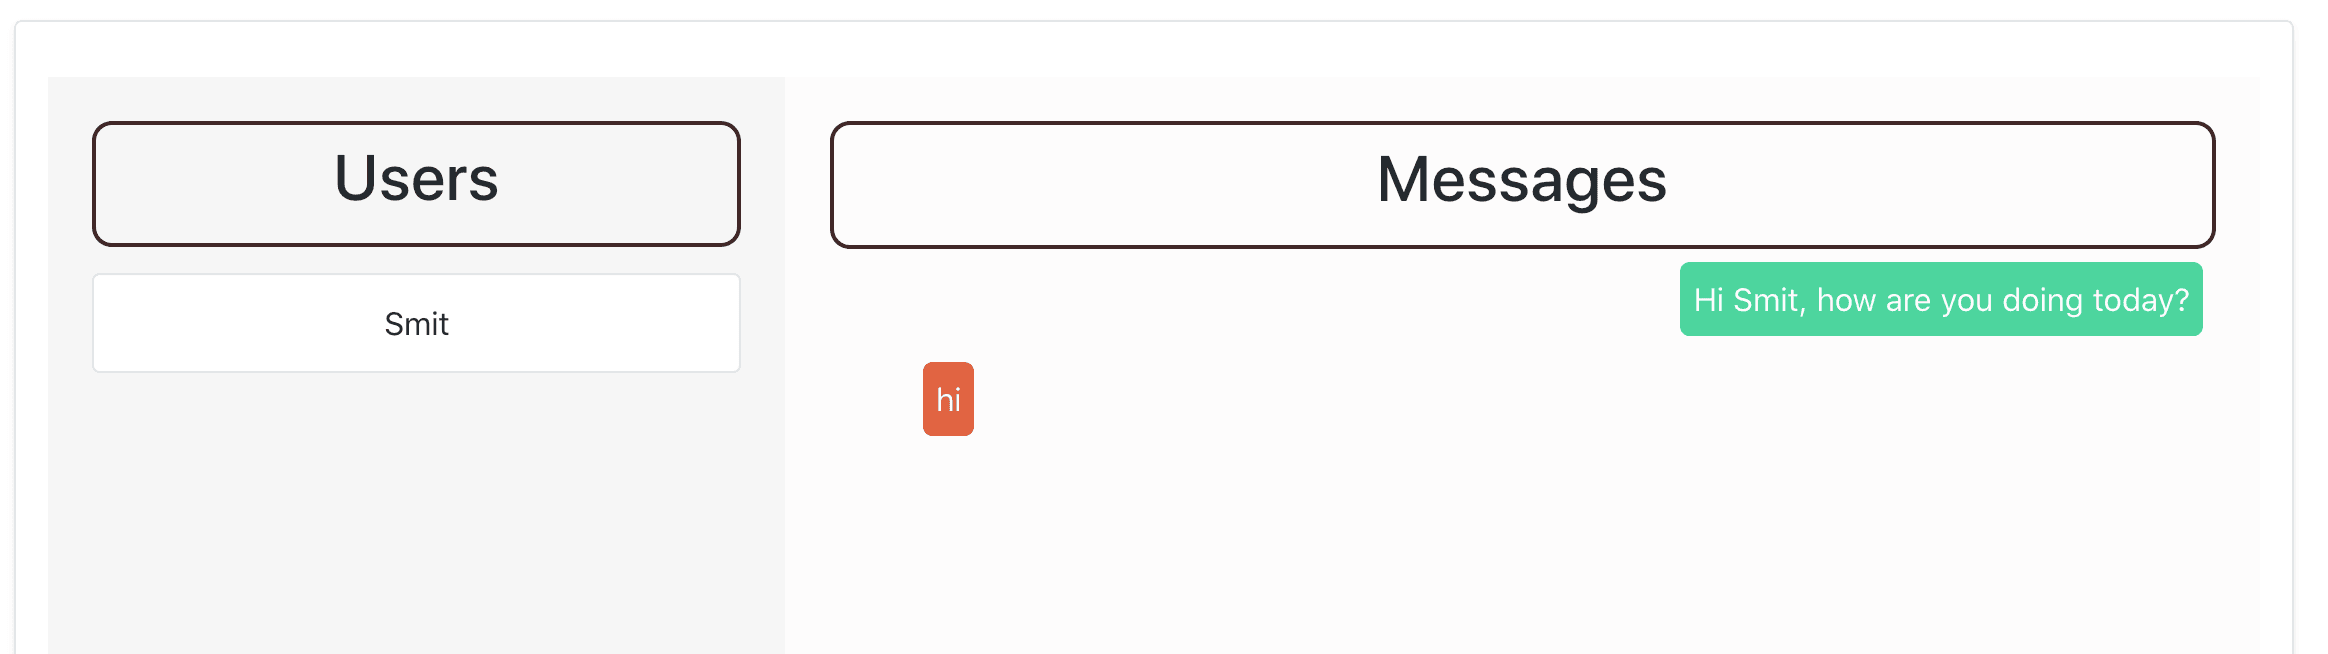
3. From Guphup’s API, we receive the user’s name, number and their input text. Now depending on the user’s input text, we can write a reply. For example, if user’s input message is “Hi” like in the above case, we could respond with a “Hello”. We could add a human touch to our messages by addressing the user by their name like “Hello Smit”.
4. We reply to user’s message by making a post request to Gupshup’s API using axios. Format of the request would be this way,
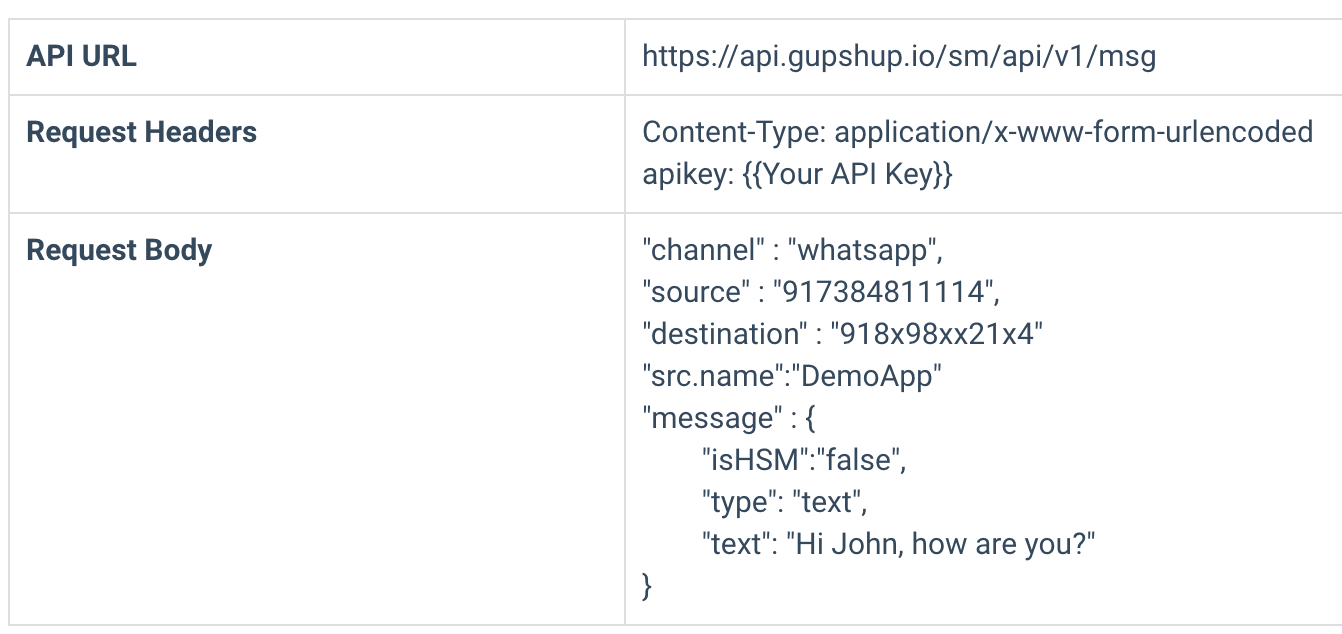
Don’t forget to include your Gupshup’s API-key in the request headers of the post request.
5. All the messages we send and receive would be through Gupshup’s API. We can assign a reply to all possible messages we’d be receiving from our users.
6. This mostly completes our job but only sending/receiving messages wouldn’t suffice. We’ll also have to keep a track of the messages we receive and send especially since our chatbot’s replies are hardcoded so that we may add more replies to user’s messages in the future.
7. Now since we managed to send and receive messages, we’ll be saving all the messages into our DynamoDB table. We’d be storing respective messages under each user’s name along with the time they were sent or received. This will allow us to keep the messages organised by time. This completes the backend part of our chatbot.
8. Front-end is built on react. We build a dashboard here listing all the user’s and messages belonging to their conversation. We make use of the time at which the record was created to sort the messages. Below the messages are sorted with the latest one sent/received at the top. This way we see the latest message and save us time scrolling through old messages.
9. It is recommended to add authorisation here if you’re considering to use this approach in production. It’s our responsibility to keep our user’s data safe and secure.
With this we have completed the walkthrough on building a WhatsApp chatbot. Once you are done making all the changes and feel the chatbot is good for production, hit the “Go Live” button on your Gupshup dashboard and follow the steps to make your chatbot public. Make sure to have your whatsApp business account details during this step.
References
For questions and suggestions, feel free to reach out to us on Twitter


