ChatGPT
  Perplexity
  Gemini
  Claude AI
 AWS CodeBuild is a continuous integration service that compiles source code, runs tests, and even deploy applications(in our case). This blog is intended to get you started on using CodeBuild building and deploying a simple application based on a serverless framework.
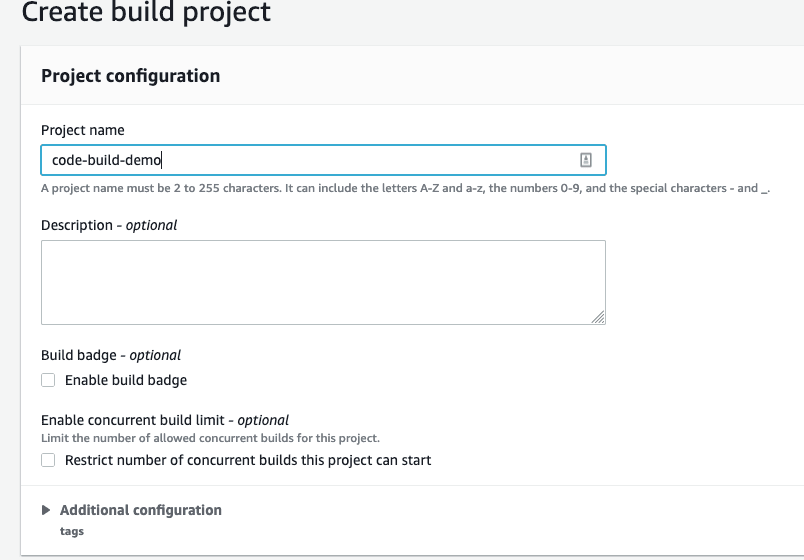
Step 1
Head to CodeBuild and click on "Create-project" and enter your project's name.
Step 2
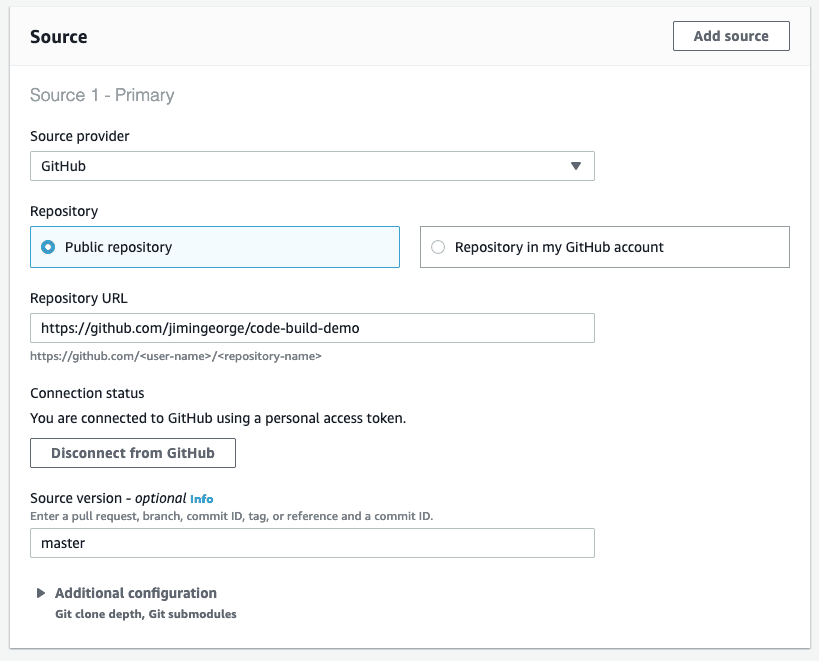
Under the "Source" section, choose the service provider where your project resides at. I have my project on "Github", hence I'd choose that.
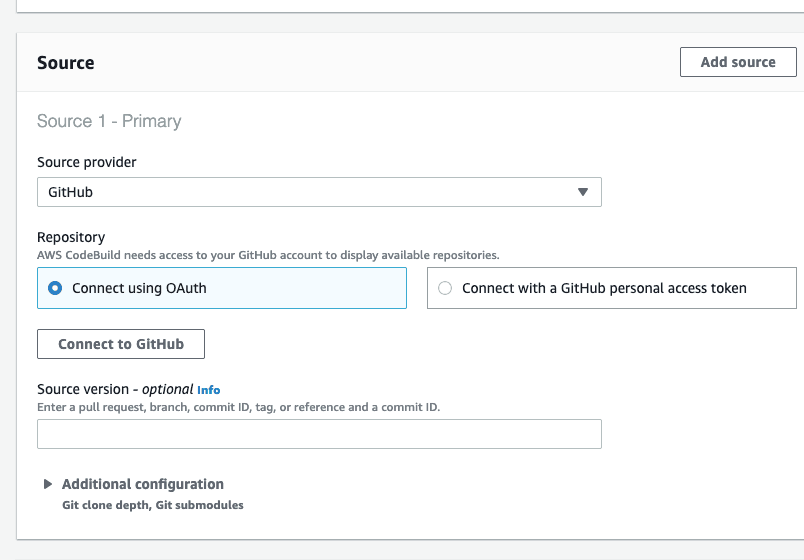
Step 3
Connect your "Source provider" with CodeBuild using OAuth or via providing GitHub access tokens. Provide your repo's URL and enter branch name or commit ID under Source version, as this will help CodeBuild have your build done faster.
Step 4
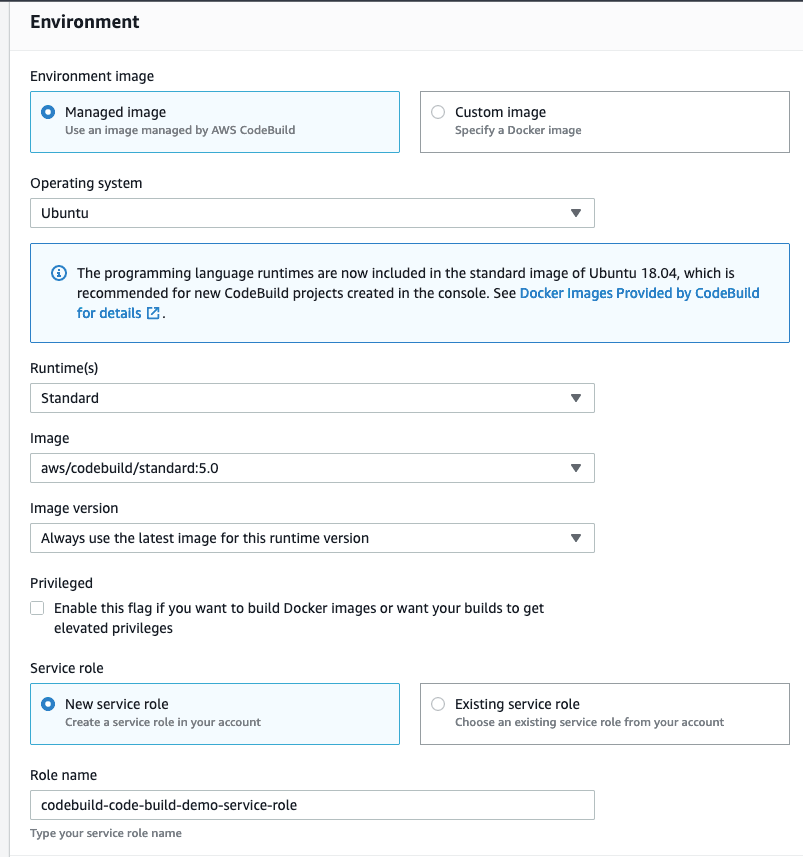
Select the Environment Image. Choose "Custom Image" if you'd want an ARM-based environment. I'd be going with the default one here. Below are the options I've selected. If you'd need access to S3 objects to access config files stored there or you'd want to run integration tests from your build against data in an Amazon RDS database that's isolated on a private subnet lambda, you may provide VPC info under "Additional Configuration" section.
Step 5
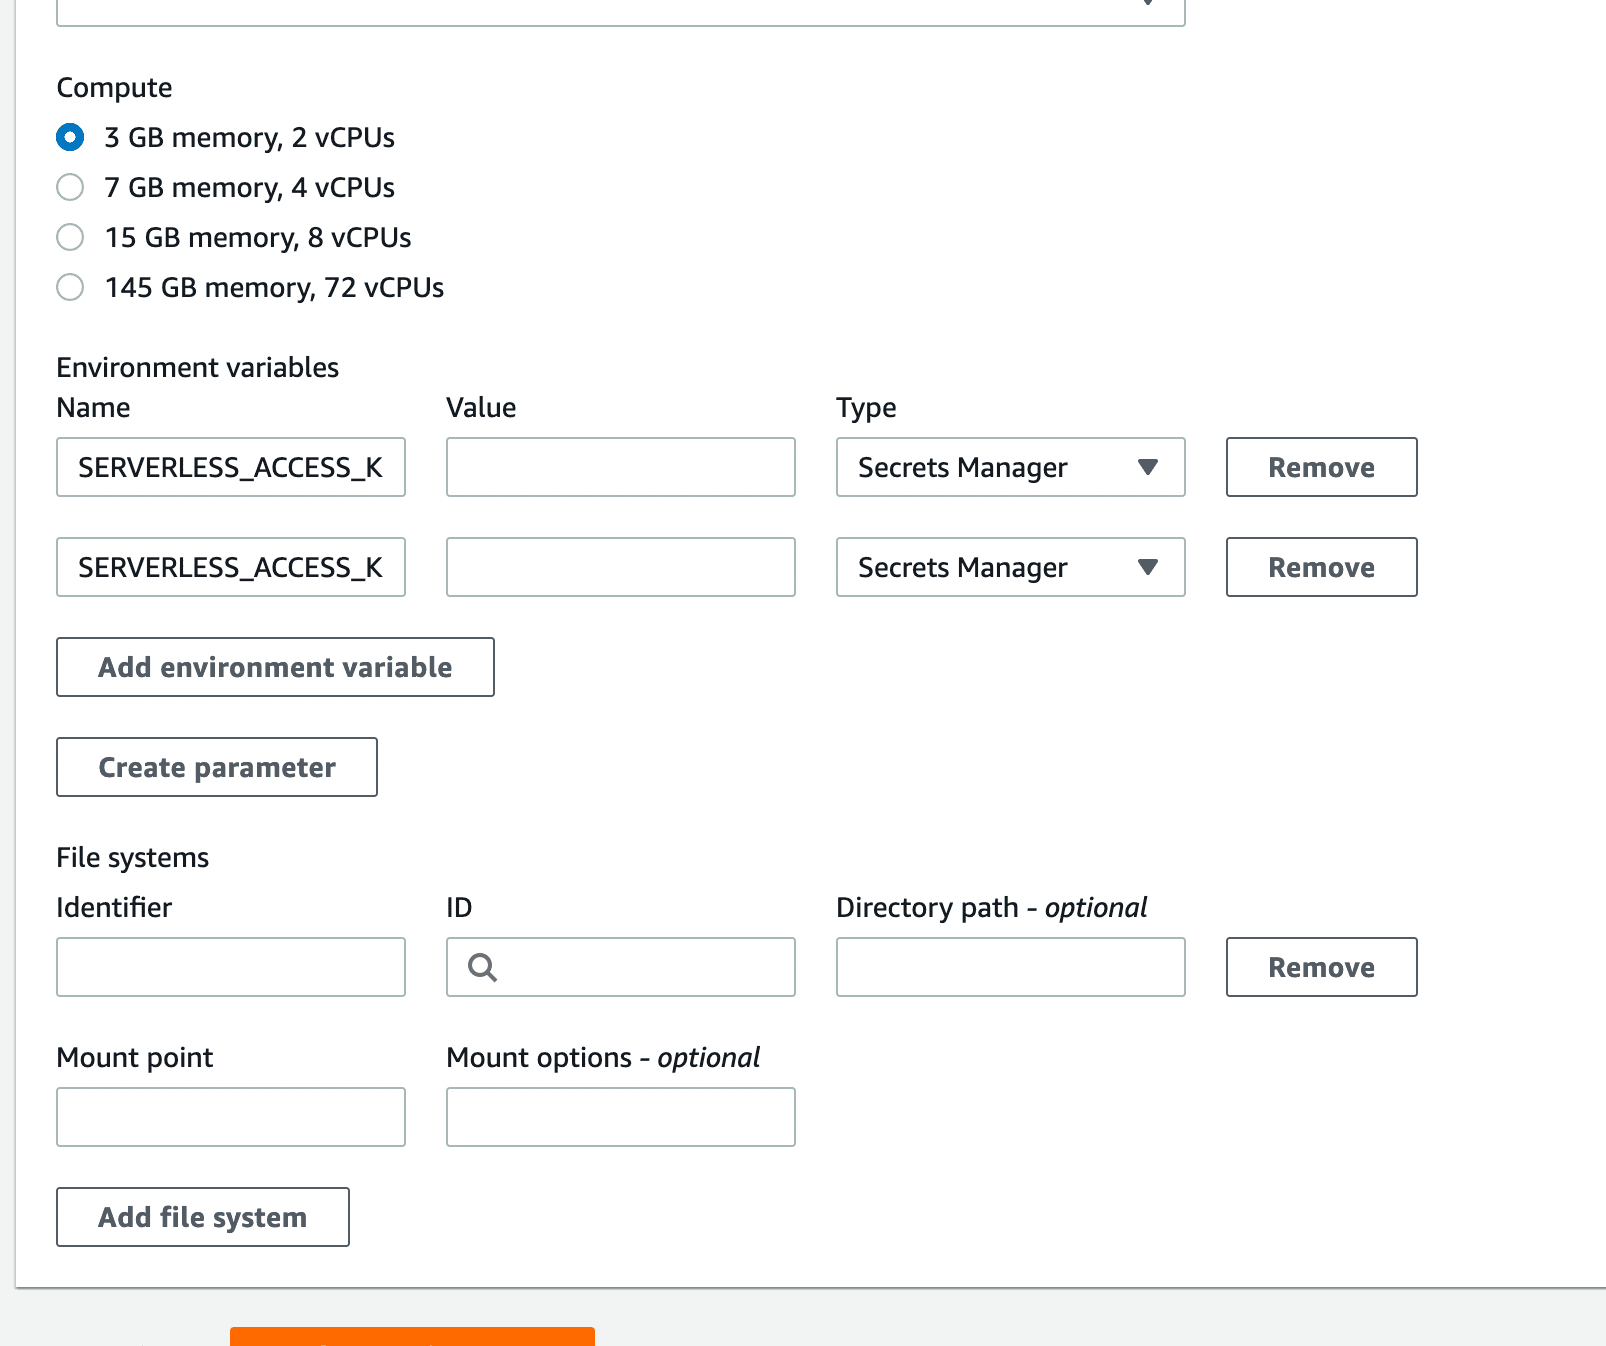
You can have a resource-id or URL to an SQS Queue or even confidential IDs, set up as environment variables. We'd be needing Access Keys for our build to succeed as we'll have the "sls deploy" command in our Buildspec. Fortunately, CodeBuild provides us a feature to set up info stored in AWS' Secret Manager as an environment variable. So if you have already set up Access Keys in Secret Manager, skip to Step 11 else move to the next step.
Step 6
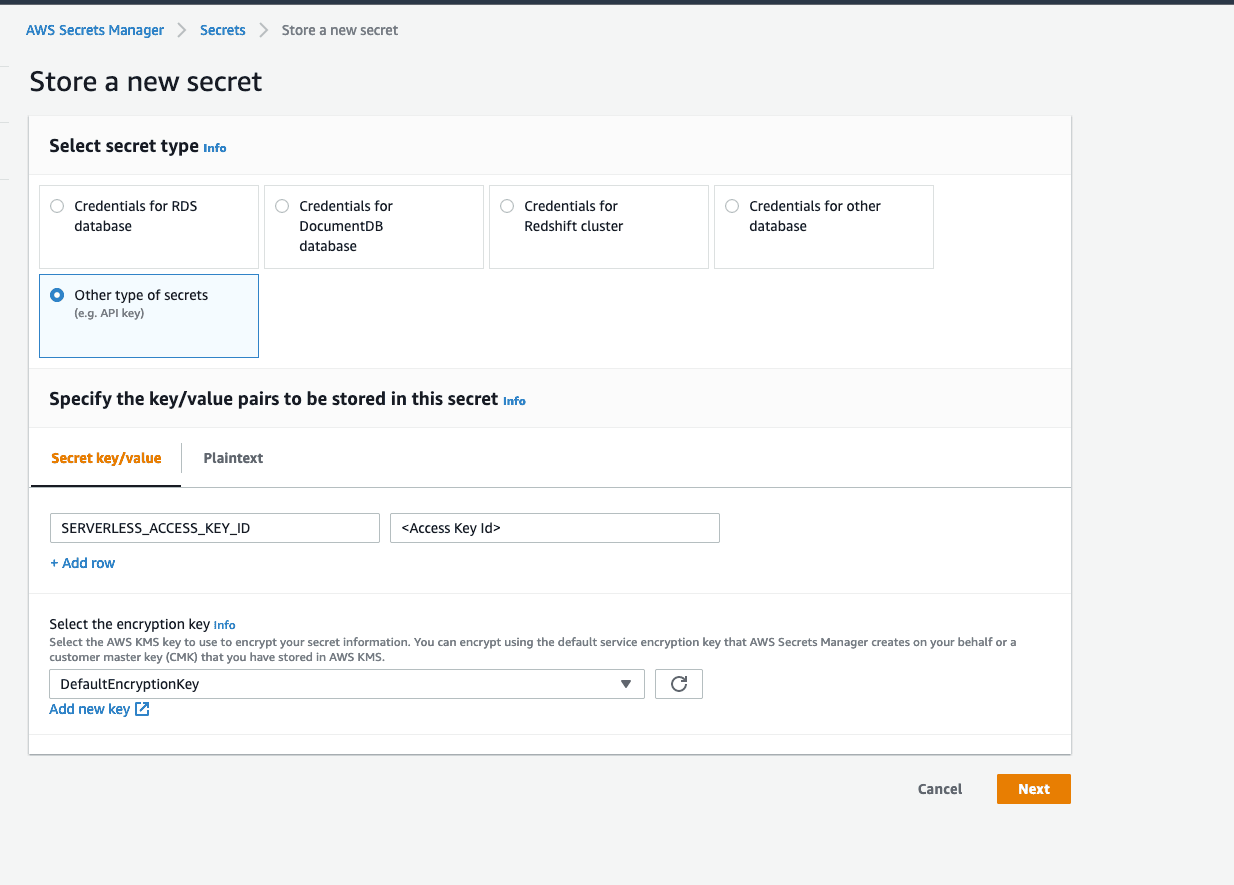
Head to Secret Manager and click on "Store a new secret".
Step 7
Select "Other Type of Secrets" and provide your Access Key ID in the below fashion and hit "Next".
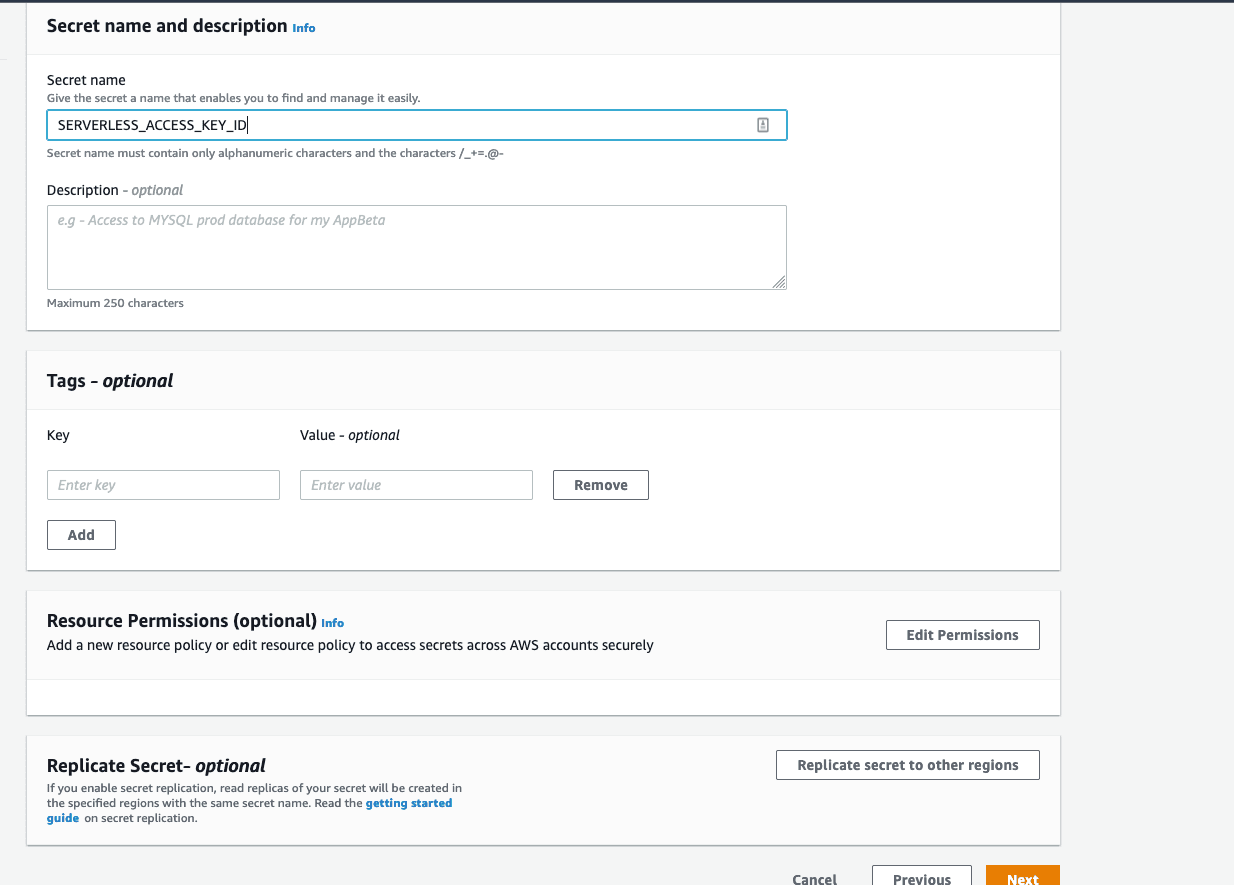
Step 8
Provide a "Secret Name", that's easy for you to identify.
Step 9
I'll leave everything as it is and head to the final page and hit "Store". Follow the same procedure to store your Secret Access Key.
Step 10
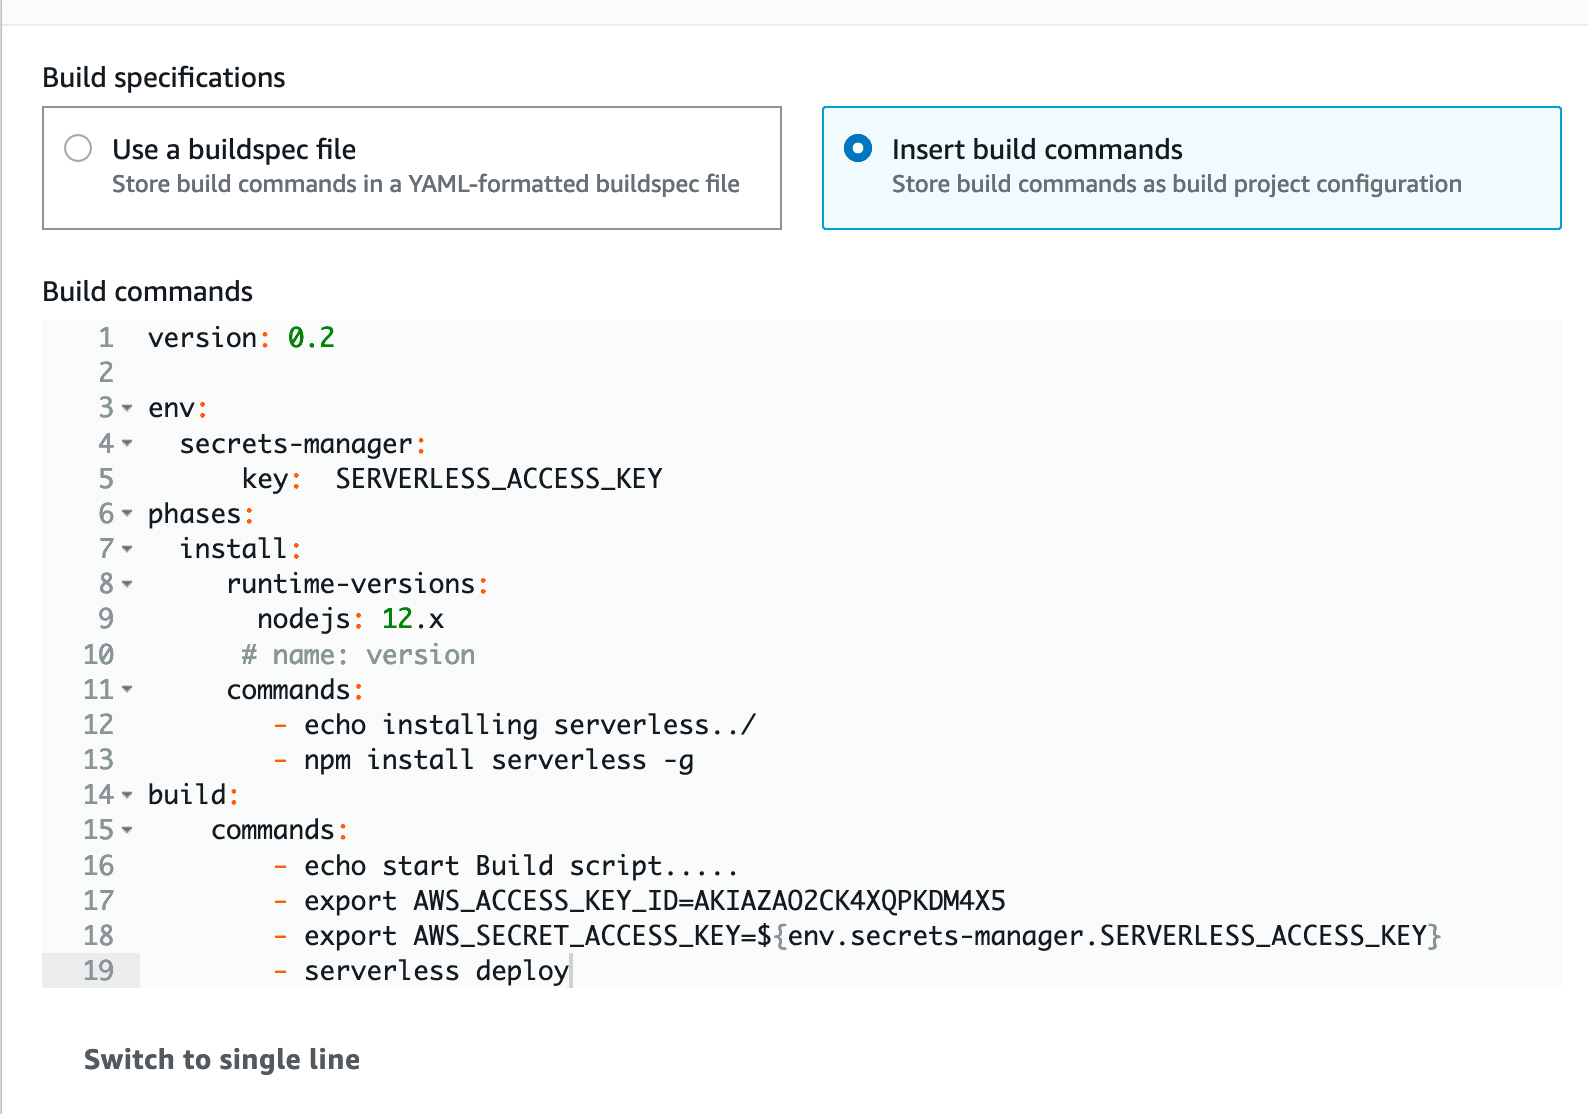
Now, you may either upload a buildspec.yml file with the build commands at the root of the source directory or you may have it filled in from the console. I'd be using the console for this. Since this is a simple serverless project developed using Serverless Framework, all we'd want CodeBuild to do is to install a serverless package and deploy it using a serverless framework. Below is my Buildspec.
Step 11
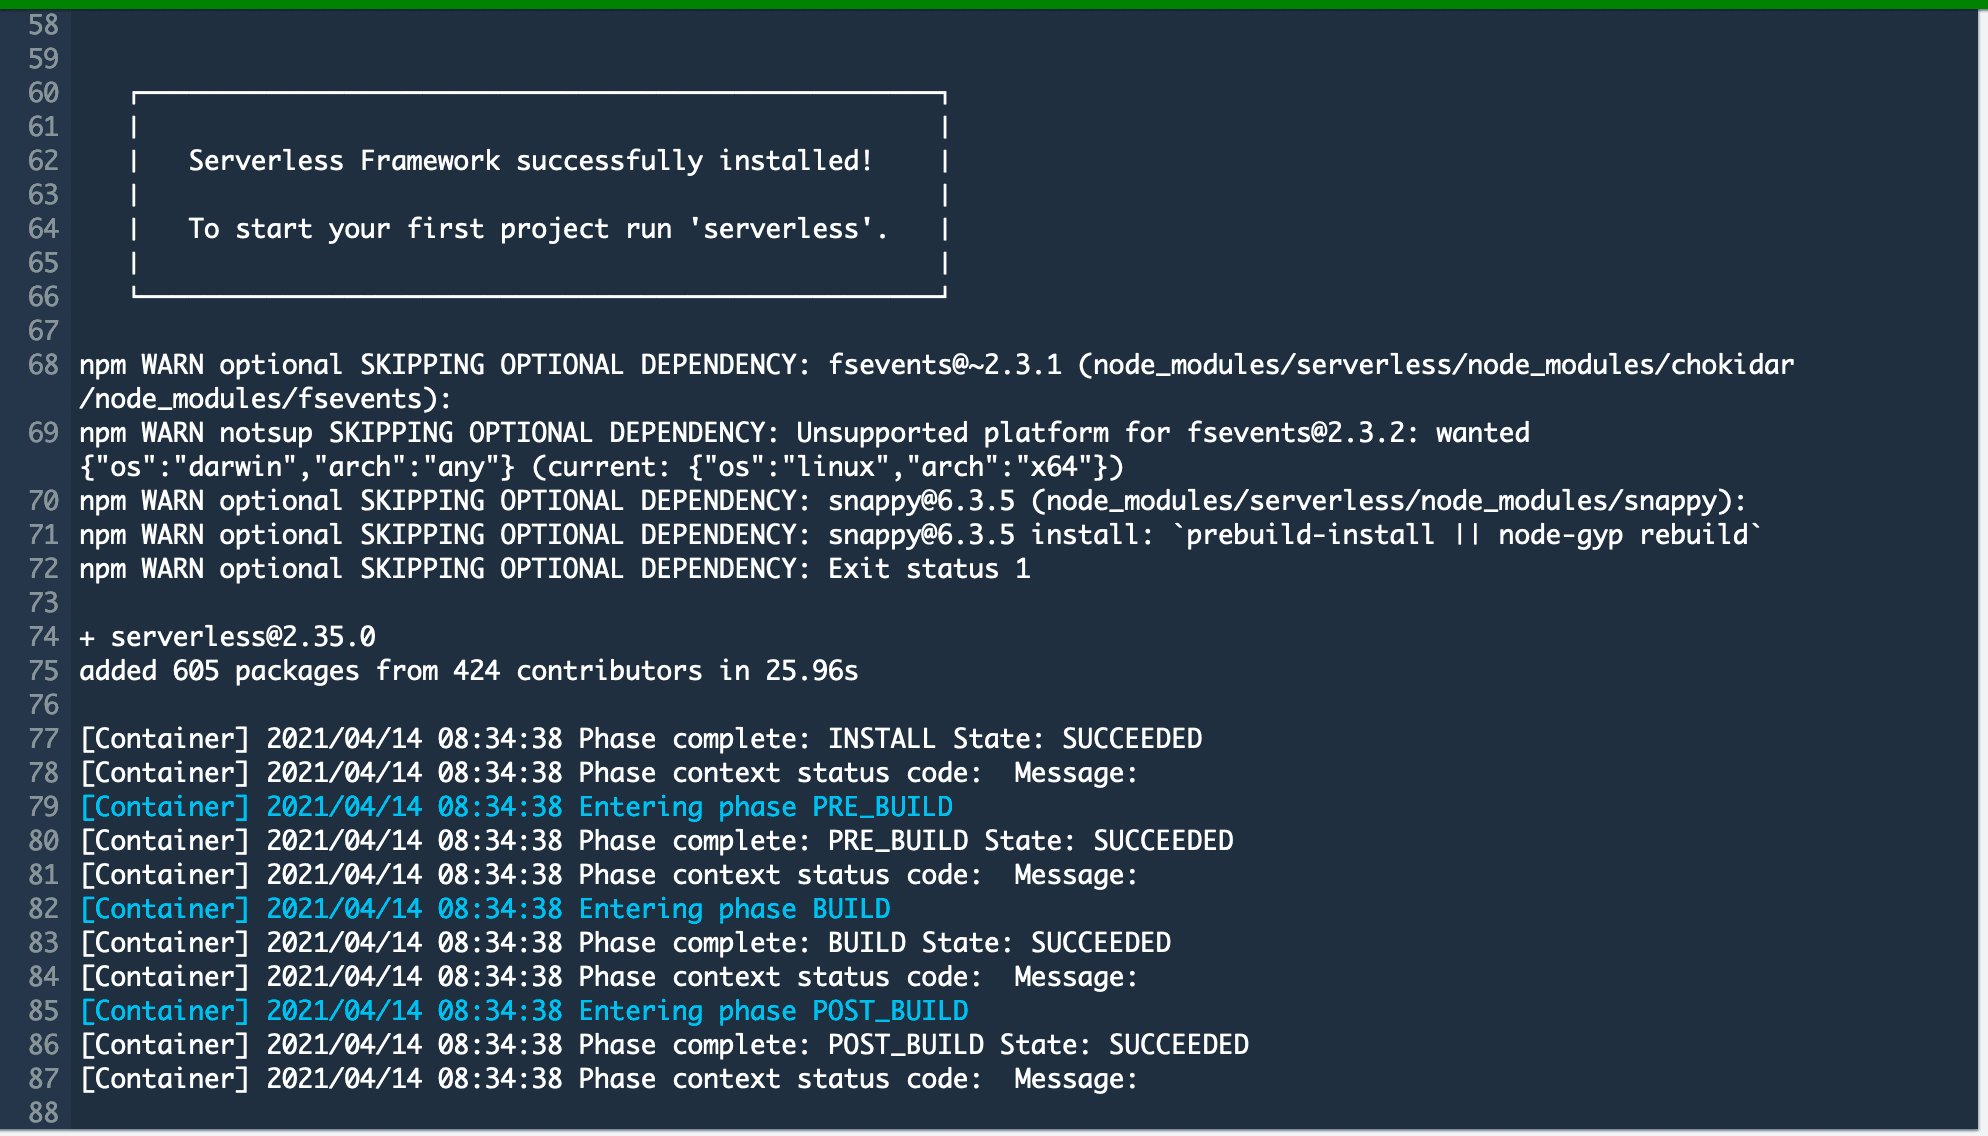
And finally it's time to hit the "Build" button. So go ahead and hit "Build". You can see the logs of your built and check out the resources that were deployed.
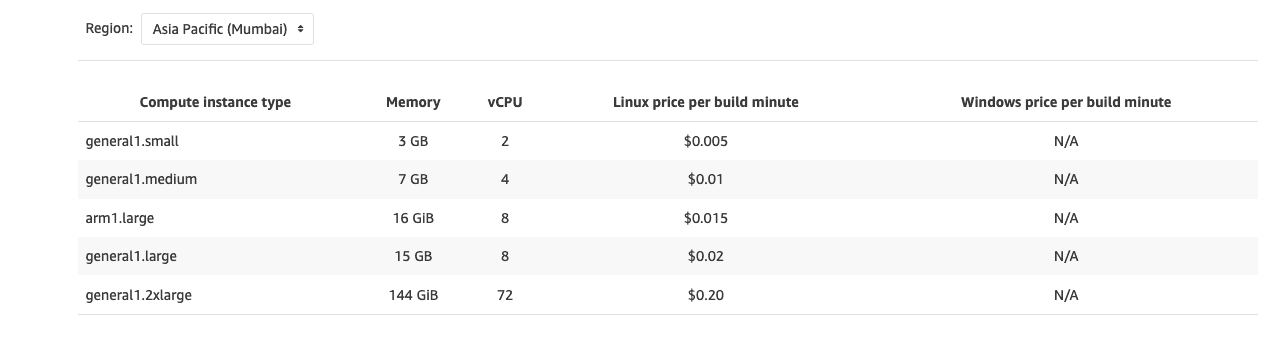
Pricing
Like most of the other services of AWS, CodeBuild too uses pay-as-you-go pricing. Check out the price below.