


Dynamic Schema Architecture for Restaurant Information System: What helps you achieve High speed Feature Velocity in QSR
Have you ever wanted to use Typescript in lambda functions, and wished to benefit from fast SAM acceleration while writing Typescript code and saving all of that juicy bill duration? Recently, AWS SAM has added Typescript compilation as a beta feature; which means now you can write serverless applications using Typescript.
Why am I using TypeScript with AWS Lambda over simply writing JavaScript?
Typescript is a free and open source language written as a super-set of Javascript, which allows the usage of type syntax. Many frontend and backend apps today use Typescript over Javascript for its enhanced performance and added features.
Let’s consider that you are developing an app where you are writing the front end in Angular, Vue, or any other Typescript framework. Using Typescript on the backend allows you not to change the language of your application and use it throughout. This will allow developers to know only a single language and prefer to use it everywhere across the board.
Typescript code also tends to be more efficient and compact than its counterpart written in Javascript. This is all thanks to the Typescript compiler, it points out compilation errors and type checks before actual run time; this reduces the risk of an exception occurring.
Using TypeScript in SAM to Build a Serverless Application
In this section ahead, we’ll walk through how to harness TypeScript in SAM, from setup and tooling to deployment, and explore best practices that make this more than just a syntax update.
Initial setup - Prepare the environment
The following assumes that you have the following already installed:
- A code editor
- Node.js 14.x or higher
- AWS SAM CLI
What I will be demonstrating here will be a simple serverless REST API. First, we use the AWS SAM to initialize the application then we make the necessary code changes to the template and the source files, and finally, we deploy the application.
Let’s get started!
Step 1
Let’s initialize our SAM application using AWS SAM.
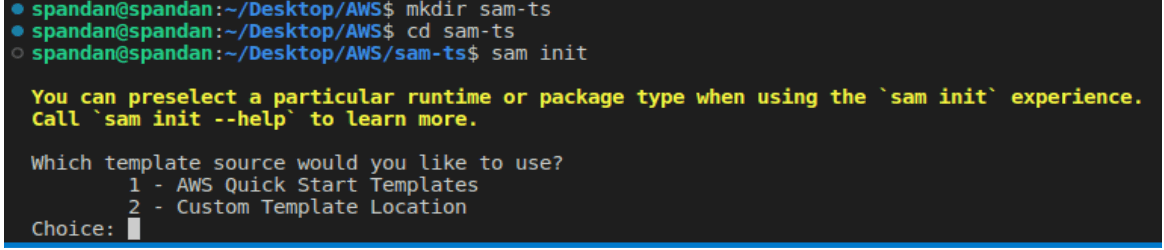
Step 2
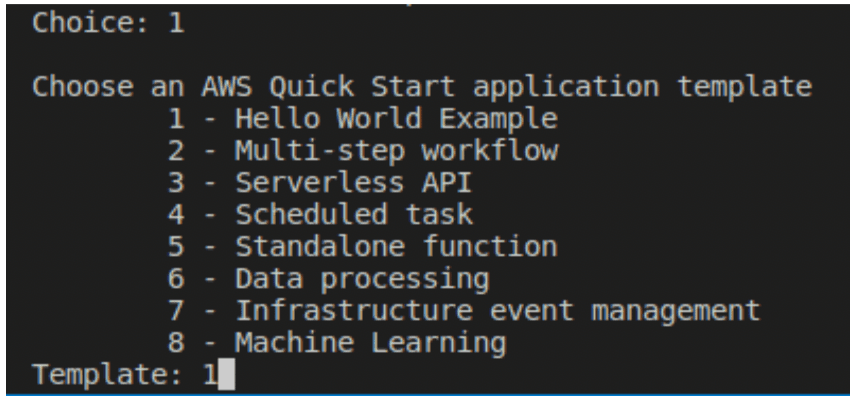
Select the AWS Quick Start Templates option here, as you would do for a normal SAM app. Here, we shall obtain a sample hello world template that will become the base of our application.
Step 3
Select the runtime for the application.
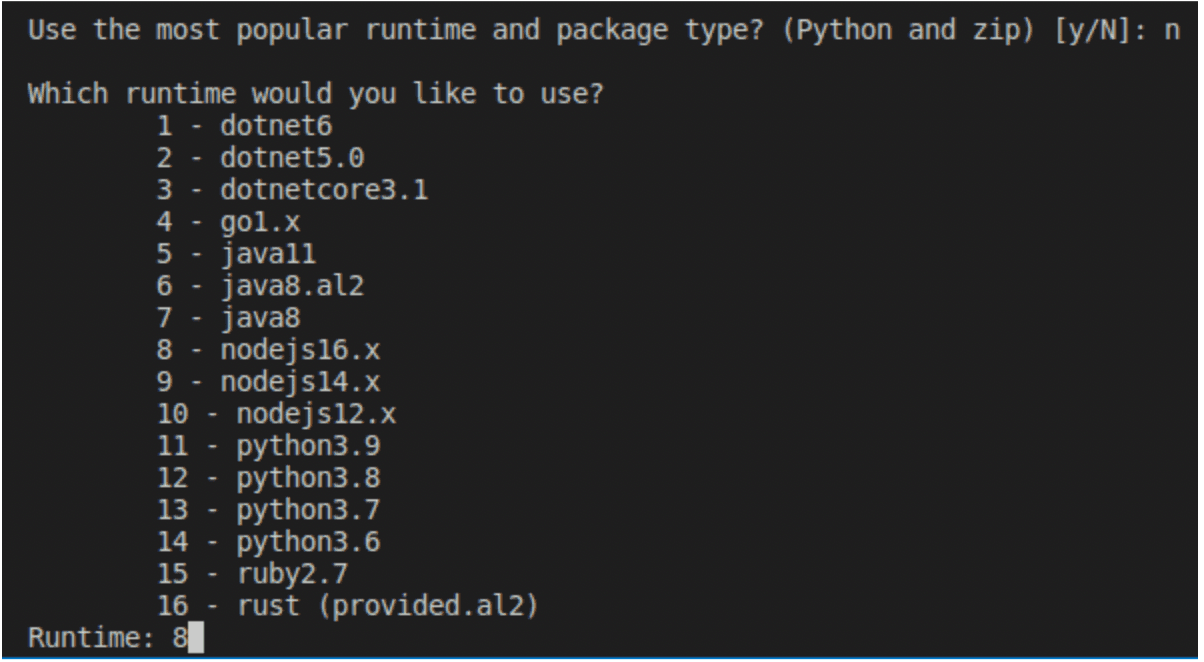
Since we are writing a typescript application, let’s select Node 16 (8). Note that for Typescript, Node 14.x works, but here I will be using 16.x for this example.
Step 4
Select the package type for the application.
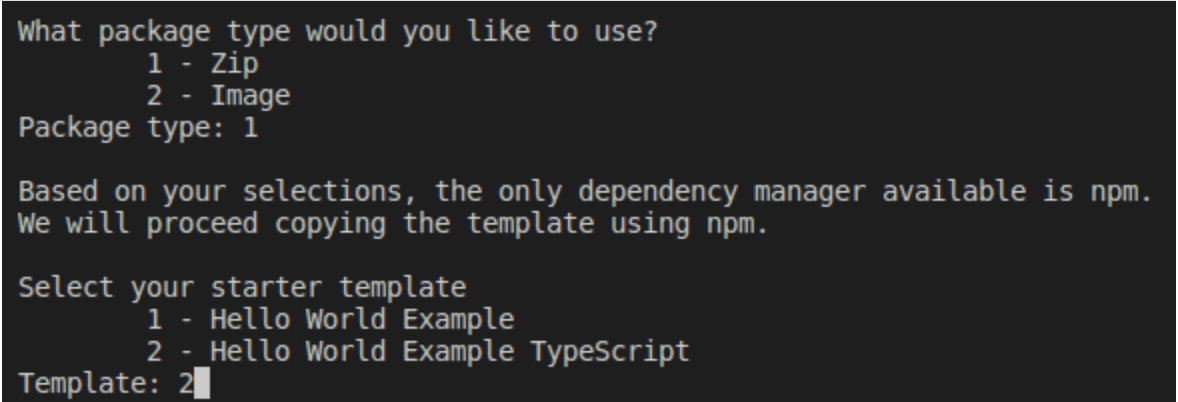
Now here’s where it’s different. Go on ahead and select the Typescript option! Provide the name of the project and wait for the completion of the setup of the application.
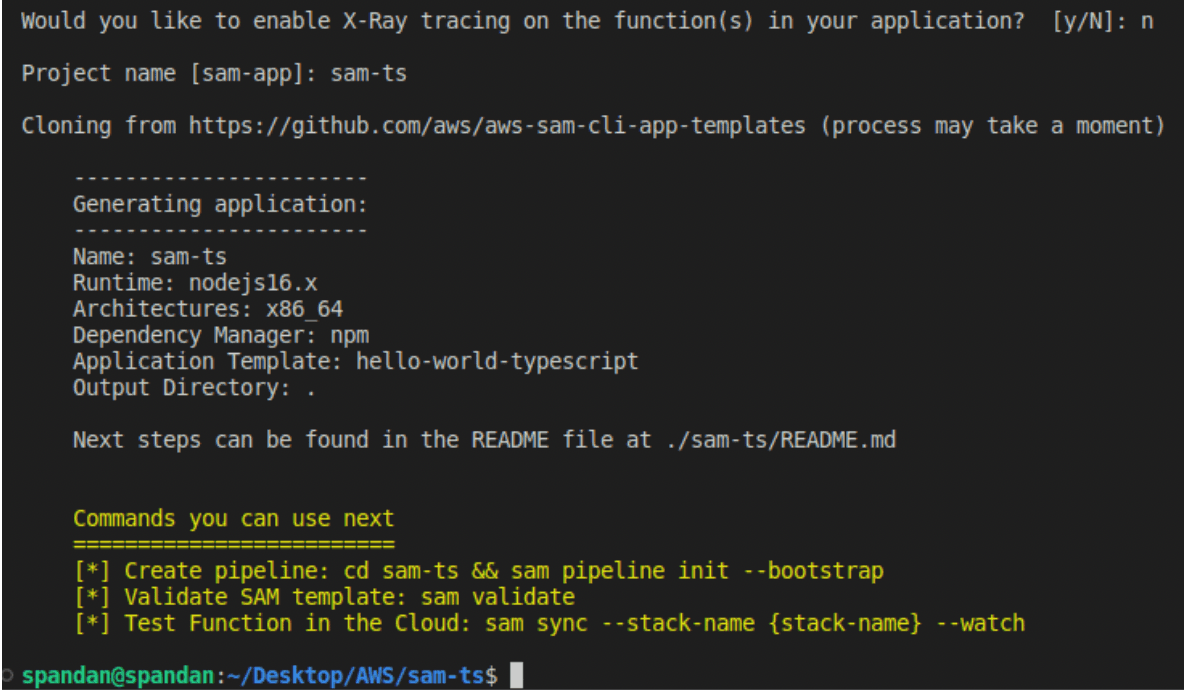
And there we go! Our sample Typescript app is created.
Project Structure of AWS SAM TypeScript Application
The next step is to write the SAM template and the lambda function. Let’s take a look at the files inside this sample application.
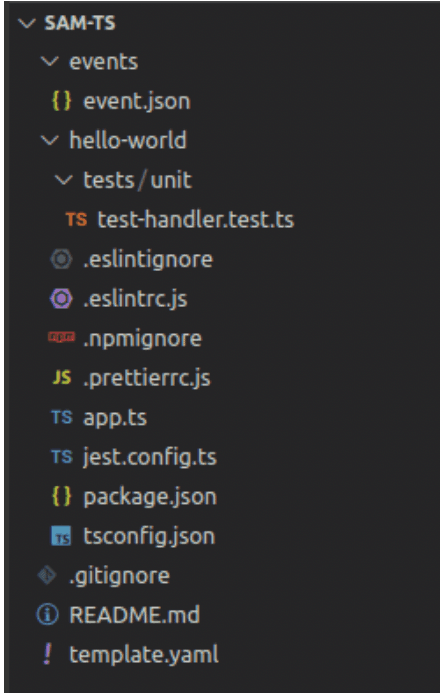
Inside the hello-world folder lies our main lambda function, in app.ts.
Step 5
Let us also take a look at the package.json file inside the main lambda source folder.
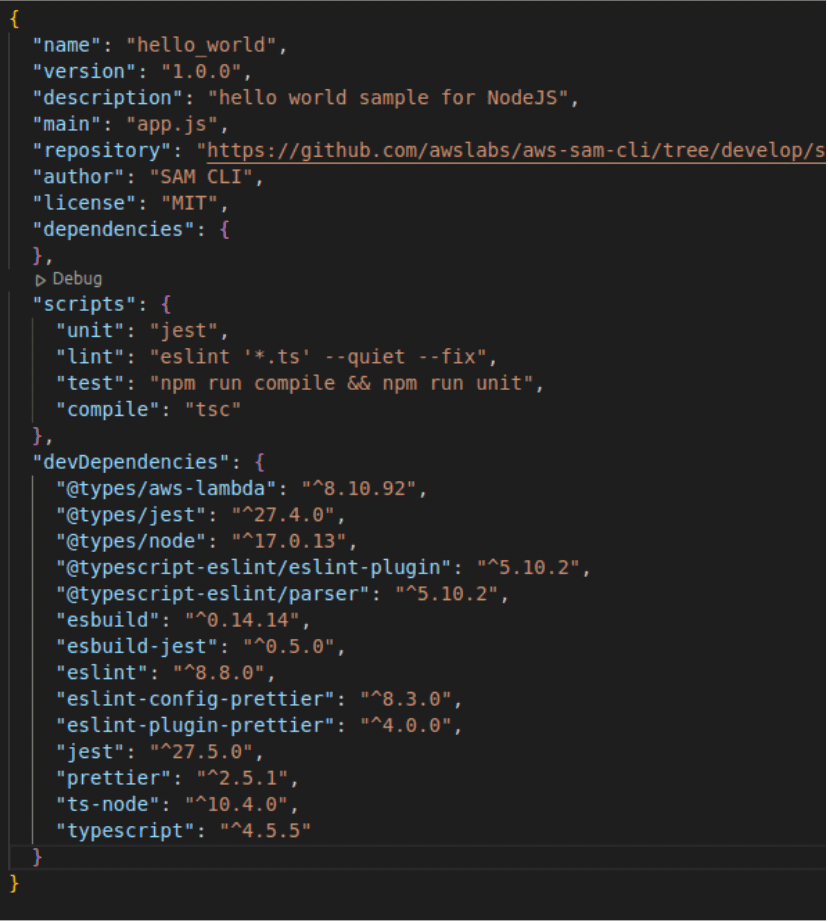
Okay, that is a lot to unpack. There are a lot of scripts already written and “compile”: “tsc” means we are using the typescript compiler here. All things required otherwise by typescript are written in devDependencies. We do not need to worry about them right now.
Step 6
Let’s take a look at the existing template of our application
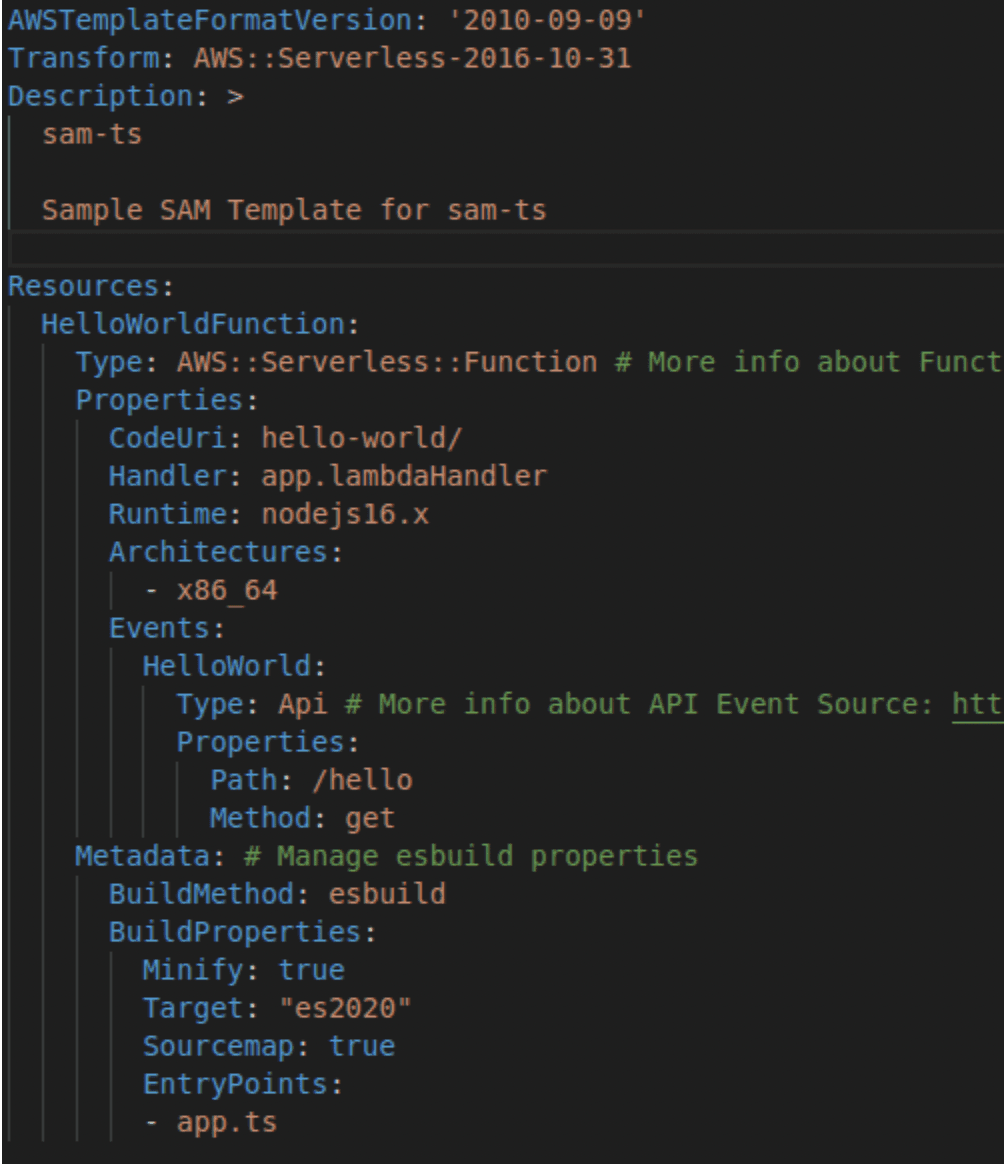
Now, the main difference that you will see in this function template is the addition of a “Metadata” attribute. What this attribute does is it tells SAM that we want to use esbuild to compile our Typescript code. What Minify does here is taking our file and remove whitespace, long variable names, and other things that unnecessarily increase file size; thus, Minifying reduces file size, which also leads to a relative decrease in lambda package size.
Step 7
We shall make changes to the template and the source file in this step. Firstly, I am going to remove the events and hello-world folders, which we won’t be using. Instead, I will create a folder named “src” that will contain all of our source files.

Next, in the template, I will update our function with the necessary changes. This can be what you want for your application; However, here I will keep it simple.
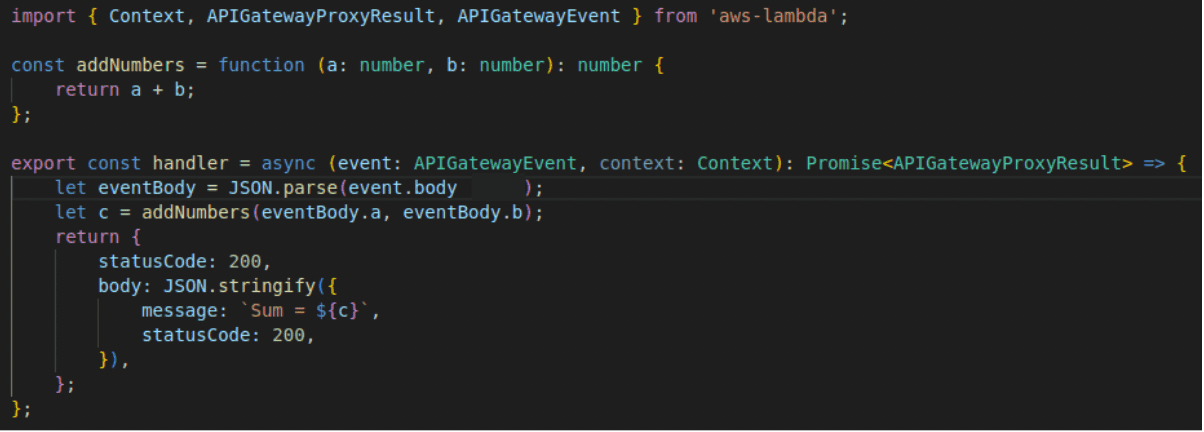
Finally, I will write the source code for mainFunc.ts. This sample function will take two values, a, and b, and return their sum.
After our changes, our directory structure should look like this

Step 8
It is now time to build the application. To do this, use the following command

This tells SAM that we want to use the beta features.

Of course, this process may take some time. If you want to speed up this process, a very good option for this is SAM Accelerate, which helps us with this. Once the app is built and deployed, you can use sam sync to almost instantaneously update code on the fly on the cloud.
Next, it is time to deploy the application.

I have given all the default parameters to sam deploy except the stack name, which will determine the name of the stack on AWS Cloudformation.
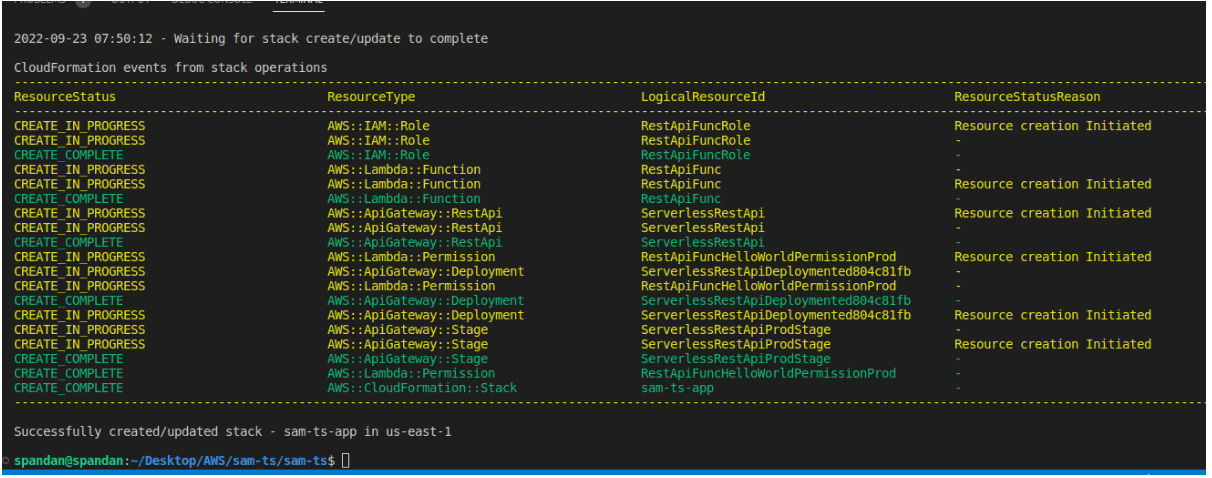
And our app has now been deployed!
Step 9
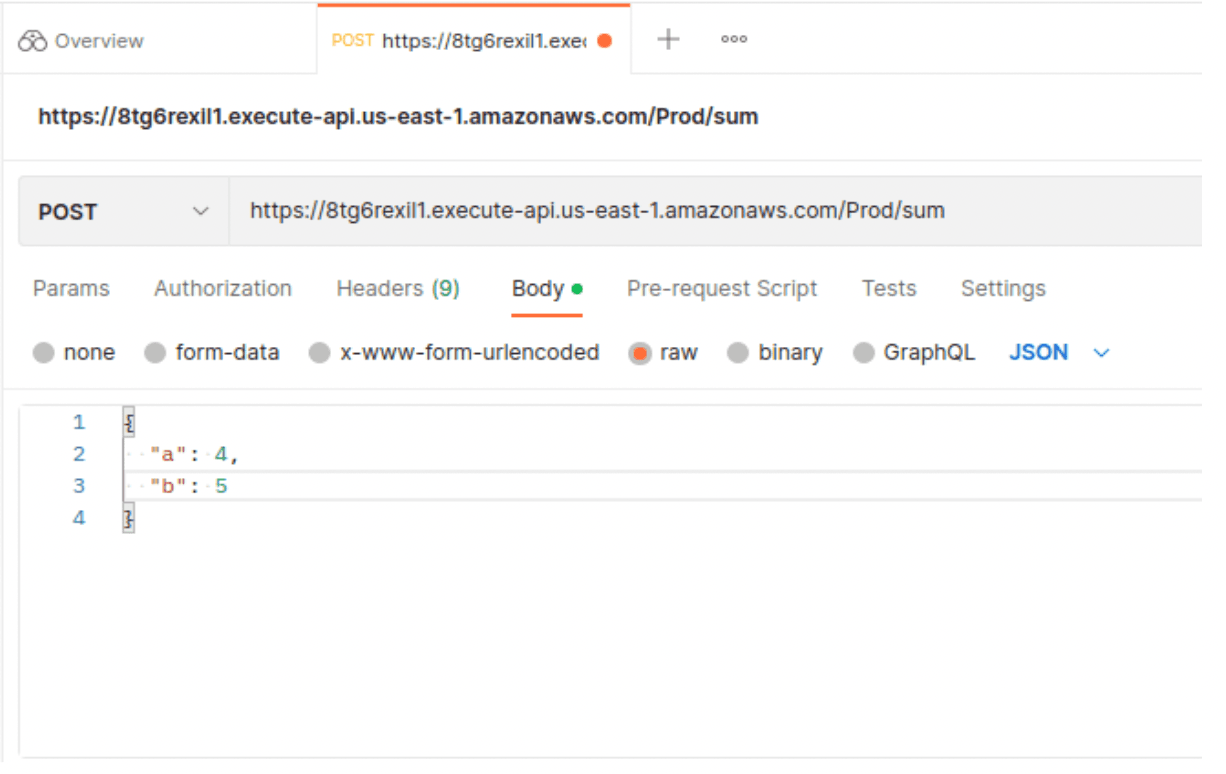
It is now time to finally test our Typescript function. To do this, I will be making use of the Postman application. The endpoint for our API here is on the /sum path with a POST method, on the Prod stage.
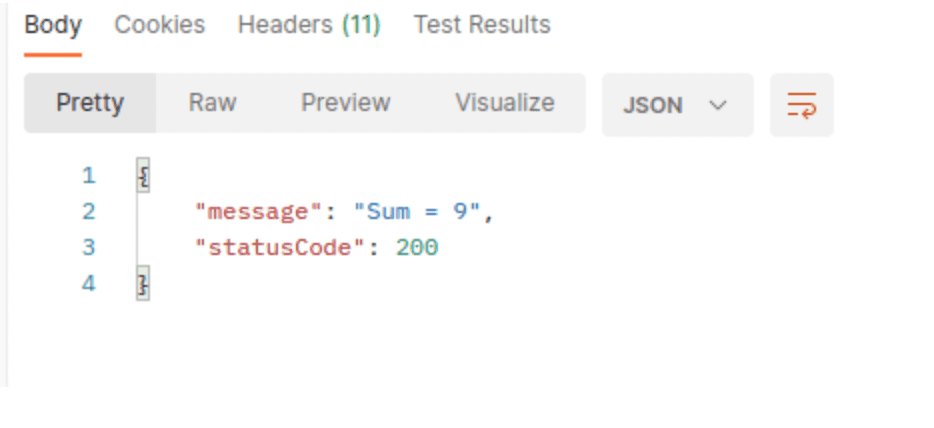
Our application works!
And hence, we now know how to build a SAM Typescript function from scratch. To integrate such functions into other applications, all you need is an understanding of what components are required to be installed and the general process.
Here is a link to the source code if you want to start with the code from this document.
FAQs
1. What is AWS SAM, and how does it support TypeScript?
AWS Serverless Application Model (SAM) is a framework for building serverless applications on AWS. As of its recent beta release, AWS SAM natively supports TypeScript, allowing developers to write Lambda functions in TypeScript and benefit from built-in transpilation and bundling.
2. Why use TypeScript with AWS Lambda instead of JavaScript?
TypeScript offers static typing, better tooling (like IntelliSense), and improved error detection at compile time. These features lead to more robust, maintainable code, especially in large-scale applications. With SAM’s TypeScript support, developers can enjoy these benefits without managing separate build pipelines.
3. What are the benefits of full-stack TypeScript in a serverless app?
Using TypeScript end-to-end (frontend and backend) enables code sharing, unified development workflows, and faster team onboarding. It supports type-safe APIs and reduces the surface area for runtime bugs, leading to better developer velocity.


