ChatGPT
  Perplexity
  Gemini
  Claude AI
 AWS introduced Synchronous Express Workflows for AWS Step Functions on 24 Nov 2020. Synchronous express workflows start the execution, wait until the execution is completed, and return the result. This introduction eliminated the need for asynchronous step function handler systems.
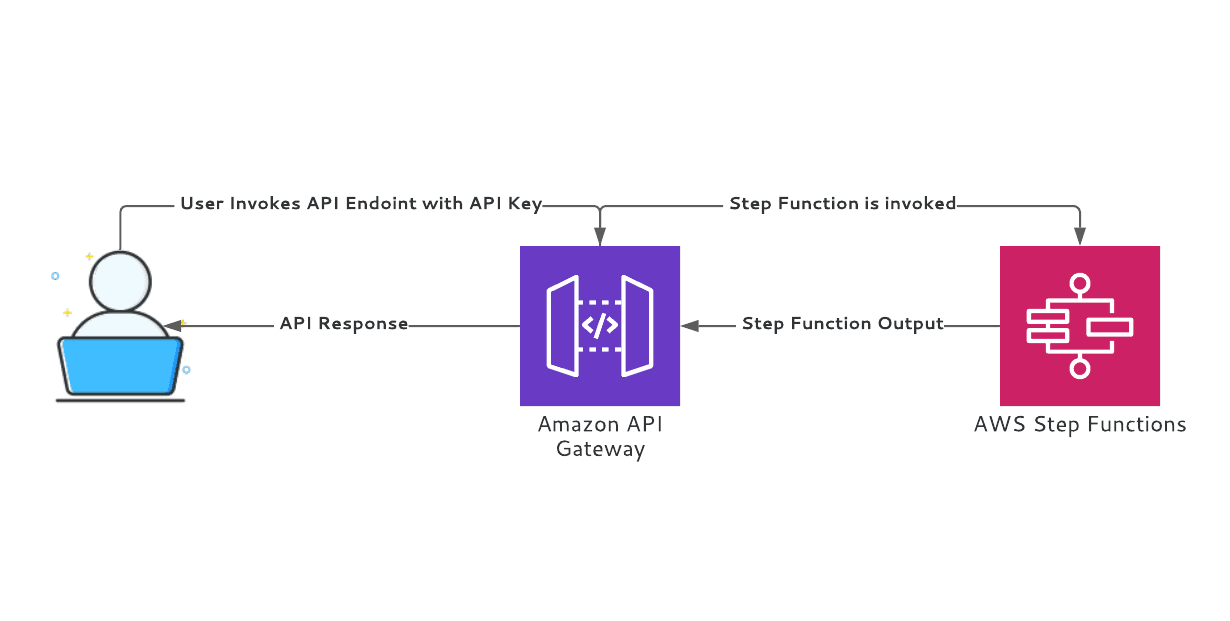
One of the patterns that came with this introduction is connecting an API Gateway's REST API to Step Function's Synchronous Workflow. A user sends a request to the API Gateway's endpoint, API Gateway invokes the Express Step Function's synchronous API (StartSyncExecution), waits for the Step function execution to complete, and sends the result of the execution to the user.
This blog will go through the steps involved in integrating an API Gateway's REST API to a Synchronous Step Function Express Workflow. And to take it one step further, we will add an API key and send it to the Step Function. Not only that, but we are also going to use mapping templates to hardcode the Step Function ARN to avoid passing it to the API.
Read Our Case Study: YamatoHK, A leading logistics company from HongKong achieved 83% cost reduction with AWS Serverless
Here's an example with and without the mapping templates.

A Postman example of API Gateway to Synchronous Step Function integration without Mapping Templates
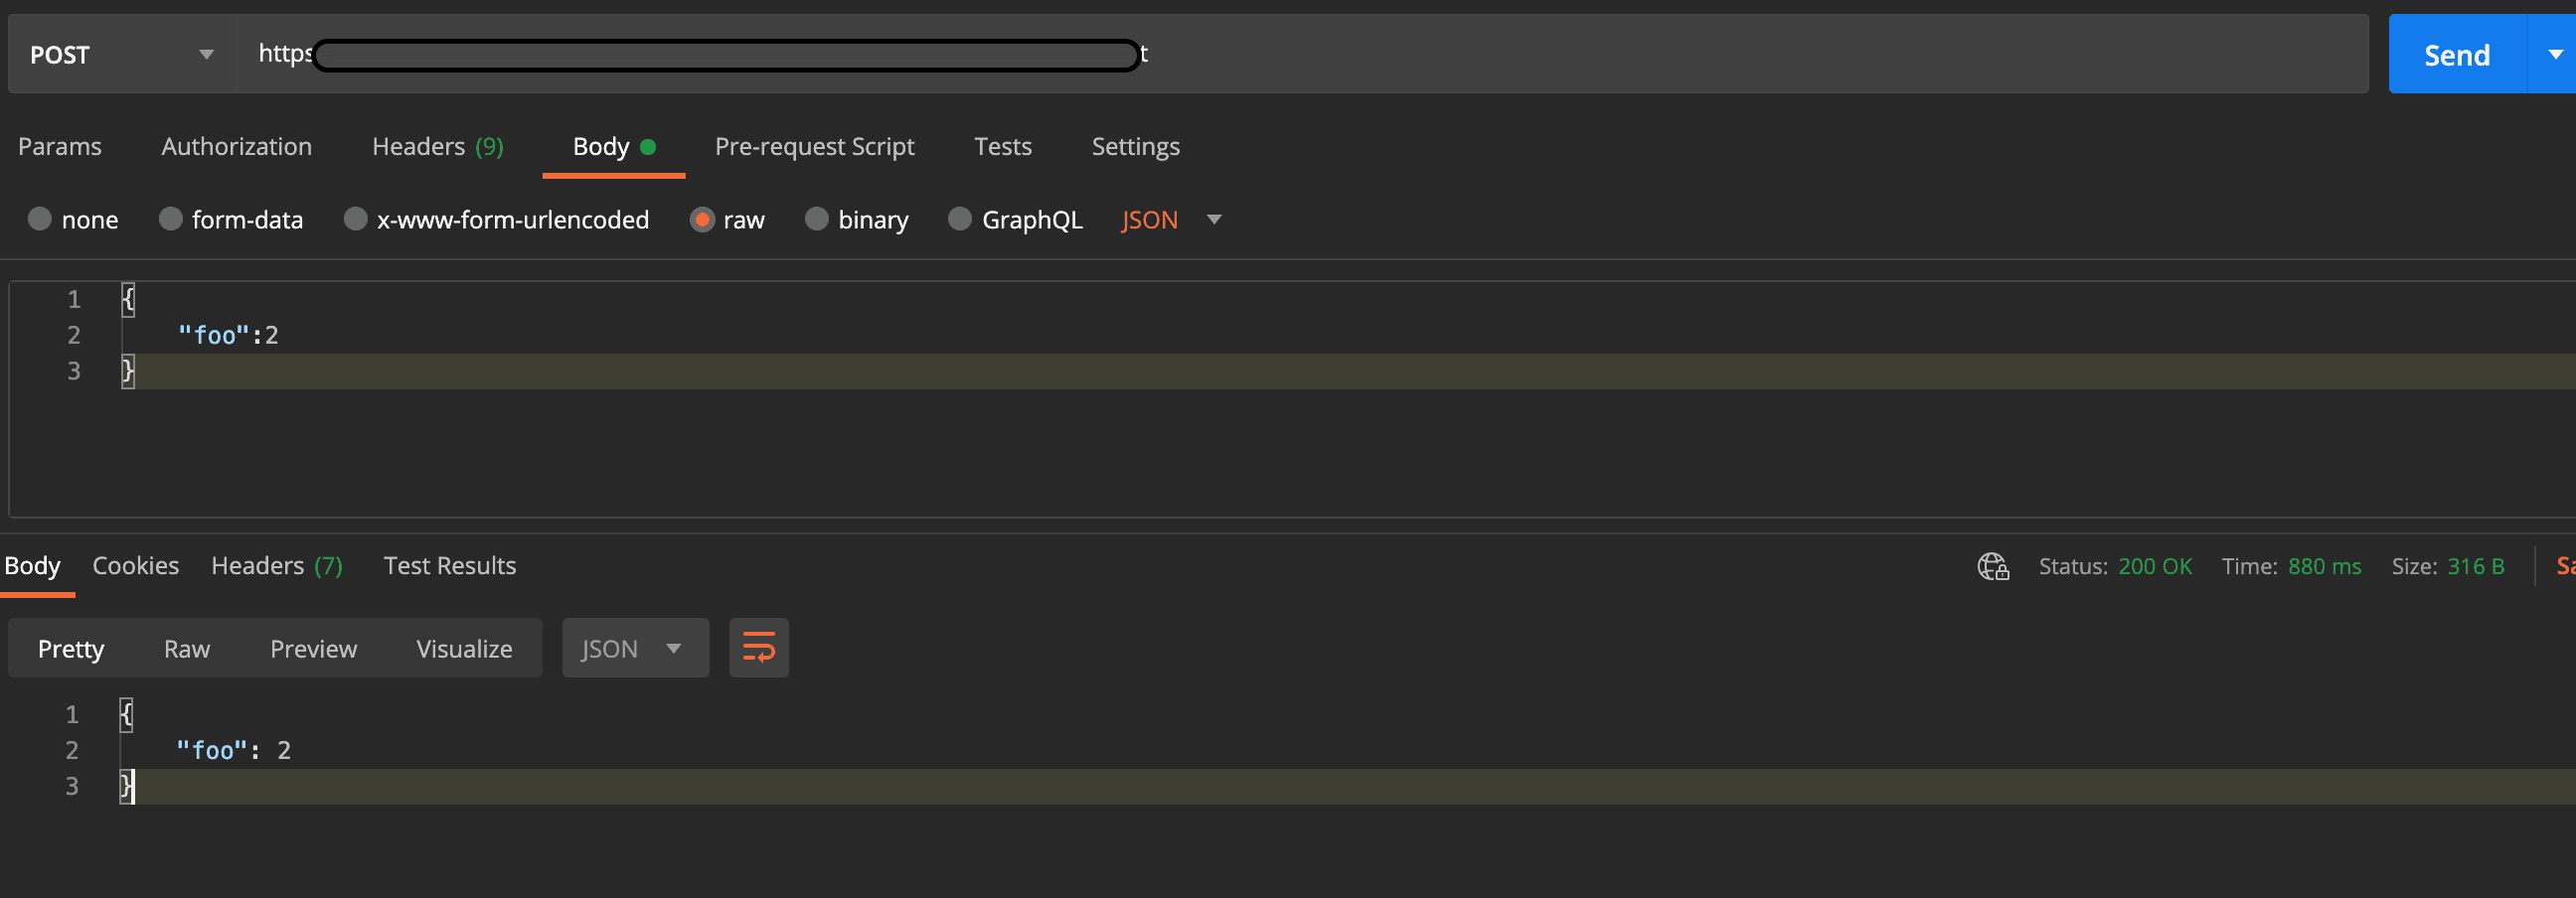
A Postman example of API Gateway to Synchronous Step Function integration with Mapping Templates
To skip the walkthough below, refer to this repo. Follow the instructions to create a SAM package and deploy the resources in your AWS Account.
Let's get started!
Part 1 - Express Workflow
In this part, we will walk through the steps to create an express workflow in the AWS Step Functions console.
Step 1
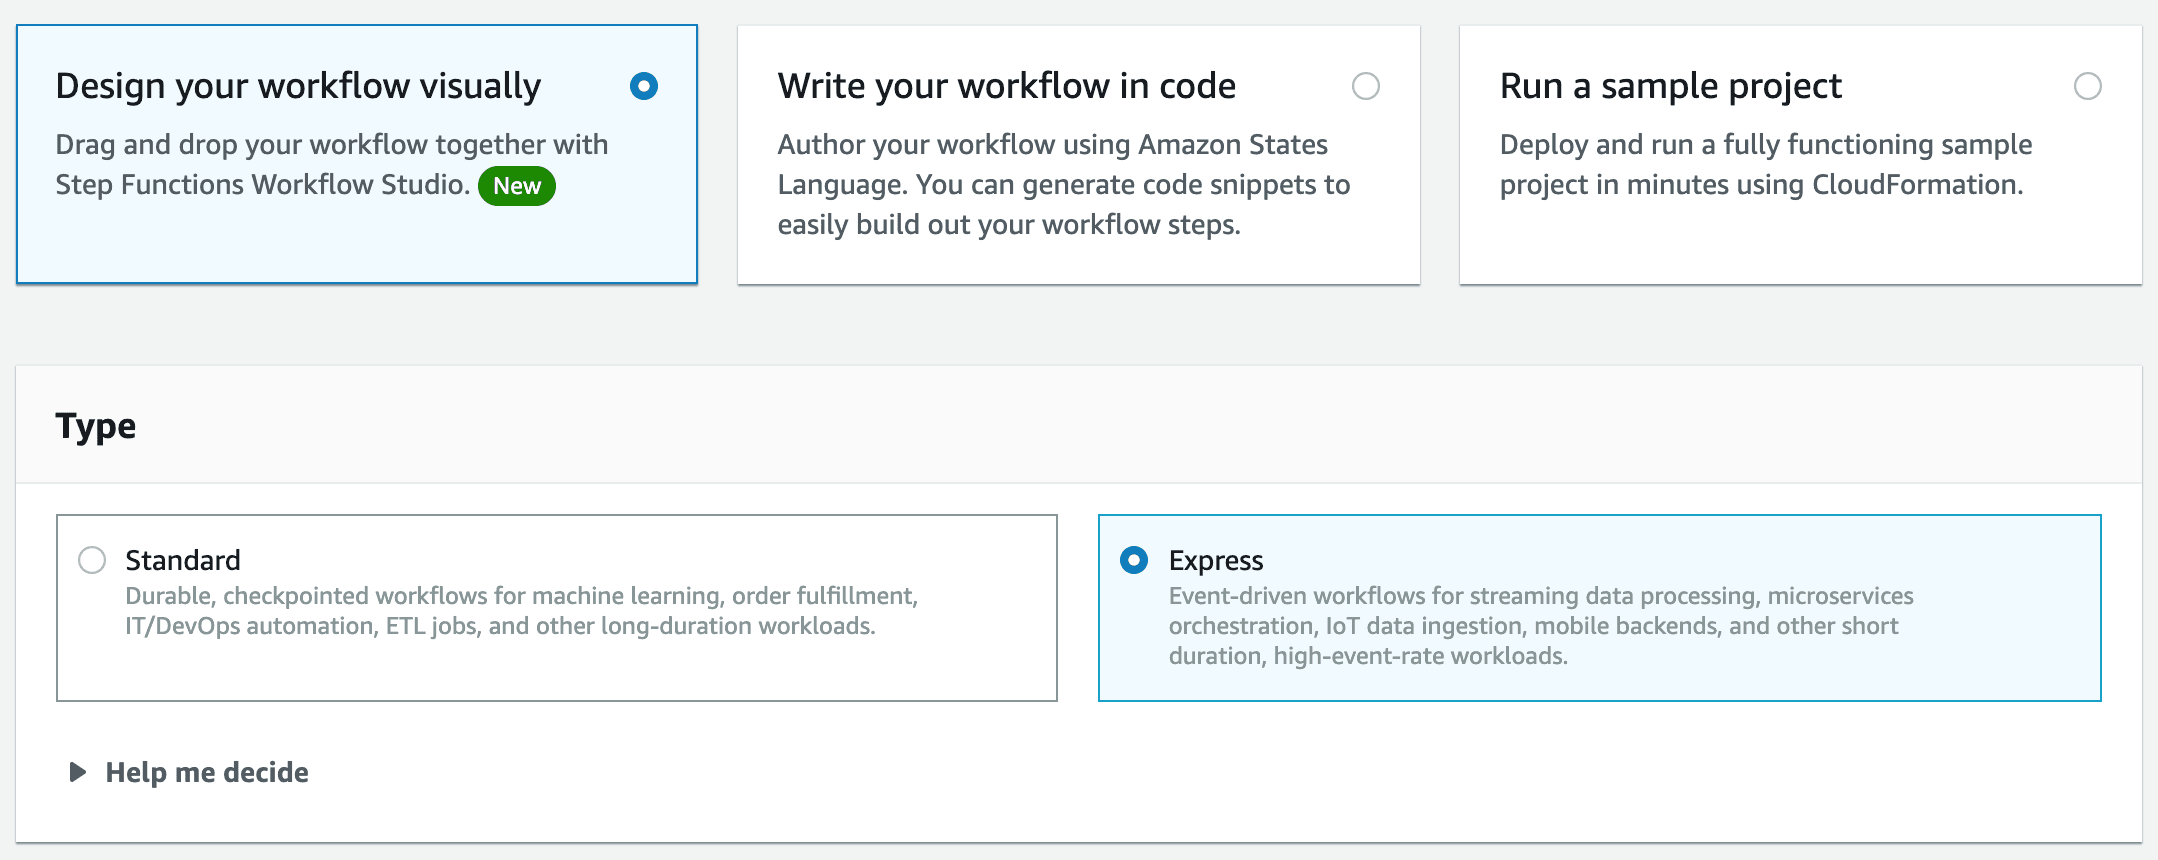
Navigate to the Step Functions console and click "Create state machine." In the next screen, select "Design your workflow visually," and in type, select "Express," as shown in the screenshot above. Click on "Next" to move to the next screen. Remember that we cannot change the "type" of a Step Function after being created. If we need to change the Step Function type, we need to delete the existing Step Function and create a new one.
Step 2

This step is about using the Workflow Studio to build a Step Function State Machine. It was introduced recently (Jun 17, 2021) to help create Step Function without worrying about the Amazon States Language. Create a workflow by dragging and dropping items from the left section to the middle section, configure the step information on the right section. After designing the workflow for the State Machine, click on "Next" to move to the next screen. For more details about the workflow studio, click here.
Step 3
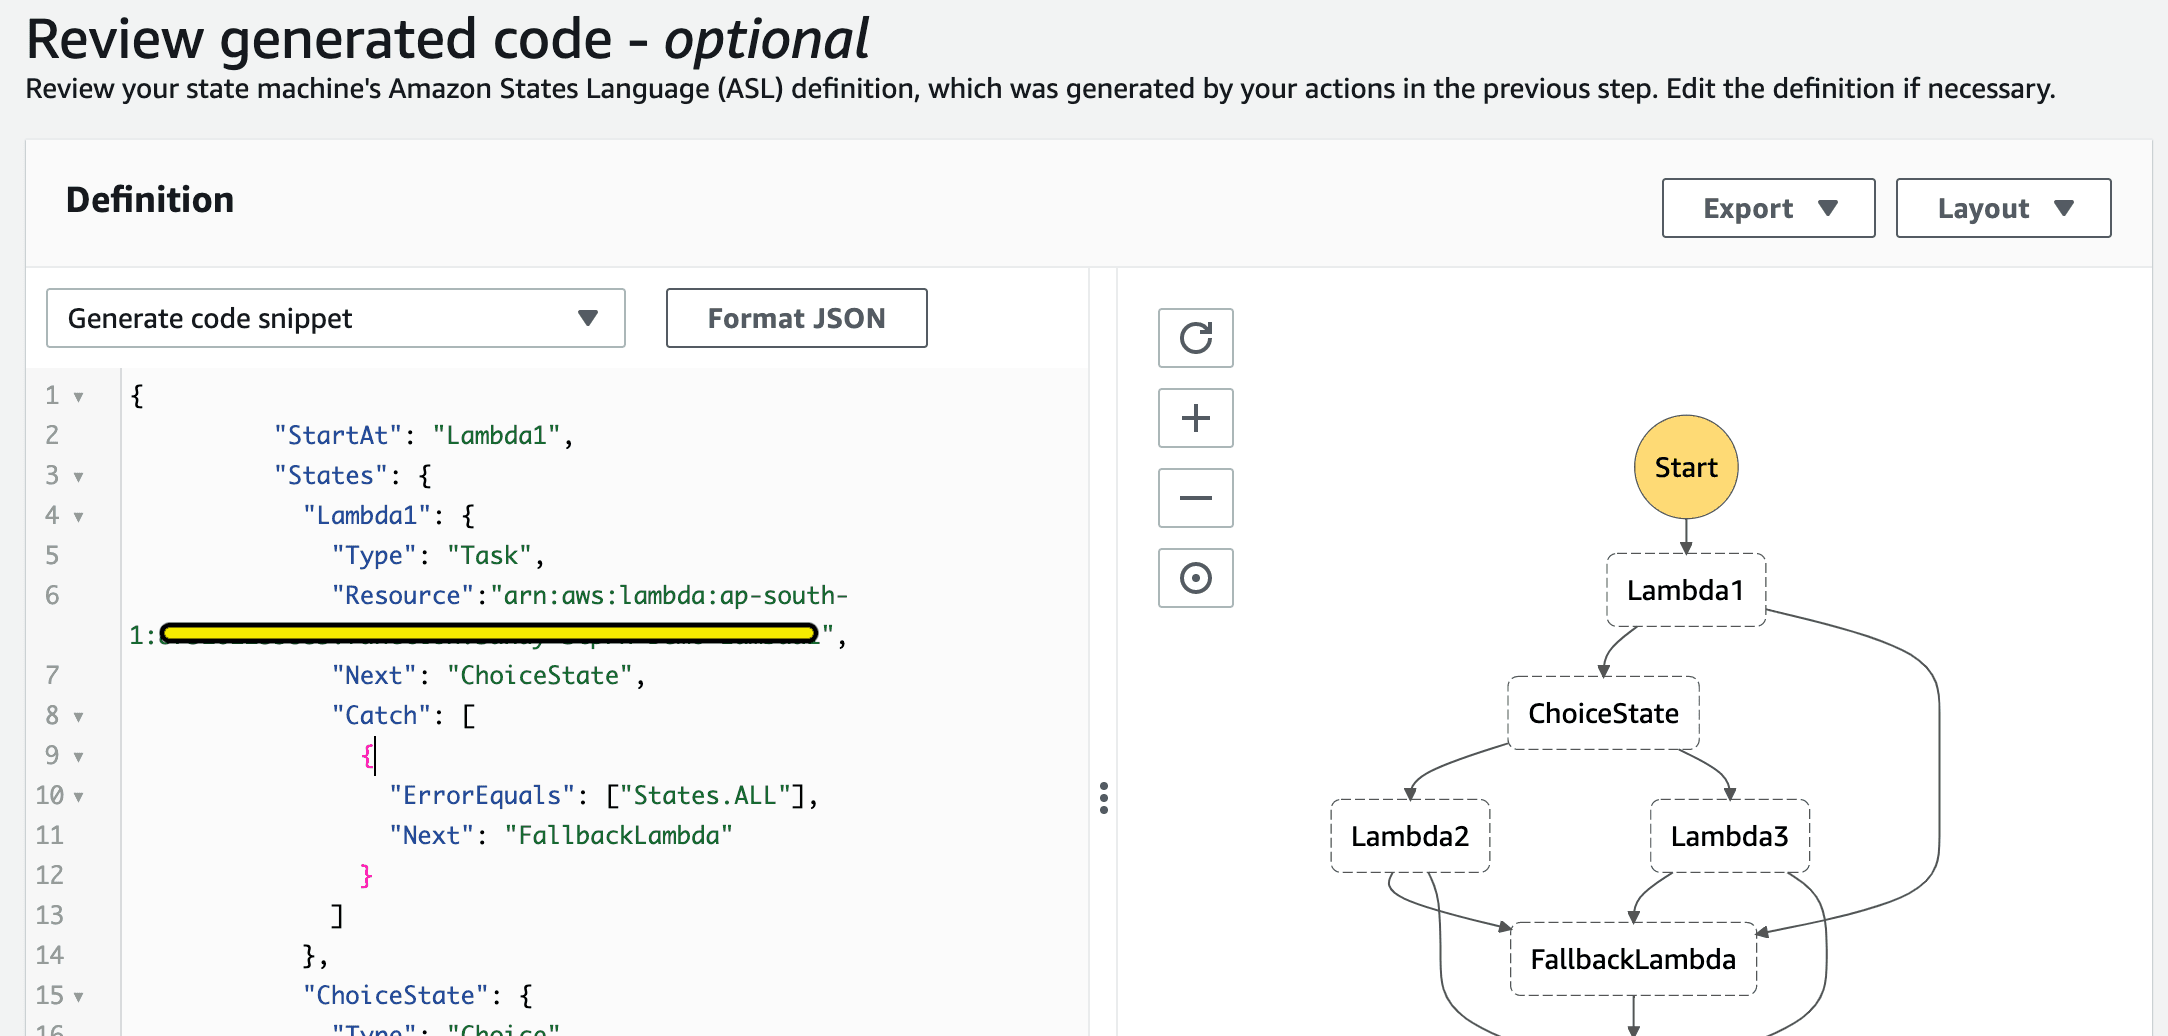
Creating the Step Function State Machine using the Workflow Studio generates the Definition. In this step, we review the generated Definition to make any changes if required. After reviewing the Definition, click "Next".
Step 4
In this final step, we configure the Step Function State Machine settings.
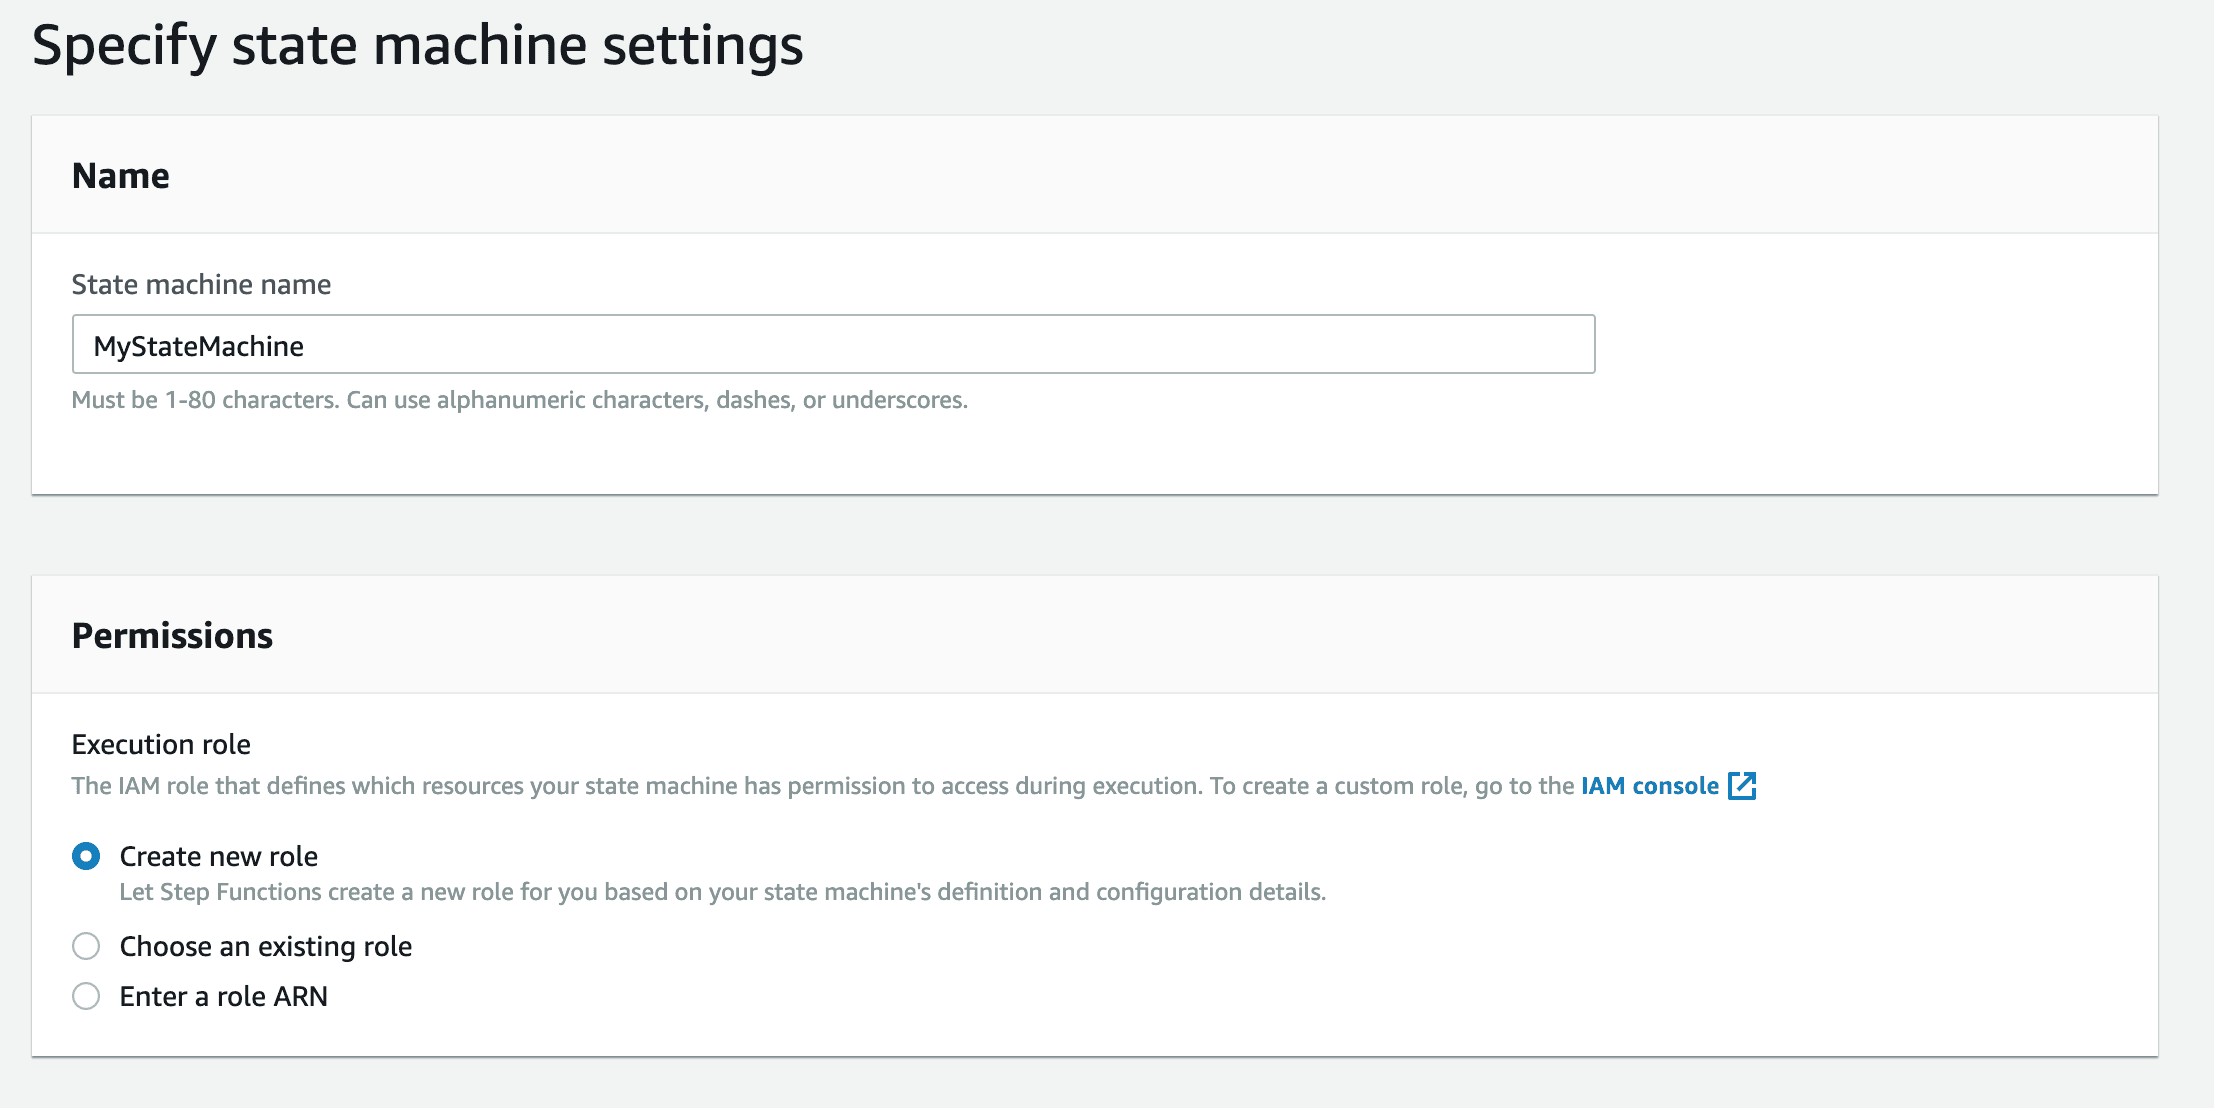
- Name - a unique name for the Step Function State Machine.
- Permissions - an IAM Role for the Step Function State Machine to access the resources declared in the definition.
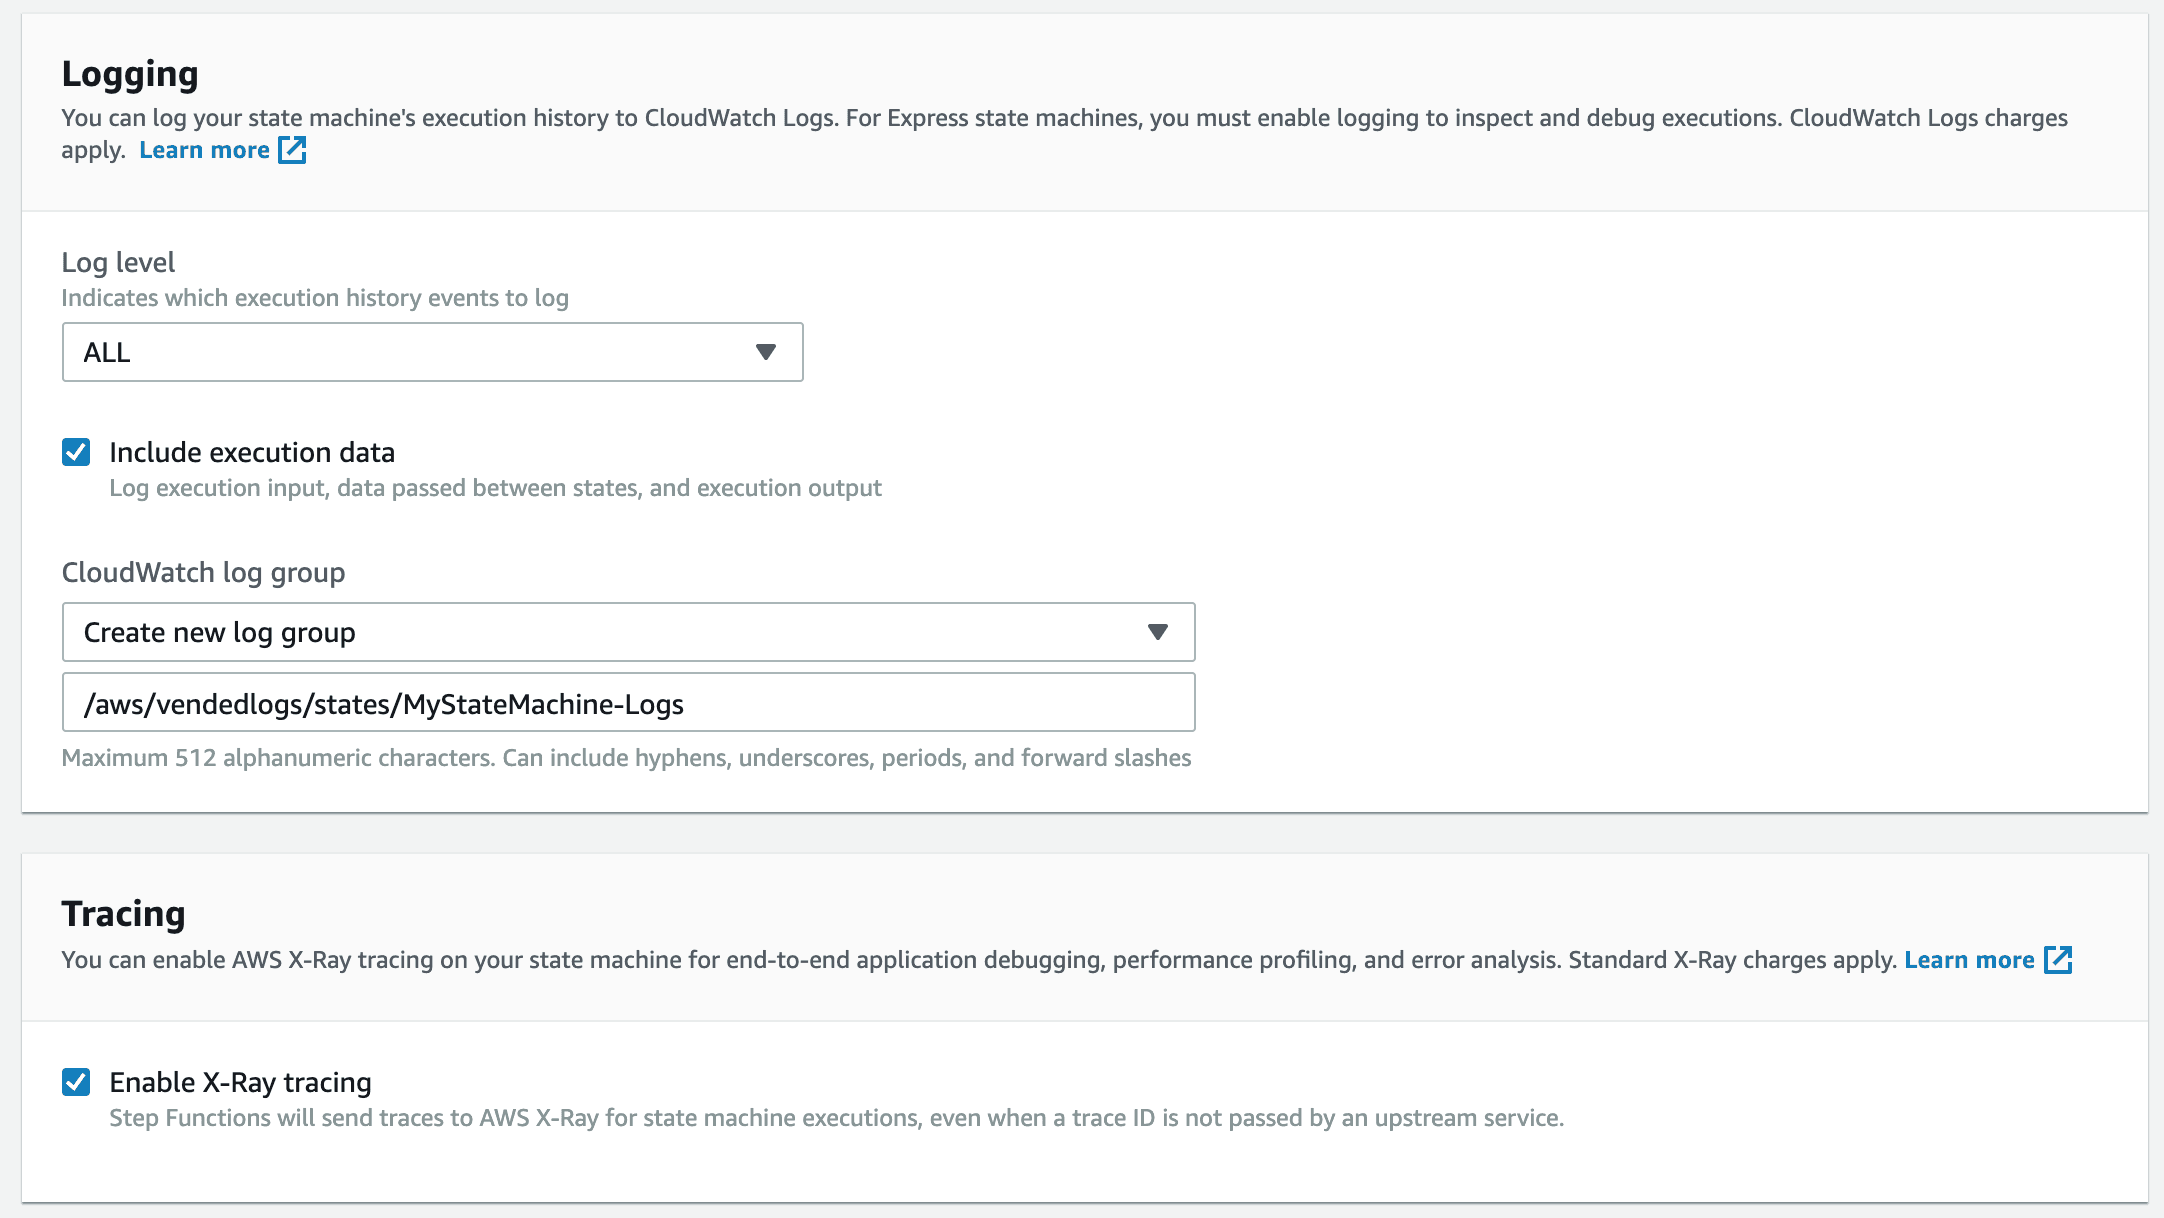
- Logging - enable logging for the Step Function State Machine.
- Tracing - enable X-Ray tracing for the Step Function State Machine.
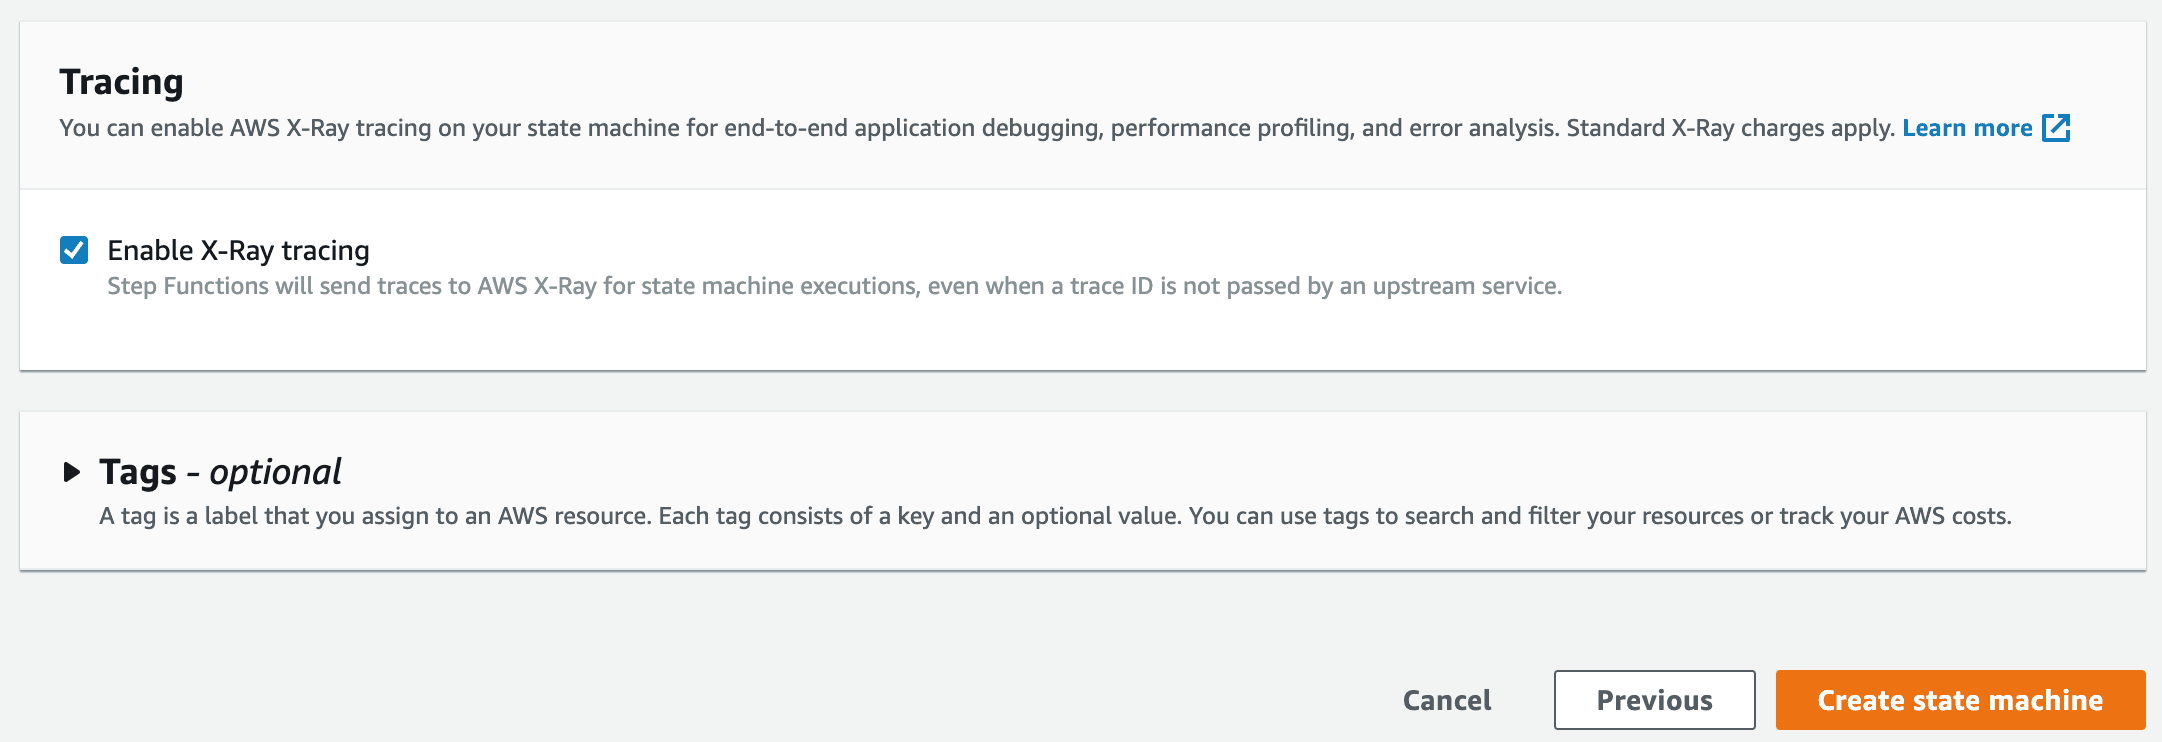
- Tags - create tags for the Step Function State Machine.
Finally, click on "Create state machine" to create the Step Function State Machine.
Part 2 - REST API
In this part, we are going to walkthrough the steps to create a REST API using the API Gateway console. We are also going to add API Keys, Usage Plan, and configure the mapping templates.
Step 1
Navigate to the API Gateway console, click on "Create API" on the right top corner. Click on "Build" under "REST API".
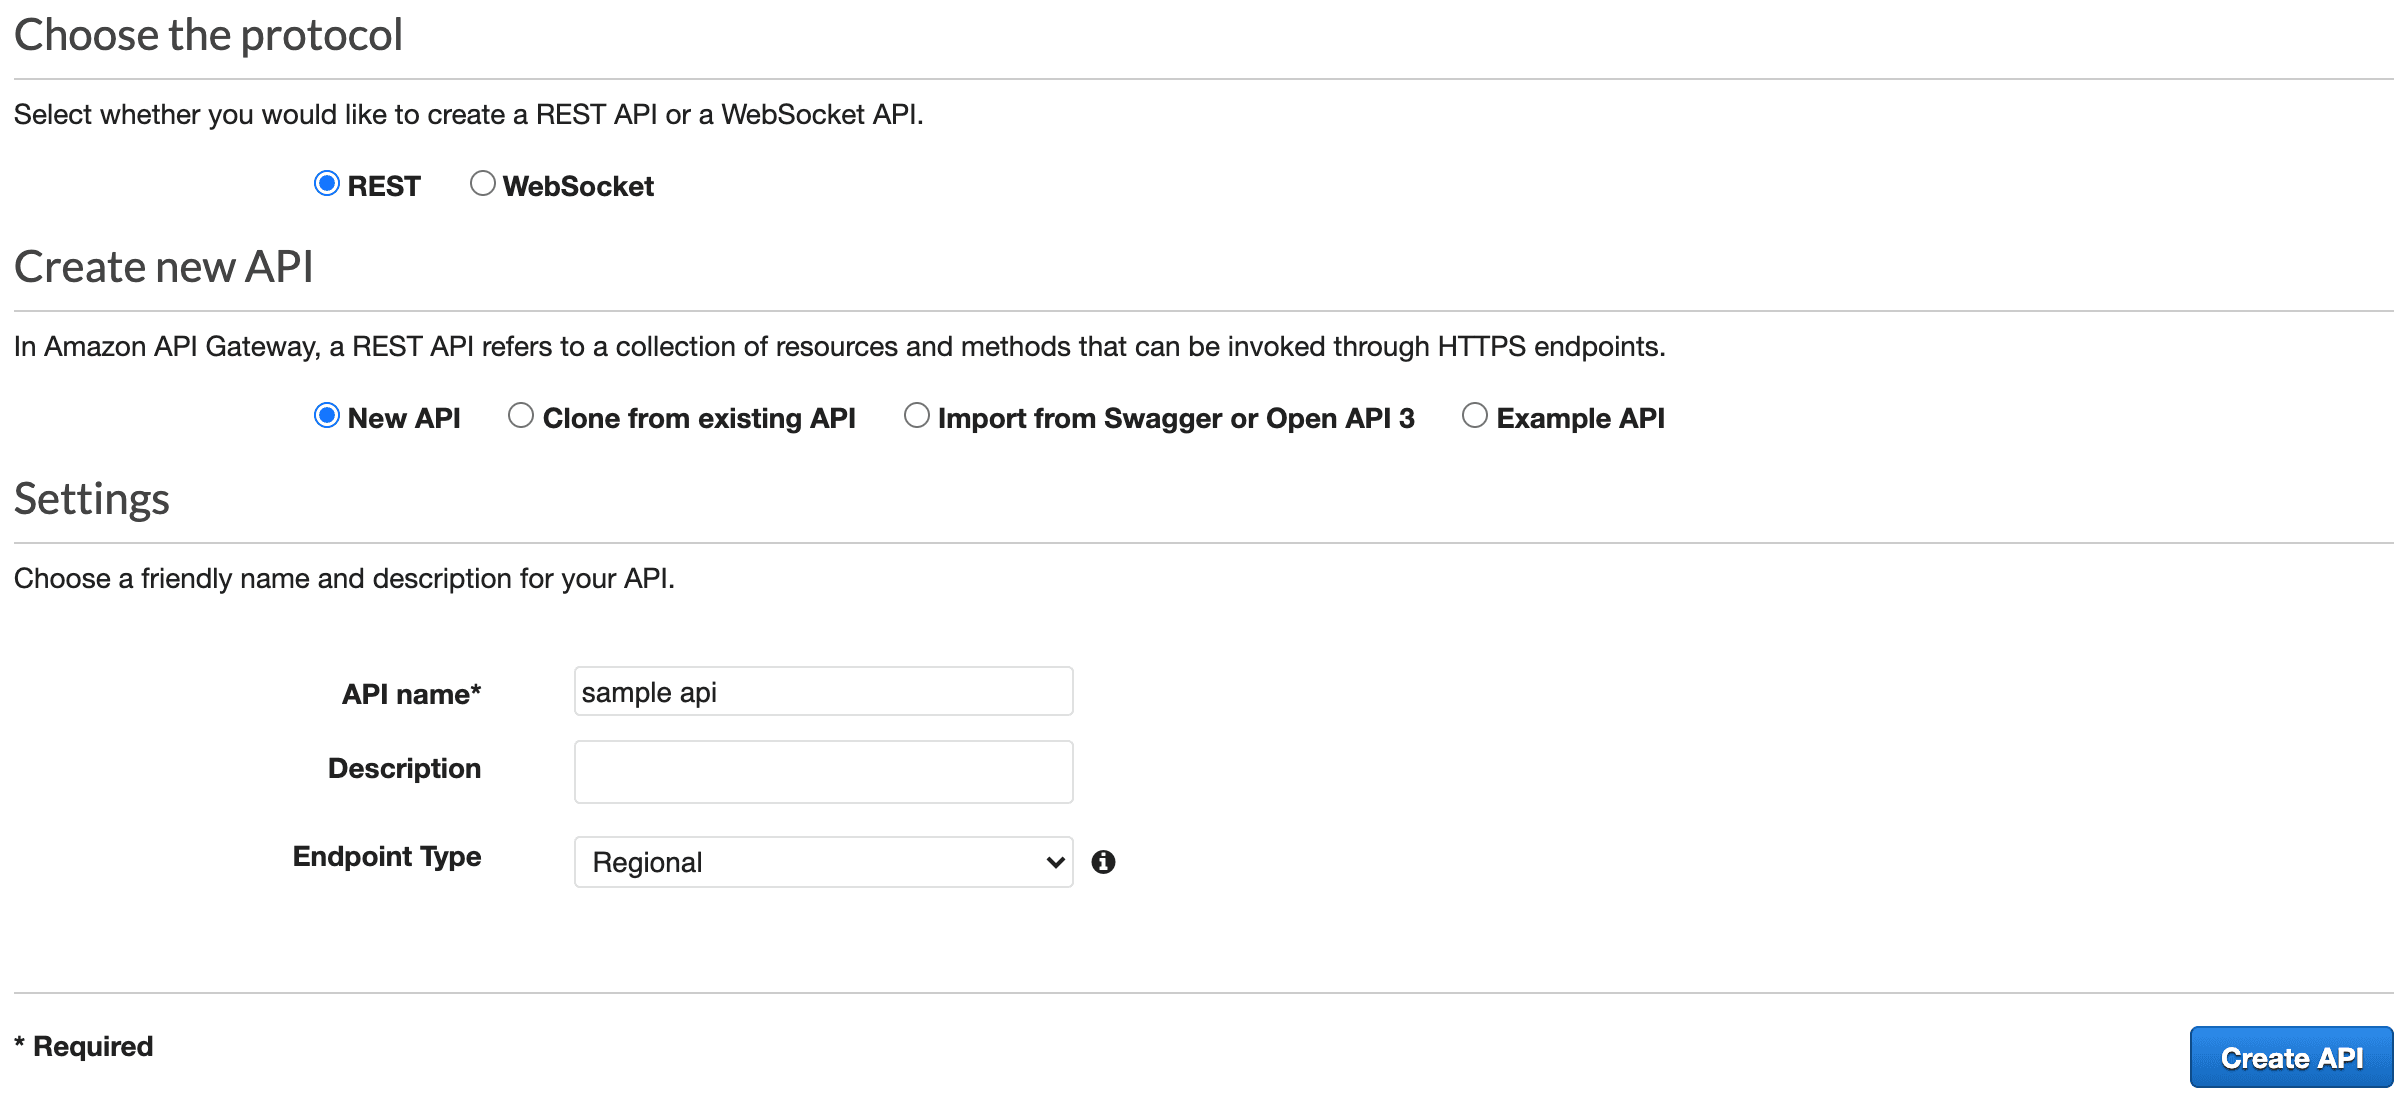
- Choose the protocol - select "REST"
- Create new API - select "New API"
- Settings - provide a suitable "API name", "Description" (optional), and "Endpoint Type"
Click "Create API" to create the base API.
Step 2
Open the newly created API. Click on "Resources" and create a "POST" method and set the "Integration Request" following as shown in figure
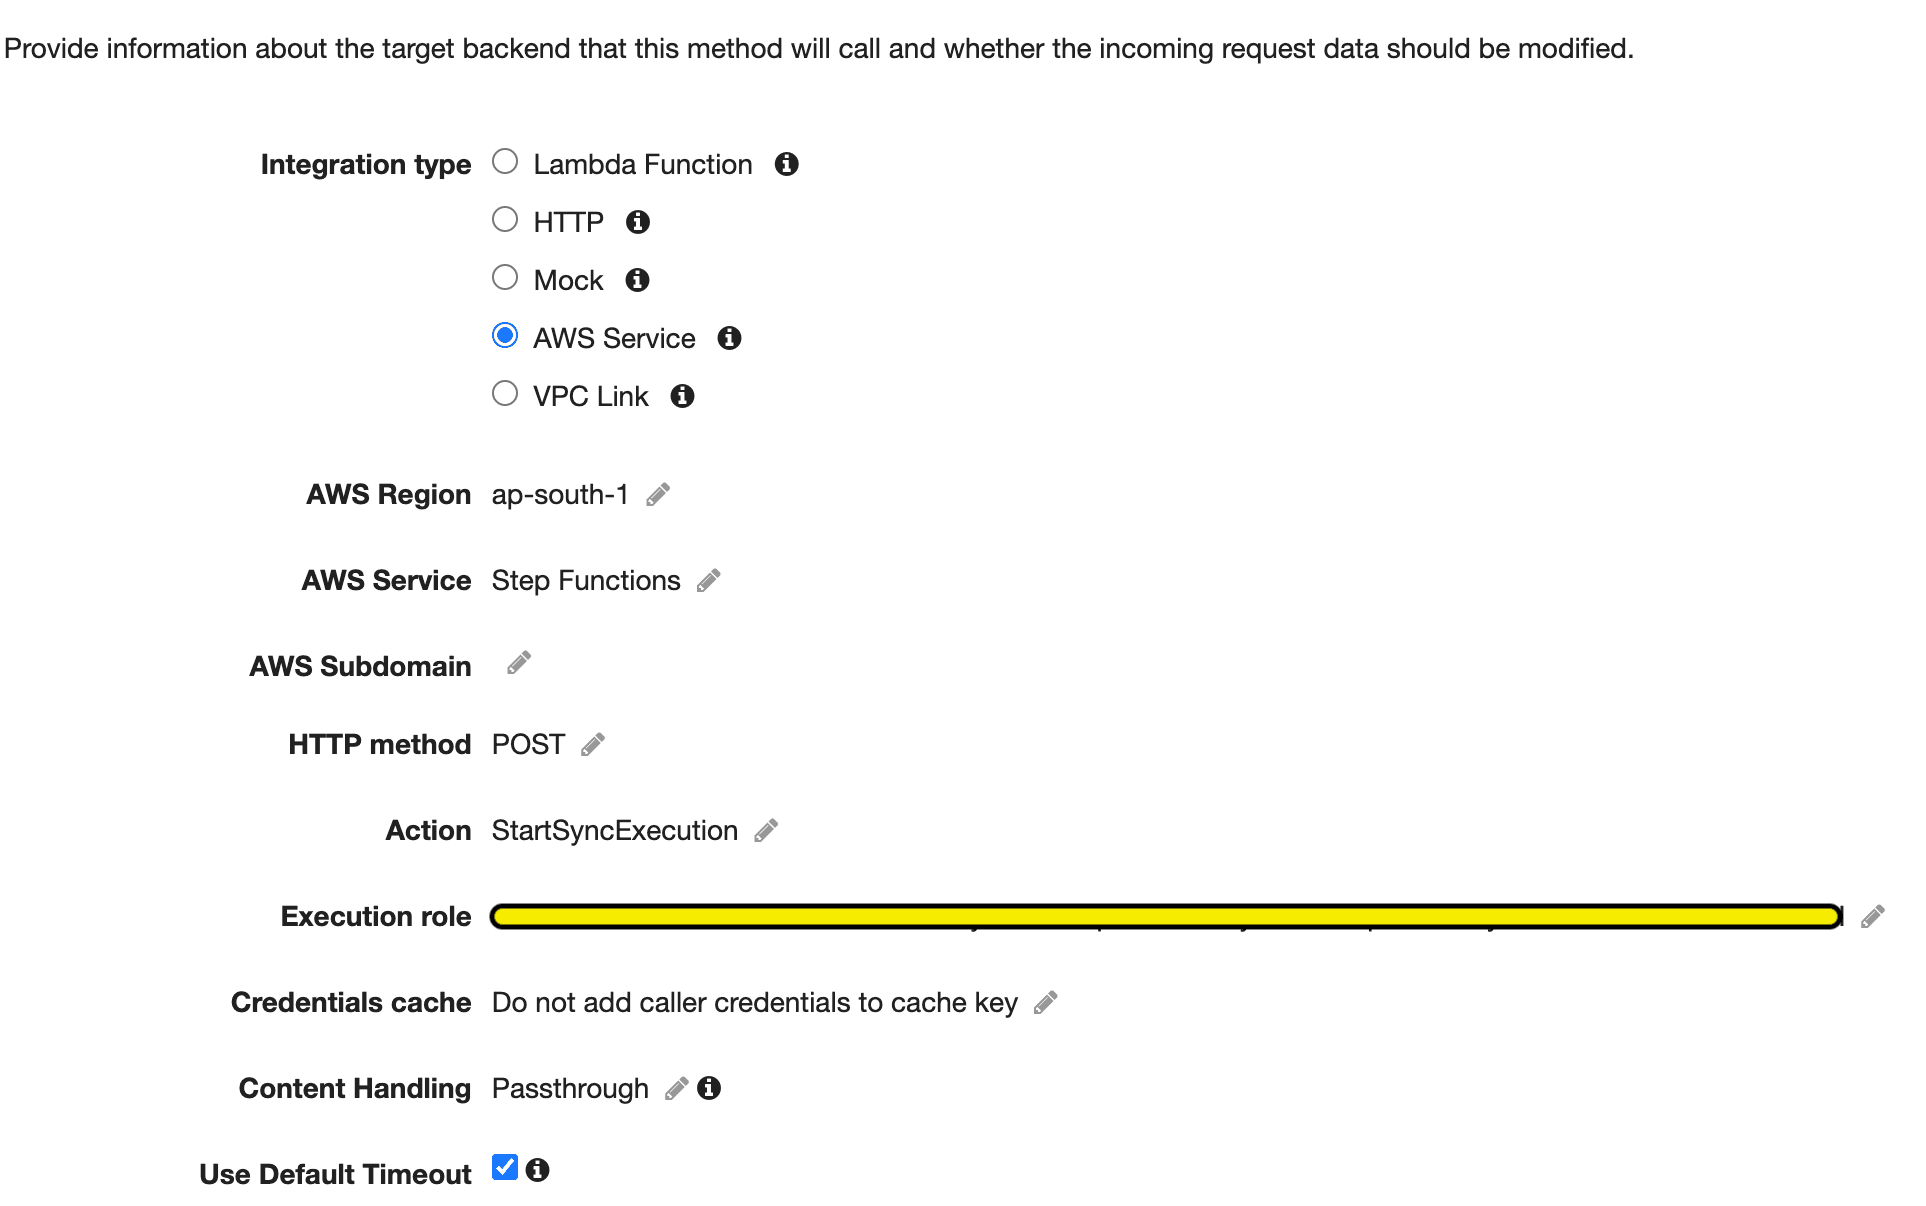
- Integration type - AWS Service
- AWS Region - Set the appropriate region
- AWS Service - Step Functions
- Action - StartSyncExecution
- Execution role - Role ARN to allow API Gateway to invoke Step Function API (IAM Action - "states:StartSyncExecution")
Step 3
Scroll down in "Integration Request" and add a mapping template for the content type of application/json. Click on "application/json" and scroll down to create the template.
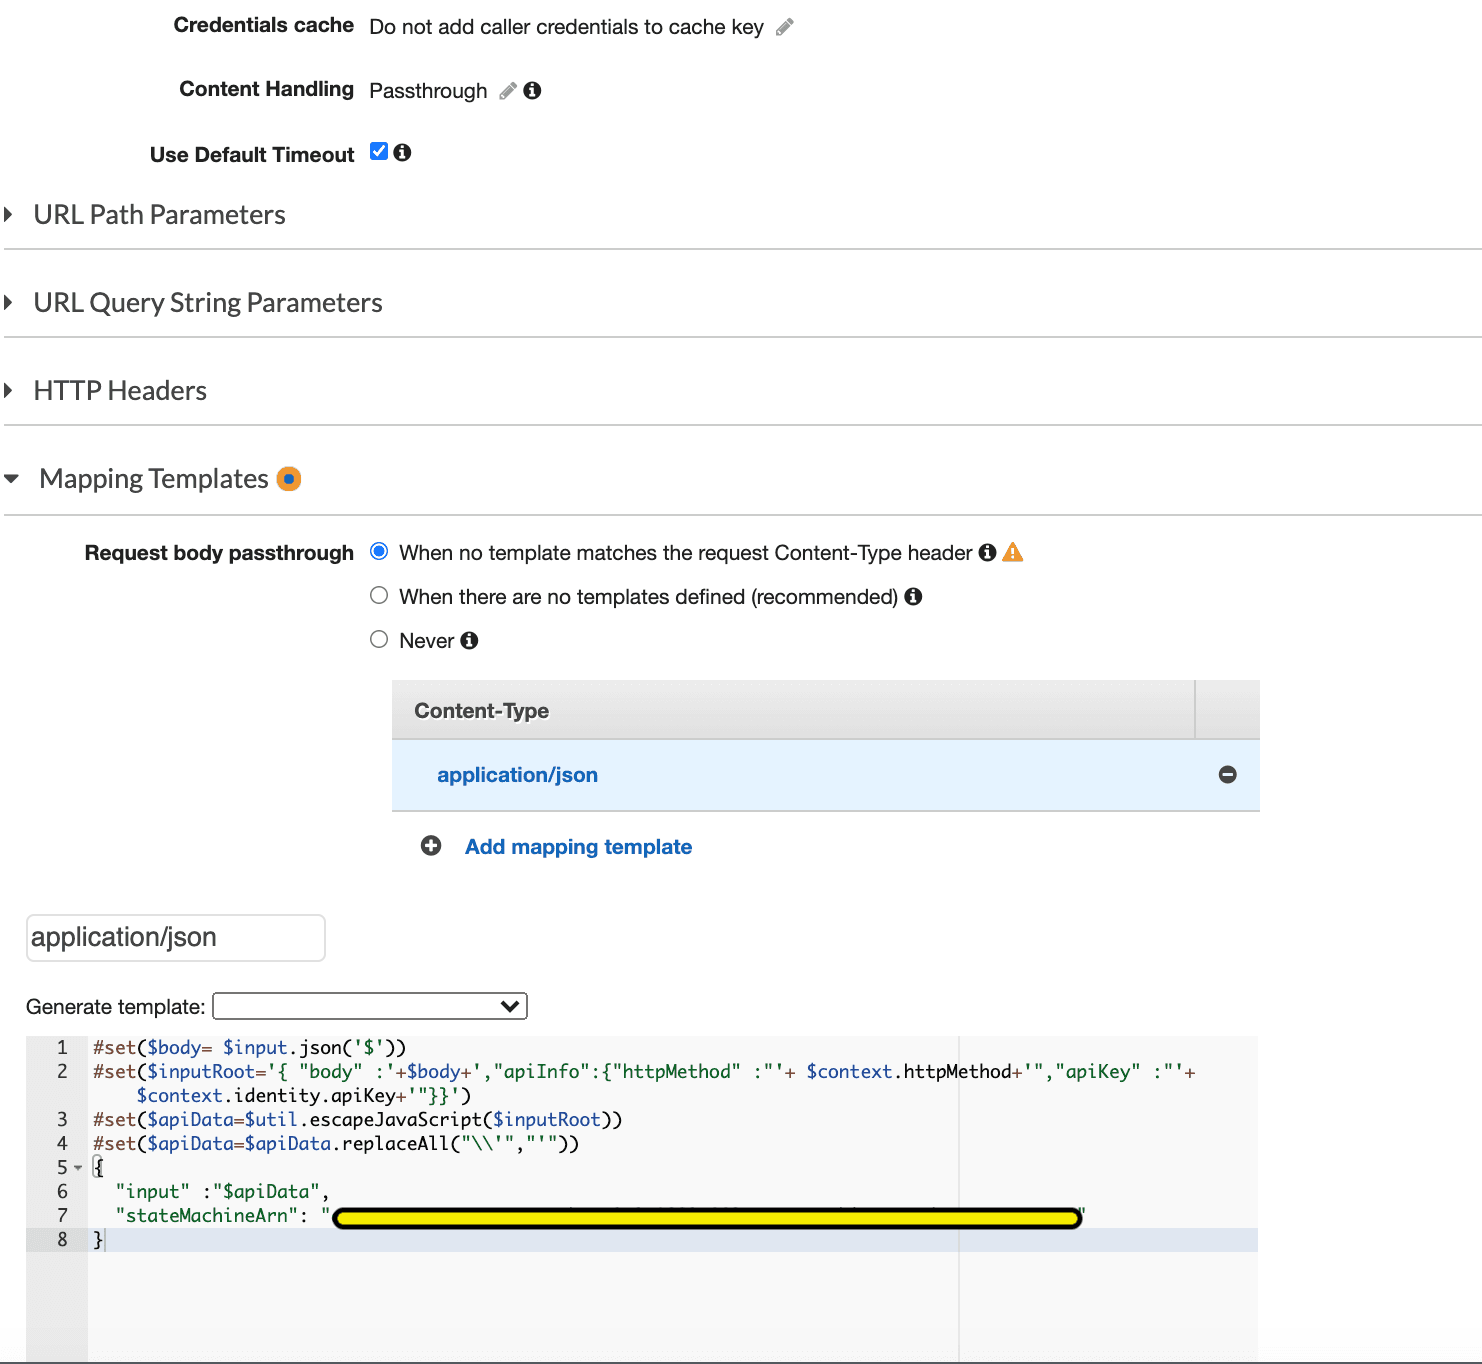
Use the following template and replace the step function arn and click "Save" at the bottom of the screen.
#set($body= $input.json('$'))
#set($inputRoot='{ "data" :'+$body+',"apiInfo":{"httpMethod" :"'+ $context.httpMethod+'", "apiKey":"'+ $context.identity.apiKey+'"}}')
#set($apiData=$util.escapeJavaScript($inputRoot))
#set($apiData=$apiData.replaceAll("\\'","'"))
{
  "input" :"$apiData",
  "stateMachineArn": "REPLACE_STEPFUNCTION_ARN"
}
The template takes the input data, adds "apiInfo" which contains the httpMethod and apiKey. The data is transformed as per the Step Function API input.
Once the "Integration Request" has been configured, by clicking on the created method, we will be able to see the rest of the options, similar to the screen shown below.
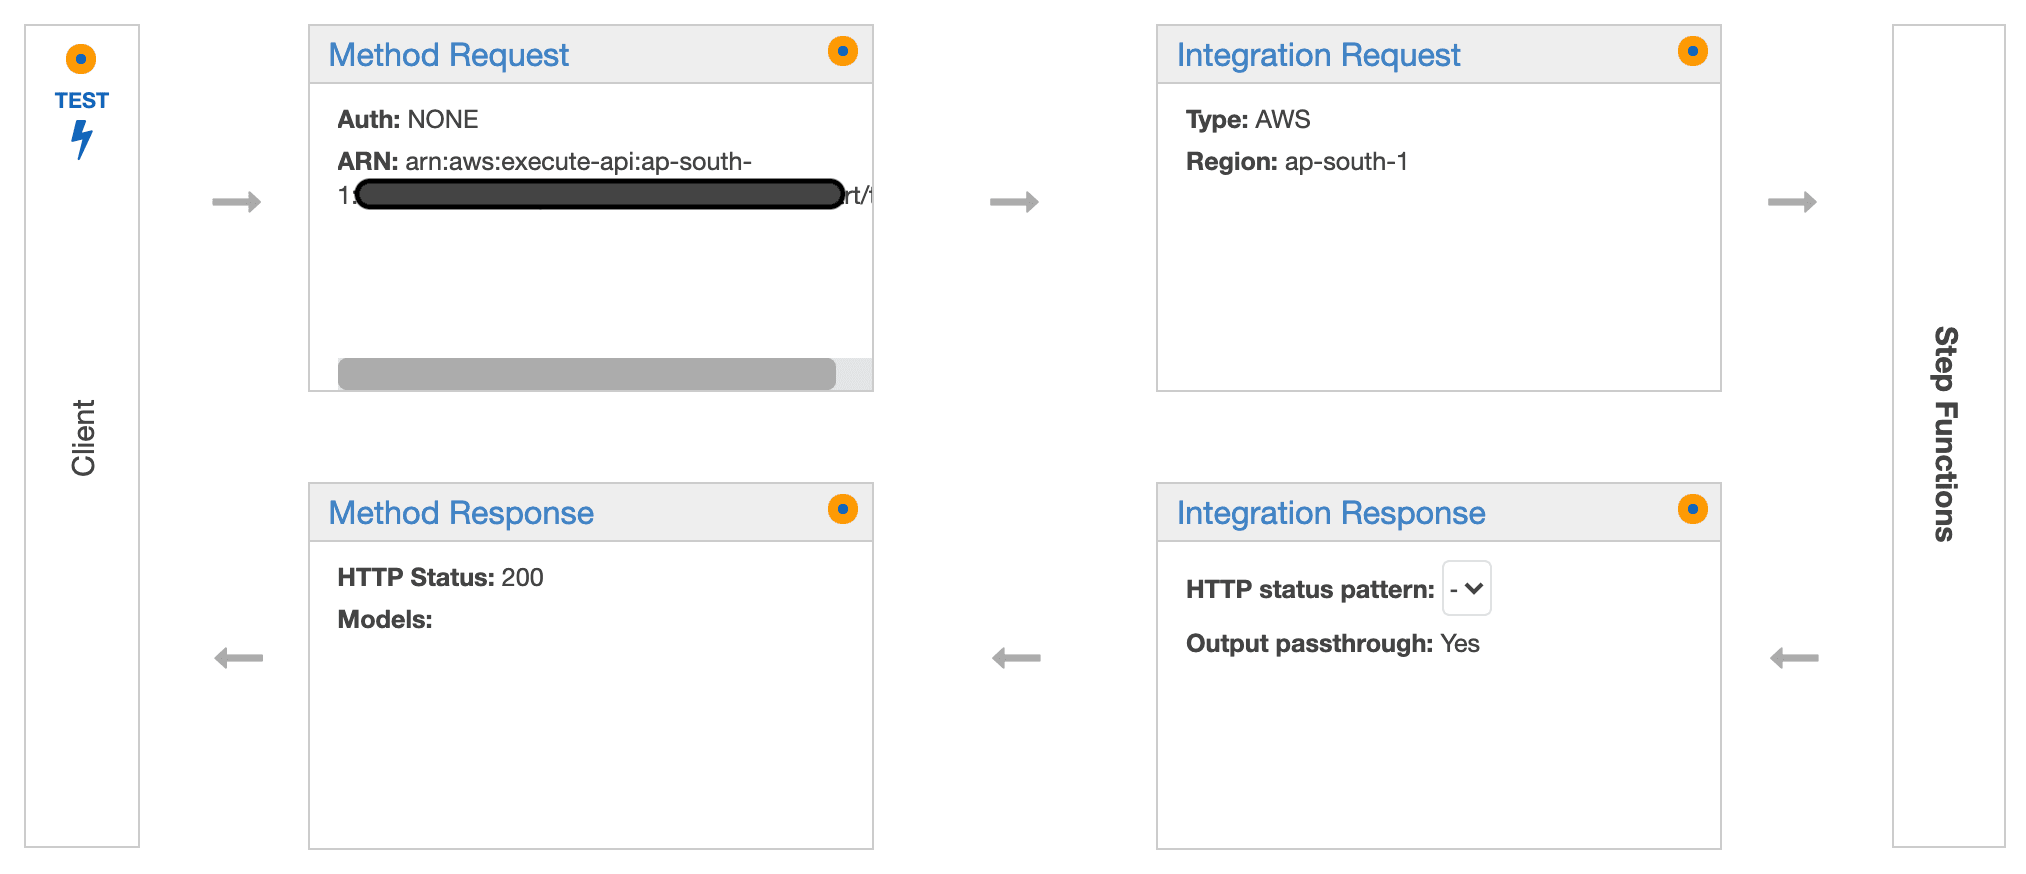
The "Integration Request" deals with the data structure sent while invoking the Step Function. To make API Key mandatory, we need to configure the "Method Request". To modify the data structure of the output of API, we need to configure the "Integration Response".
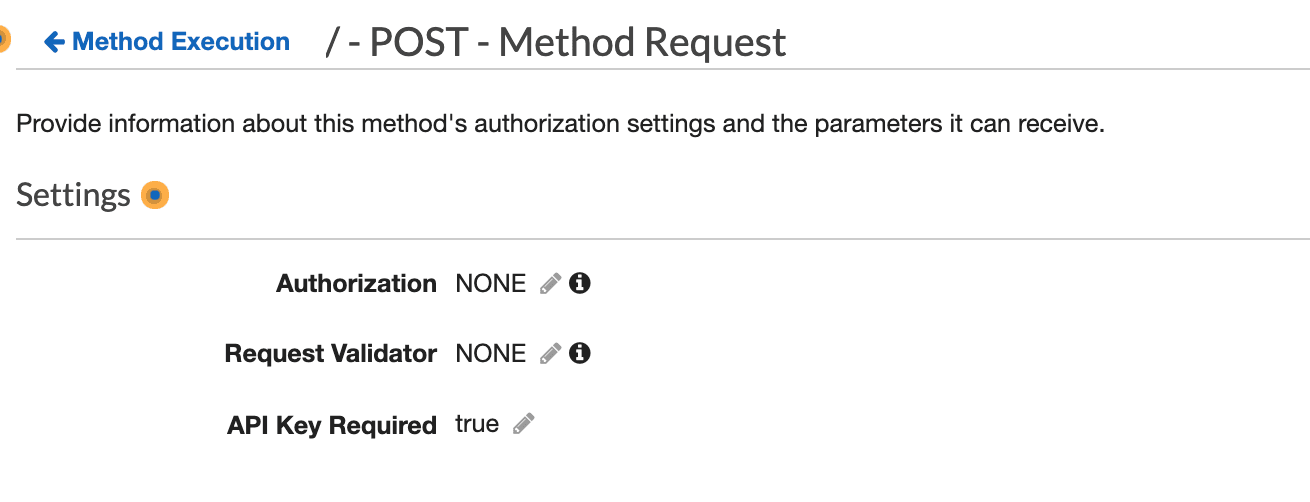
- Click on "Method Request" and Set the API Key Required to true in the "Method Request".
Now, lets configure the "Integration Response"
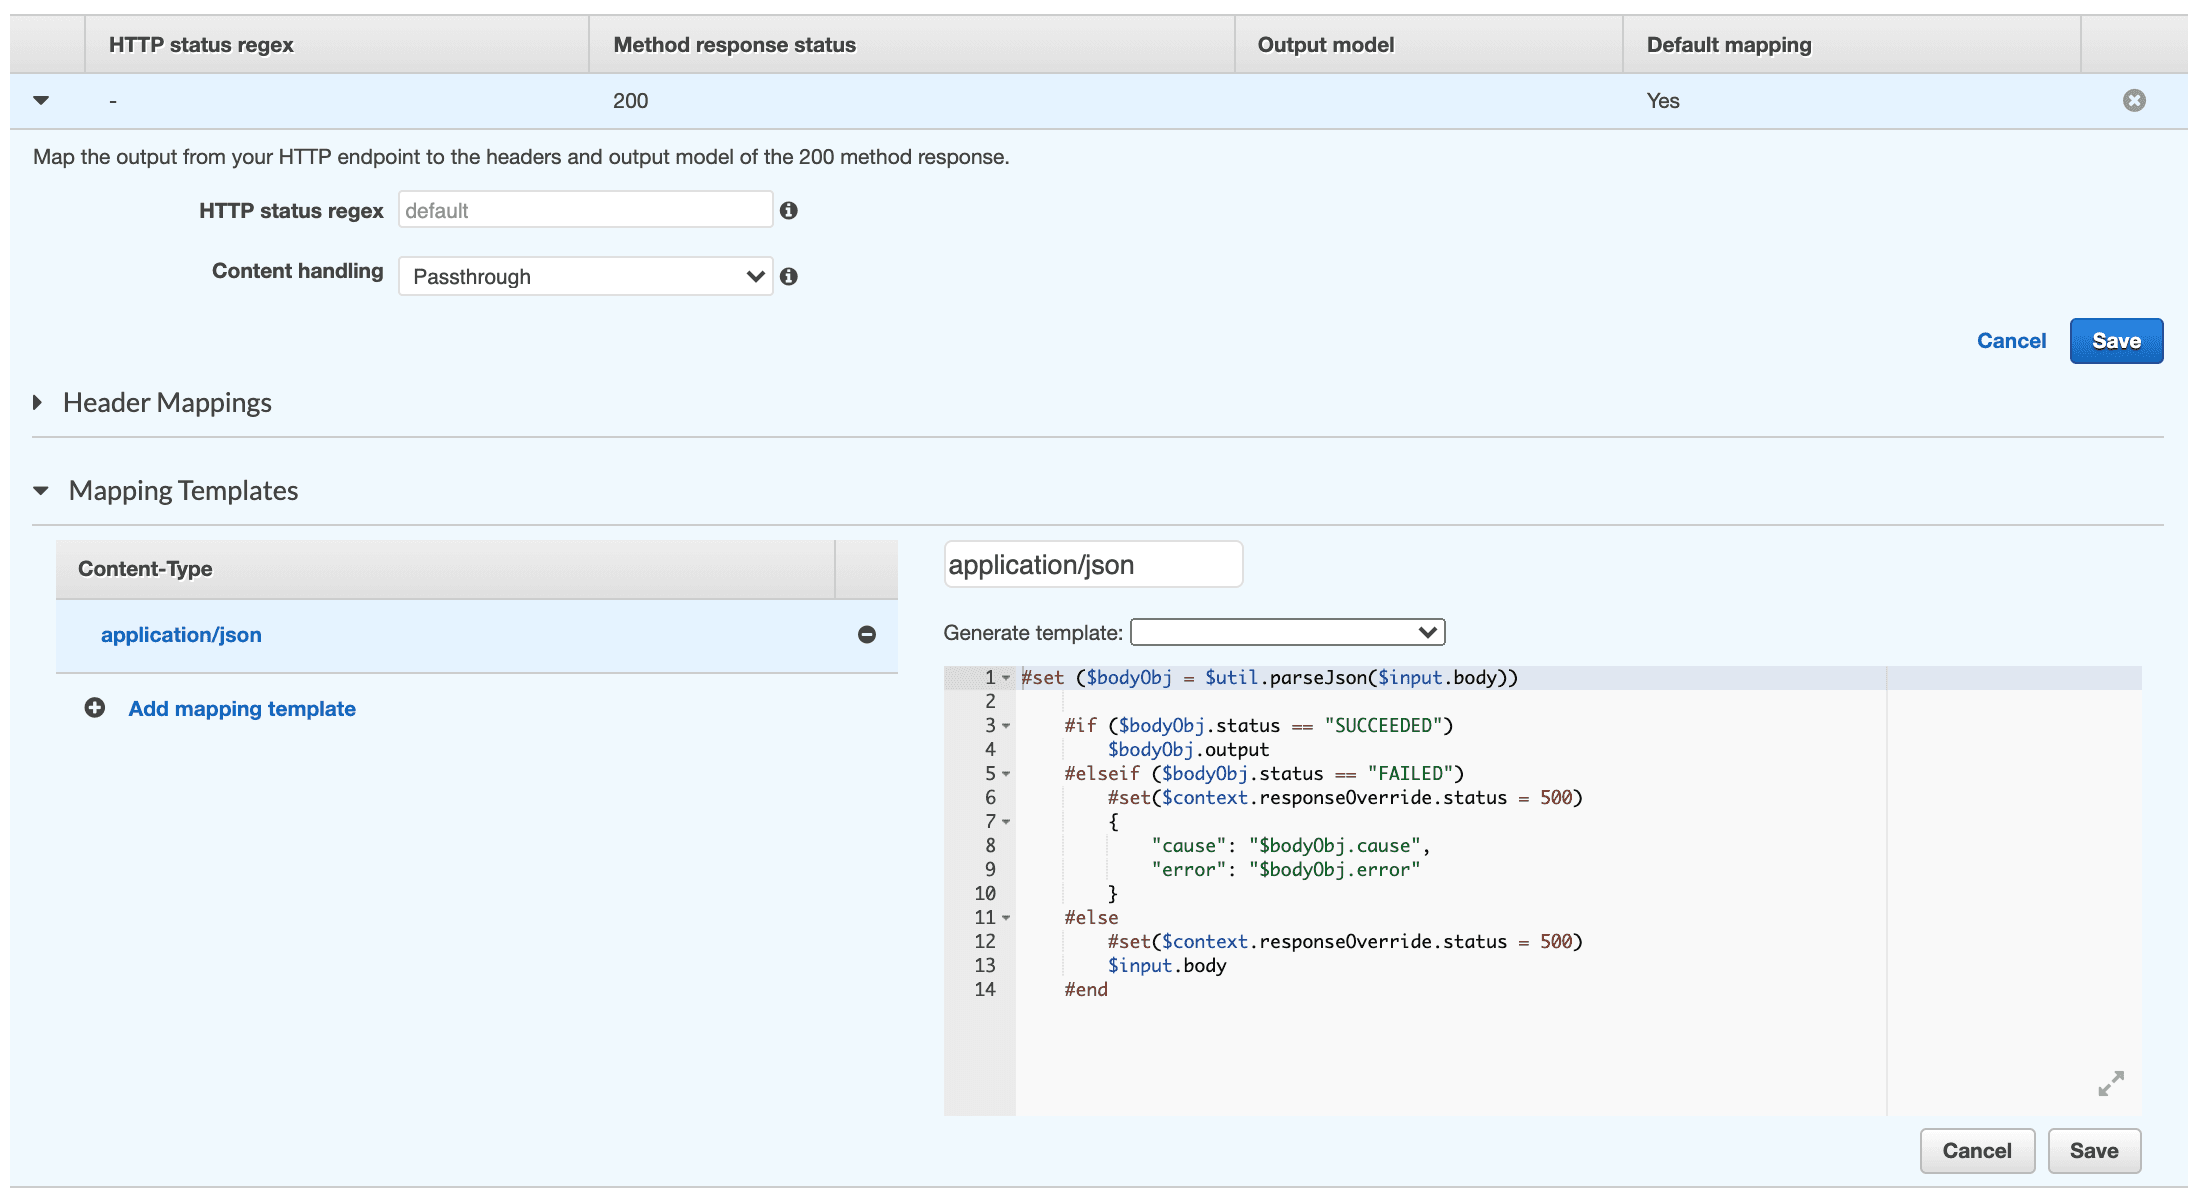
- Expand the default method response.
- Expand the mapping templates section
- Click on the "application/json" content type
- Add the sample template given below to handle the Step Function output
#set ($bodyObj = $util.parseJson($input.body))

#if ($bodyObj.status == "SUCCEEDED")
    $bodyObj.output
#elseif ($bodyObj.status == "FAILED")
    #set($context.responseOverride.status = 500)
    {
        "cause": "$bodyObj.cause",
        "error": "$bodyObj.error"
    }
#else
    #set($context.responseOverride.status = 500)
    $input.body
#end
- Save the mapping template and the default method response.
Finally, deploy the API into an appropriate stage.
Step 4
Open the newly created API.
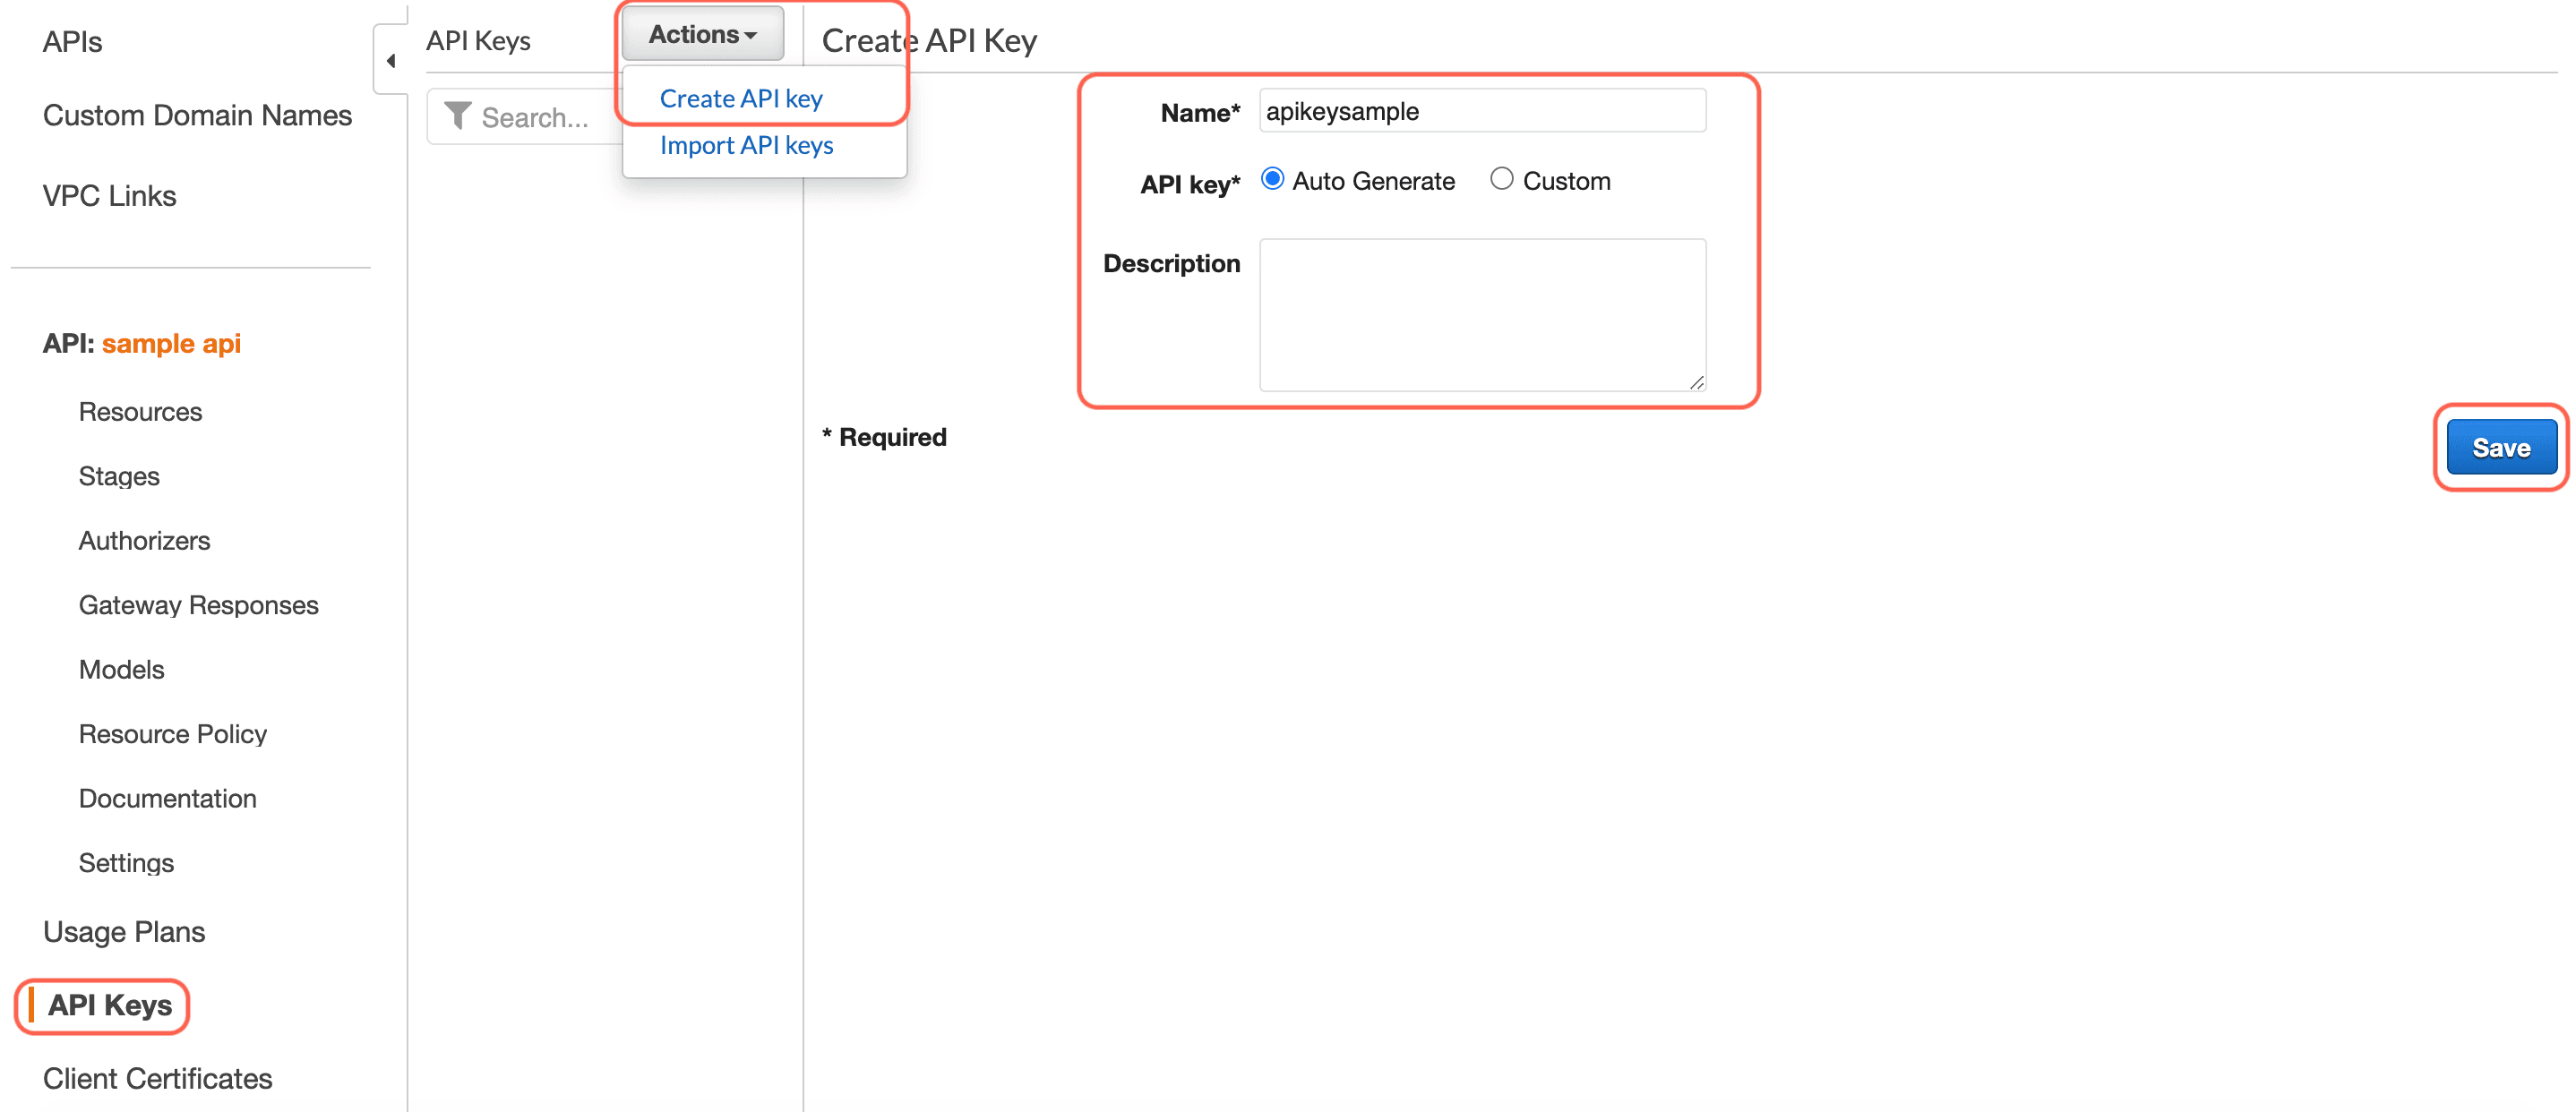
- Click on "API Keys" in the left section.
- Click on "Actions" and select "Create API key" in the middle section.
- Enter an API Key parameters and click "Save" in the right section.
Step 5
Open the newly created API.
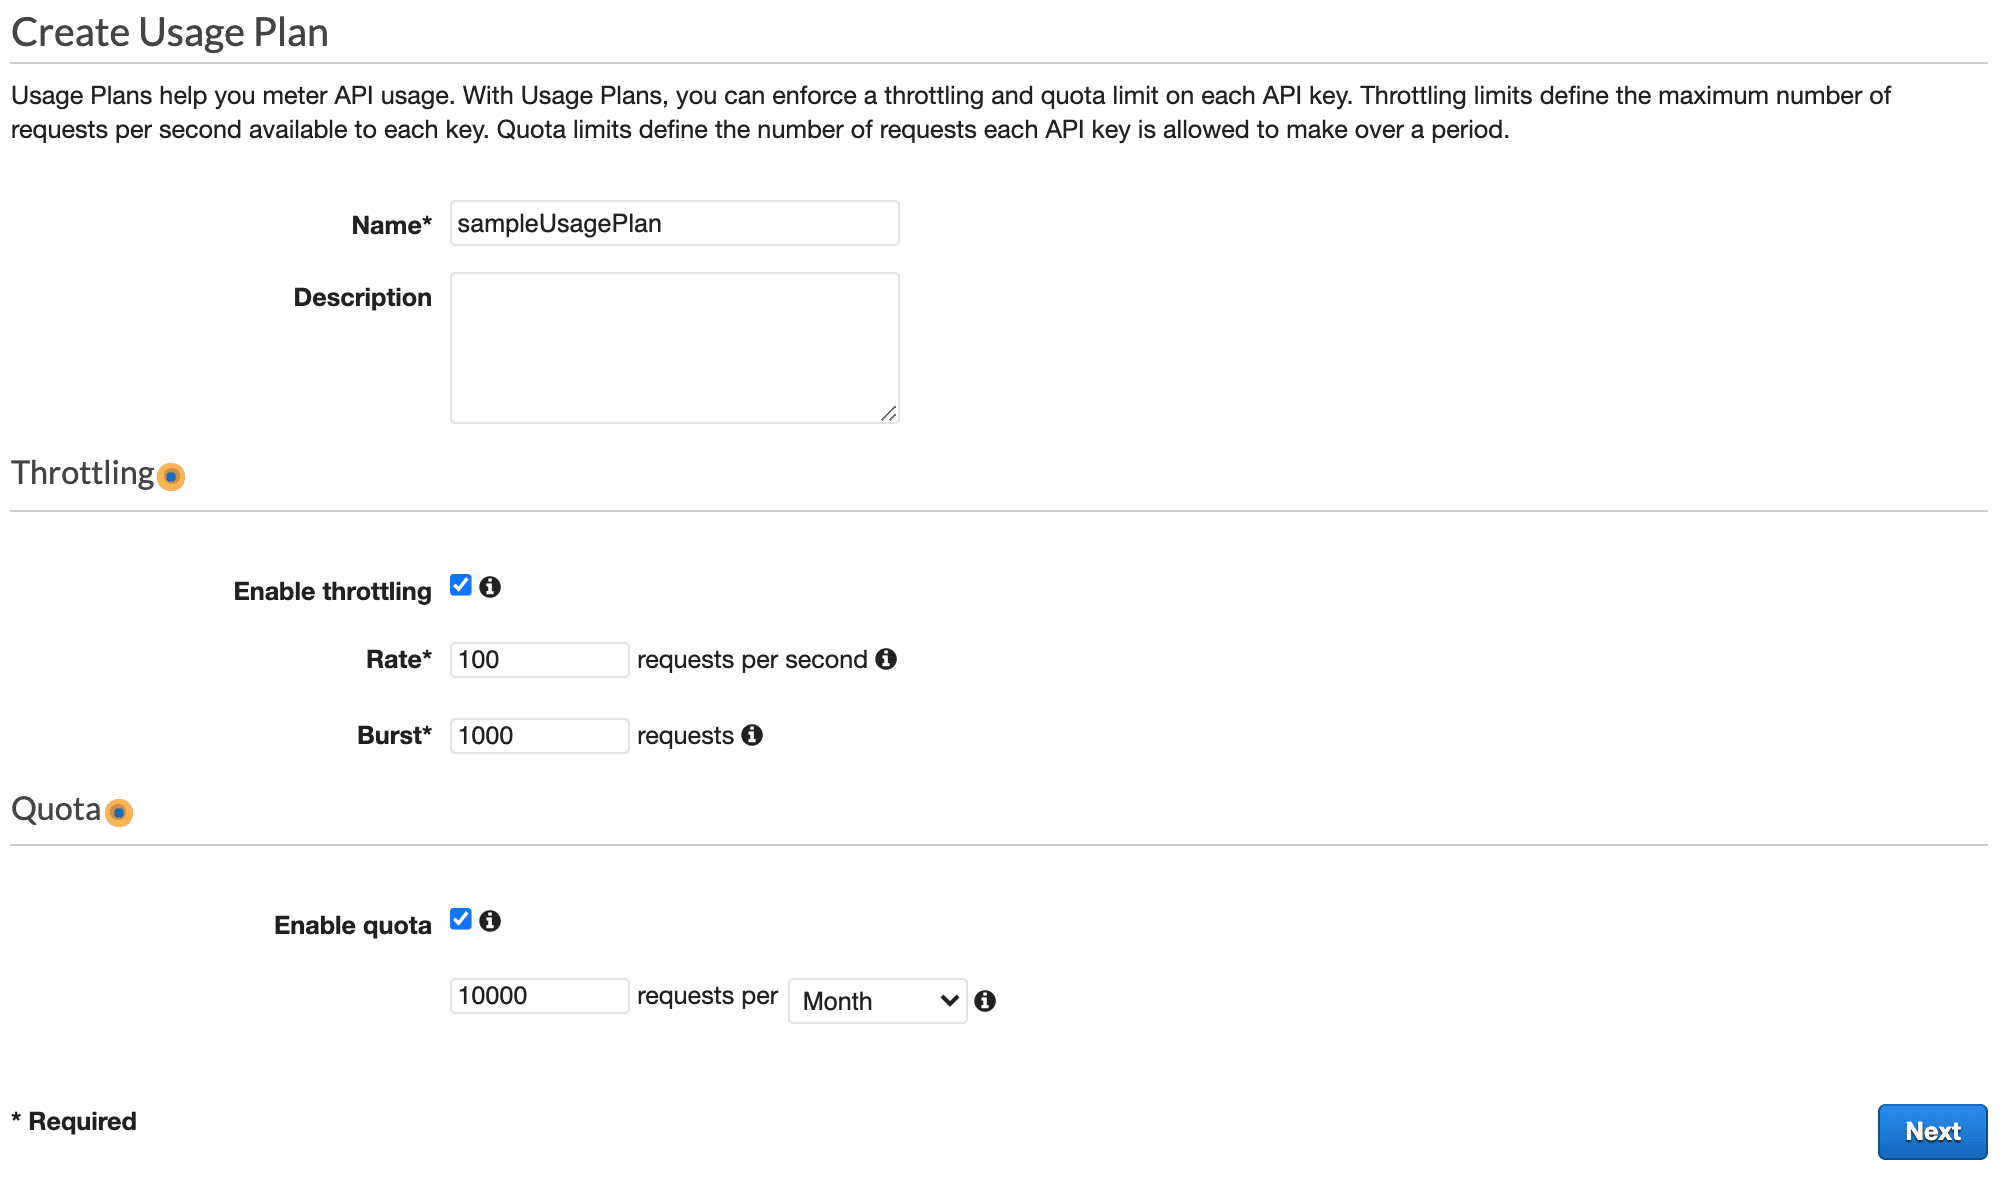
- Click on "Usage Plans" in the left section.
- Click on "Create", set the appropriate "Throttling" and "Quota", click "Next"
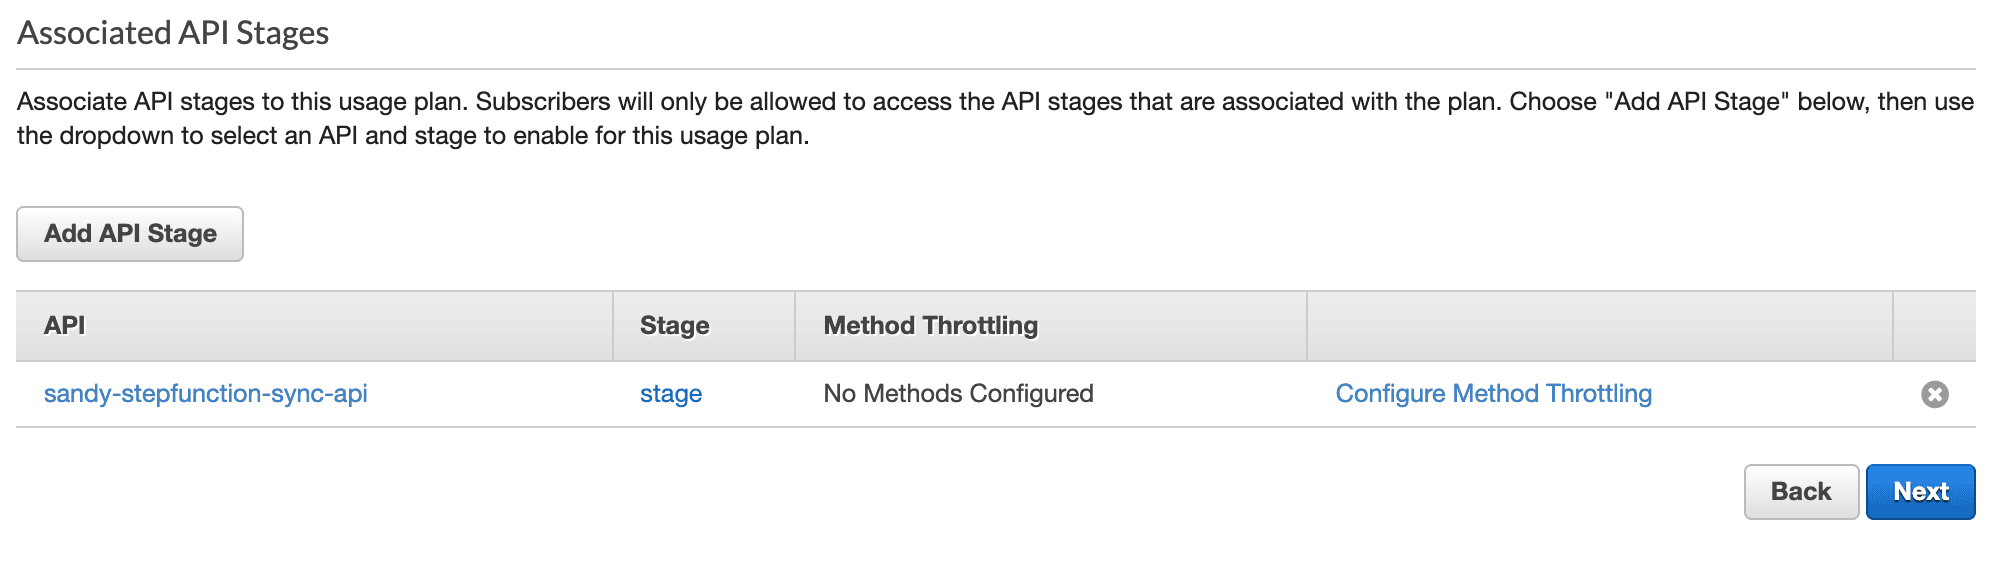 - Click "Add API Stage", select the appropriate API and Stage from the dropdown, click "Next".
 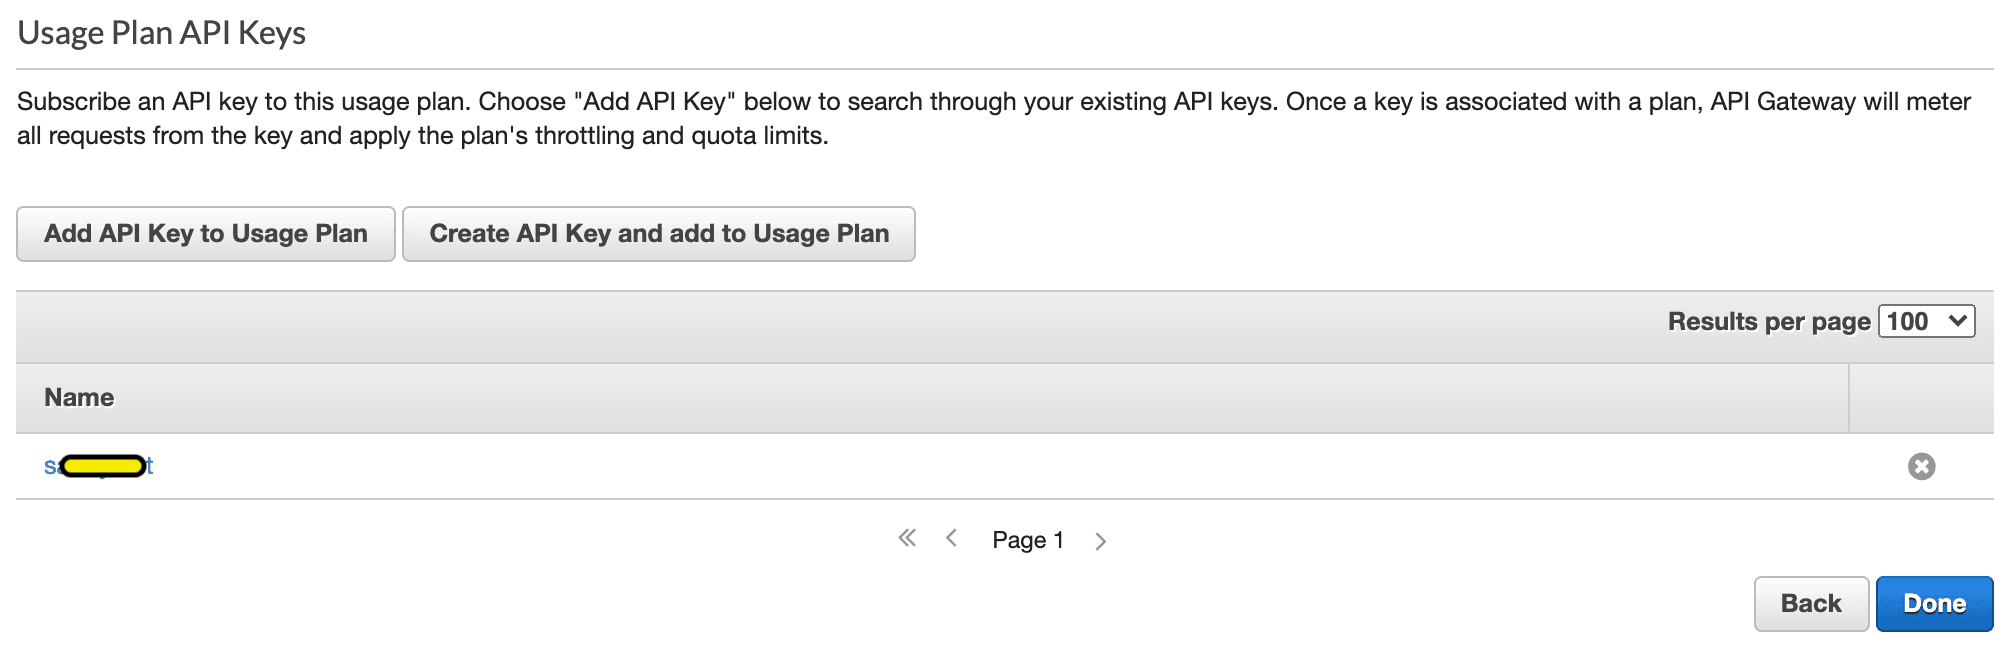 - Click "Add API Key to Usage Plan", select the appropriate API Key from the dropdown, click "Done"
 All done! Now retrieve the URL from the deployed stage from API Gateway and start consuming it.
The entire process can be pretty confusing while doing it for the first time, so here's a repo with a sample SAM application that creates all the required resources.
"Synchronous Express Workflows are ideal to manage high-volume, short duration, synchronous workflows such as the orchestration of microservices behind Amazon API Gateway. For example, capture responses submitted through an online feedback form and return a reference number to the submitter. Express Workflows can now be synchronously invoked from Amazon API Gateway, AWS Lambda, or by directly calling the new API."
Click here to view the complete article