


Scaling R&D Drug Discovery with Serverless. Faster go-to-market with Data Engineering
A walkthrough on how to build a LinkedIn and Twitter Bot on AWS using serverless framework. The purpose of the bot is to post videos from youtube channel and blogger post’s of logged-in user to their Twitter and LinkedIn accounts. We’d also be looking up at how to setup a CRON job to run the bot every few minutes/hours.
Stack Used
- ReactJS for front-end hosted on amplify,
- Serverless framework which makes our job easier in setting up all AWS resources via a simple .yml file.
- Express - node framework,
- And all the important AWS pieces to complete our setup - Lambda, DynamoDB, API Gateway.
Packages Used
- aws-sdk
- twitter-lite : modern client / server library for the Twitter API.
- dotenv: loads environment variables from a .env file into process.env
- express: web framework for node,
- serverless-http: This module allows you to ‘wrap’ your API for serverless use.
- Axios : Promise based HTTP client for the browser and node.js
- query-string: Parse and stringify URL query strings
- Cors : Provides a Connect/Express middleware that can be used to enable CORS with various options.
Part I
First part of our application is to collect the necessary access tokens of user’s Twitter and LinkedIn account.
Front-End
To obtain the access tokens from users, we wanted an interface that allows users to sign in on their own to their respective accounts and grant our bot the necessary permissions to post on their behalf. This is where the front end comes in. We used React to develop it and amplify to host it.
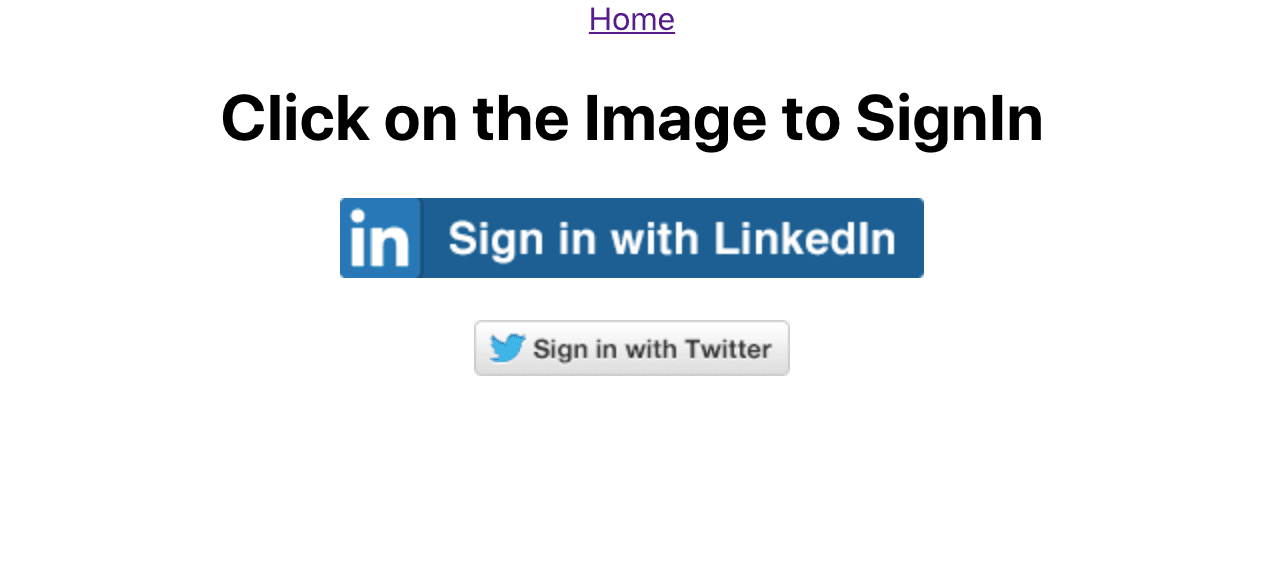
Frontend is very minimal and would contain only buttons to sign-in to Twitter and LinkedIn. Clicking on either of the buttons would redirect the user to the respective site’s login page. On logging in, the user is asked to grant necessary permissions to the bot to post tweet/post on their behalf.
Back-End
We start by writing the serverless.yml file with all the required info to setup the aws resources. Serverless has a set of templates for different languages. Since we’d be using node, we can start off with
serverless create --template aws-nodejs
command which will create basic files for us to begin our work. You can read more about serverless framework here.
Resources we’d be using here are lambda functions, API gateway to access them, DynamoDB to store and read the access tokens. Serverless yml file for this application would look similar to this, except there’ll be 4 lambda functions instead of 1.
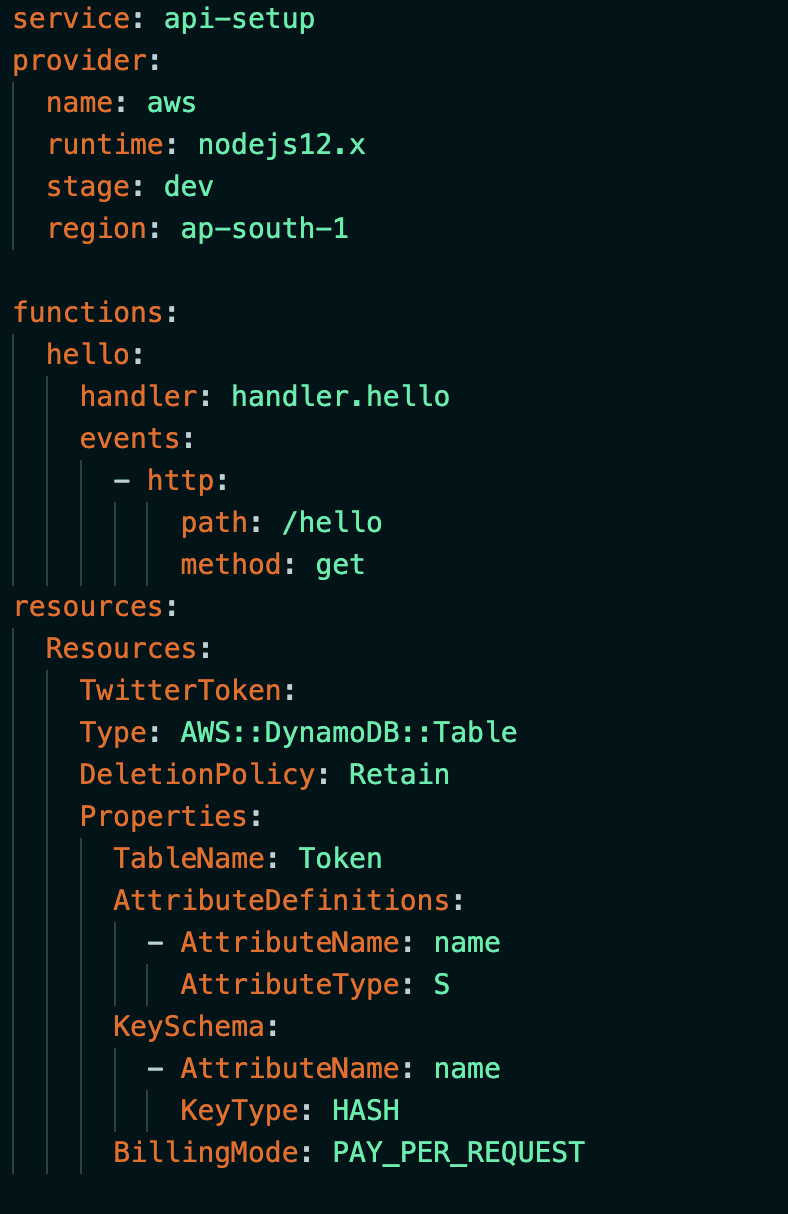
Once we write our serverless yml file and deploy it, all our aws resources are set up with necessary permissions. Everytime we make a change to our files, we have to redeploy deploy it.
Pro tip: You can automate deployment from a github repo everytime you make a push. You can read about it [here.]
We use four lambda functions here in total. Two each for Twitter and LinkedIn. One lambda function is to obtain the access tokens and the other lambda function to pick a random video/blog from the user’s youtube/blogpost and post/tweet them to linkedIn/Twitter. Now let’s look at the flow of our app in obtaining the permission and access tokens.

- From the frontEnd, the Api gateway link is hit which triggers the lambda function to obtain access tokens.
- Lambda redirects to Twitter/LinkedIn based on the button clicked by the user.
- Once the user logs in and grants necessary permission to the bot, we receive the access tokens.
- This access token is necessary to interact with the logged-in user’s account.
- The access token and other required params are stored in the DynamoDB table.
Part II
Once we have the access tokens stored in the DynamoDB table, we are good to set up CRON job on the second lambda function. This CRON job basically triggers our second lambda function responsible for picking up random video/blog from the user’s youtube/blogpost and post/tweet them to linkedIn/Twitter in the given schedule.
To setup CRON job,
- Head towards CloudWatch in aws console.
- Click on rules and select ‘Create Rule’.
- Click on ‘Schedule’ radio button and enter the interval at which your target(in our case, the Lambda function) needs to be triggered.
- Click on ‘Add target’ that’s found on the right side.
- Choose Lambda functions under the dropdown menu and select the function that has to be triggered. We’ll be triggering the second lambda function which is used to post/tweet.
- Hit on ‘Configure Details’, name your rule and click on ‘Create Rule’.
That’s it. That’s how simple it is to setup CRON job in aws.
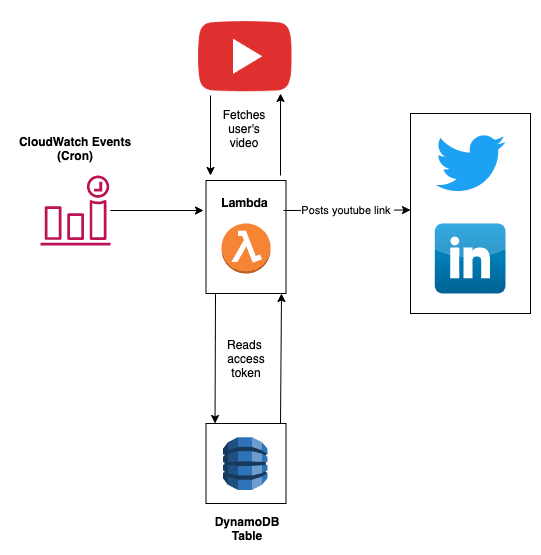
Now let’s look at the flow of posting tweets and blog links at scheduled time.
 **
**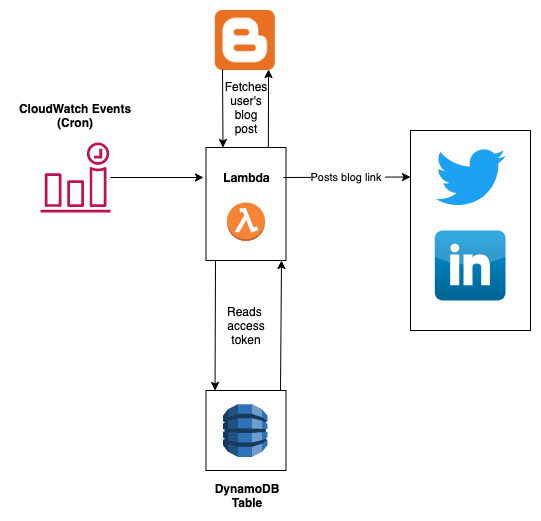 **
**As from the above diagram it is quite clear that posting of both blogs from Blogger and videos from Youtube is similar. The only difference being the lambda function that is called.
- Separate Cloudwatch CRON job is scheduled as per needed to trigger both lambda functions respectively.
- Lambda functions read access tokens from DynamoDb table to post/tweet to user’s LinkedIn/Twitter.
- Random BlogPost/Youtube video link of logged in user is fetched from their respective account. We wouldn’t need special access to their youtube or blogpost profile, as they are public.
- The fetched link is then posted to the user’s LinkedIn/Twitter account.
References
For questions and suggestions, feel free to reach out to us on Twitter


