ChatGPT
  Perplexity
  Gemini
  Claude AI
 Amazon Location Service lets you add location data to applications, which includes capabilities such as maps, points of interest, geocoding, routing, geofences, and tracking. Amazon Location provides cost-effective location-based services (LBS) using high-quality data from global, trusted providers Esri and HERE. With affordable data, tracking and geofencing capabilities, and built-in metrics for health monitoring, you can build sophisticated location-enabled applications.
Key features in Amazon Location Service
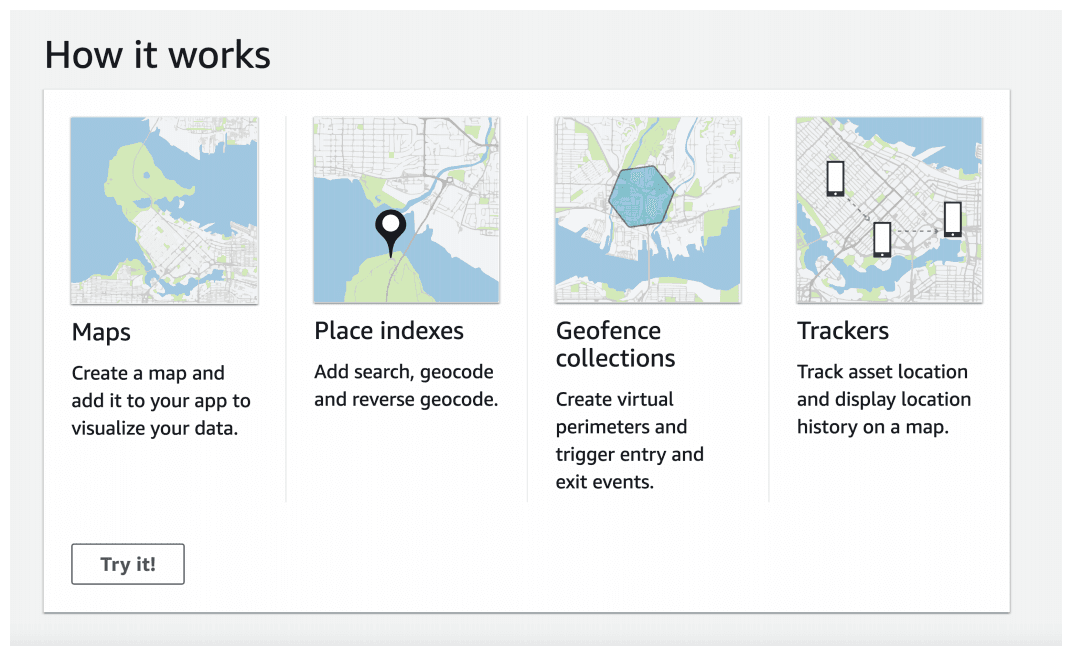
Amazon Location provides the following features:
- Maps
- Places
- Geofencing
- Trackers
- Routing coming soon
For more information Amazon Location Services Key-Features
Pricing
The cost incurred to use the geocoded address and the reverse geocoded is $0.50 per 1000 requests. It is much cheaper than google's geolocation API costing about $5.00 per 1000 requests. Even with the stored geocoded and reverse-geocoded requests, the Amazon Location Service costs $4.00 per 1000 requests. With the AWS free tier, you get 3 months of free trial with 10k geocoded and reverse-geocoded requests where the result is not stored.
For more information:
Integrating Amazon Location Services to React App
Here, we walk through integration of Amazon Location Service to a React App. To learn more about the service, see the Amazon Location Service Developer Guide.
Creating a new React App
First, we’ll create and start a new React app with create-react-app, a CLI tool used to bootstrap a React app using current best practices. We’ll then add Amplify and initialize a new project. The following procedure will walk you through this process.
To create new React App, run the following commands from your project directory.
npx create-react-app amazon-location-service-places
cd amazon-location-service-places
This creates a new React app in a directory called amazon-location-service-places and changes into that new directory.
Now since you are in root directory of your project, run npm start command to run the project. This command will run a development server in your localhost with default port 3000. So you can see the output in your browser by navigating to http://localhost:3000.
If the React's default page loads, it means that the React App is created successfully.
Installing all Dependencies
Run the following command to install the required dependencies.
npm install aws-sdk aws-amplify
Adding Auth for React App
The next feature you will be adding to the React app is authentication. The Amplify Framework uses Amazon Cognito as the main authentication provider. Amazon Cognito is a robust user directory service that handles user registration, authentication, account recovery & other operations.
In the following steps, we are going to add Cognito User Pool as a reference to our App's authentication. Only the users in registered can access the location services. Run the following command from your project's root directory.
amplify add auth

? Do you want to use the default authentication and security configuration? Default configuration
? How do you want users to be able to sign in? Username
? Do you want to configure advanced settings?  No, I am done.
Run amplify push command to deploy the service.
Integration of React App and Amazon Location Service
In this step, we will connect of your React App to the Amazon Location Service.
Open your src/App.js and add these code in it.
import Amplify, { Auth } from "aws-amplify"
import Location from "aws-sdk/clients/location"
import awsconfig from "./aws-exports"

Amplify.configure(awsconfig)

const createClient = async () => {
  const credentials = await Auth.currentCredentials()
  const client = new Location({
    credentials,
    region: awsconfig.aws_project_region,
  })
  return client
}
You’ve now successfully connected your React app to the Amazon Location Service.
Creating the Amazon Location Service APIs
You will need to create resource of the Location Services in order to access it. You can create resources using either Amazon Location Service console or AWS Command Line Interface (CLI). Once the resources are created, you can use them calling APIs.
This section provides you an example of using the Amazon Location Service APIs. In this example, we create a Place Index in the Amazon Location Service console and use the APIs to search for places.
Creating a new place index:
1. Open the Amazon Location Service console to create a place index.
2. Enter MyPlaceIndex in Name.
3. Press Create place index.
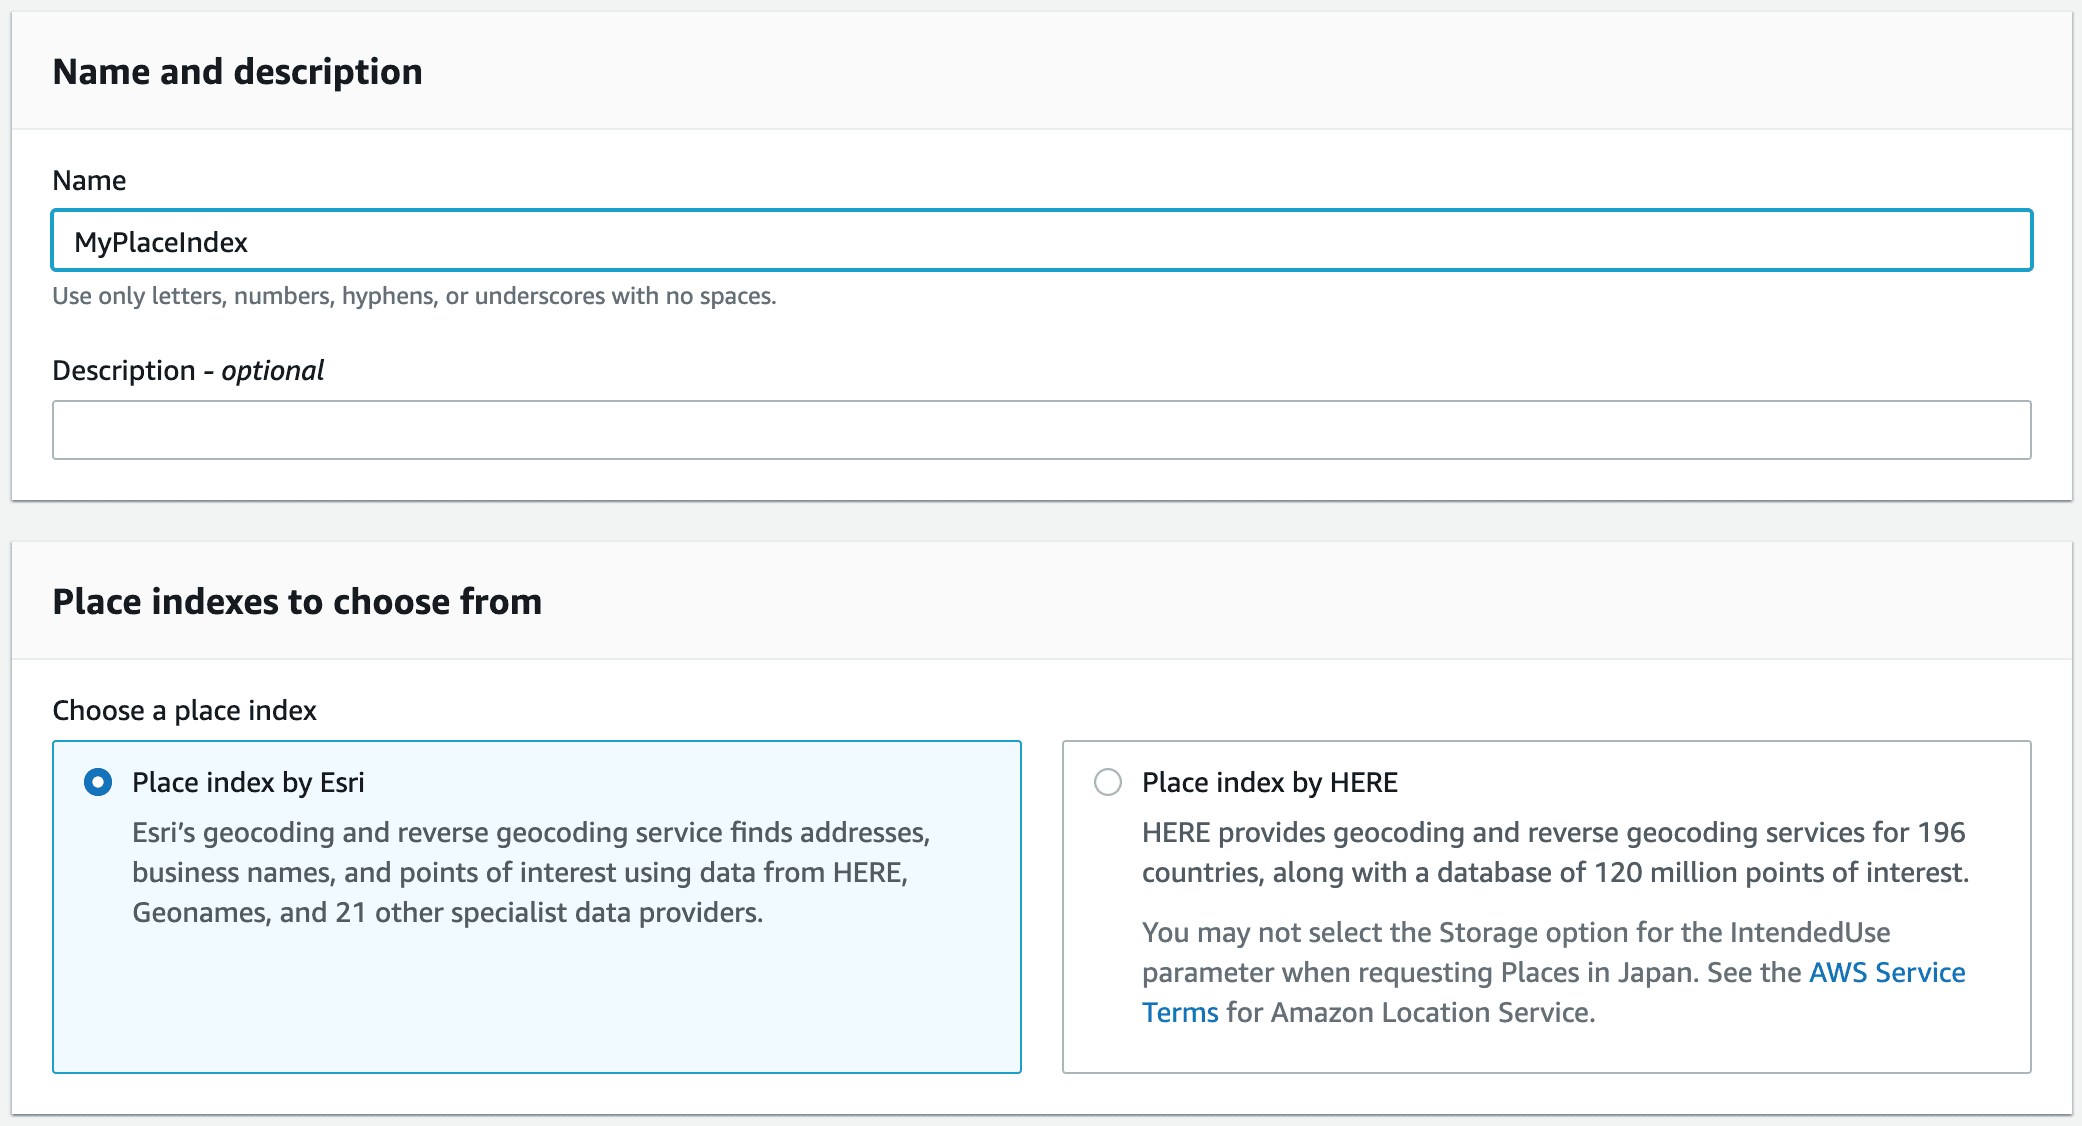
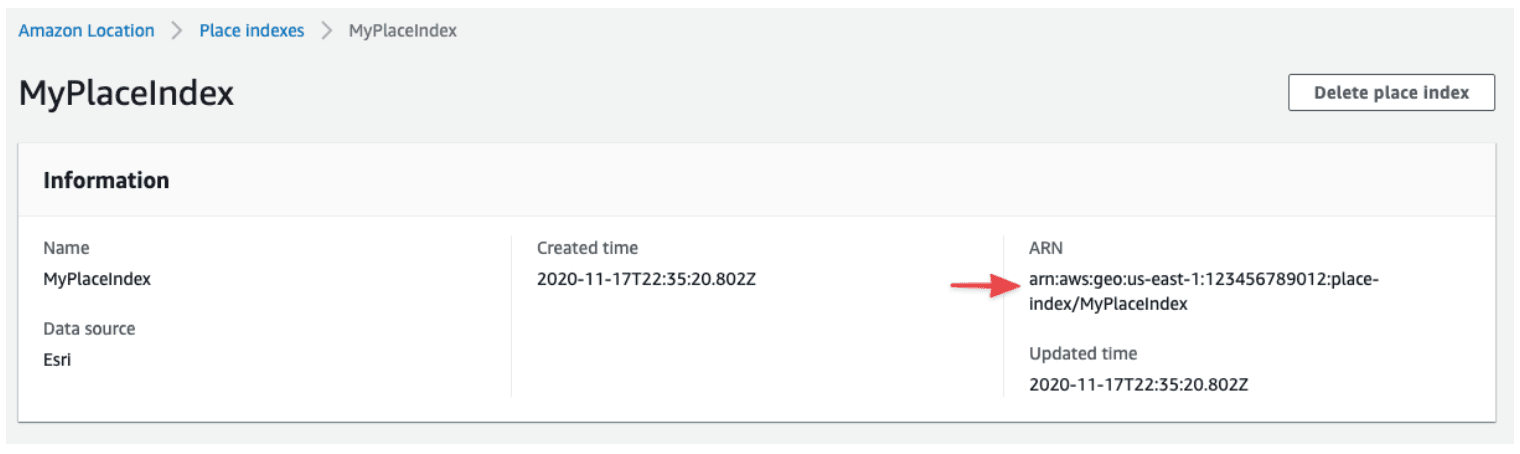
4. Note the Amazon Resource Name (ARN) of your place index.
Allow Guest users access to the place index:
Now since Amplify is authenticating with AWS Cognito, you need to give access to those Users to access the Place Index.
1. Navigate to the root of your project and run the following command:
amplify console auth
2. Select Identity Pool for Which console? when prompted.
3. You will be directed to the Amazon Cognito console. Click on Edit identity pool in the top right corner of the page.
4. Open the drop down for Unauthenticated identities, choose Enable access to unauthenticated identities, and then press Save Changes.
5. Click on Edit identity pool once more. Make a note of the name of the Unauthenticated role. For example, amplify-<project_name>-<env_name>-<id>-unauthRole.
6. Open the AWS Identity and Access Management (IAM) console to manage Roles.
7. In the Search field, enter the name of your Unauthenticated role noted above and click on it.
8. Click +Add inline policy, then click on the JSON tab.
9. Fill in the [ARN] placeholder with the ARN of your place index which you noted above and replace the contents of the policy with the below.
{
  "Version": "2012-10-17",
  "Statement": [
    {
      "Effect": "Allow",
      "Action": "geo:SearchPlaceIndexForText",
      "Resource": "[ARN]"
    }
  ]
}
10. Click on the Review policy button.
11. In the Name field, enter LocationTracker.
11. Click on the Create policy button. You have now successfully added authentication to your Android app.
Permissions required:
{
  "Version": "2012-10-17",
  "Statement": [
    {
      "Sid": "Search",
      "Effect": "Allow",
      "Action": [
        "geo:SearchPlaceIndexForPosition",
        "geo:SearchPlaceIndexForText"
      ],
      "Resource": "arn:aws:geo:us-west-2:account-id:place-index/PlaceIndex"
    }
  ]
}
Searching for places by Text:
The following code details how to use the Amazon Location Service APIs to search for places using the Place Index you just created:
Using JavaScript:
const params = {
  IndexName: "ExamplePlaceIndex",
  Text: "Anyplace",
  BiasPosition: [-123.4567, 45.6789],
}
client.searchPlaceIndexForText(params, (err, data) => {
  if (err) console.error(err)
  if (data) console.log(data)
})
Using API:
POST /places/v0/indexes/ExamplePlaceIndex/search/text
Content-type: application/json
{
 "BiasPosition": [ -123.4567,45.6789 ],
 "FilterCountries": [ "USA" ],
 "Text": "Any Town"
}
Extracting Address of place from Geo-Coordinates:
The following code details how to use Amazon Location Service APIs to get Address of the place from Geo-Coordinates:
Using JavaScript:
const params = {
  IndexName: "myLocationIndex",
  Position: [78.6165983, 13.2783941]
};
client.searchPlaceIndexForPosition(params, (err, data) => {
  if (err) console.error(err)
  if (data) console.log(data)
})
Using API:
POST /places/v0/indexes/ExamplePlaceIndex/search/position
Content-type: application/json
{
 "Position": [ -123.4567,45.6789 ]
}
Sample Output:
{
  "Summary":{
    "Position":[
      78.6165983,
      13.2783941
    ],
    "MaxResults":50,
    "DataSource":"Esri"
  },
  "Results":[
    {
      "Place":{
        "Label":"6th Cross Road, Jayanthi Nagar, Bengaluru, Karnataka, 570245, IND",
        "Geometry":{
          "Point":[
            76.61378010073193,
            12.279847956653757
          ]
        },
        "Municipality":"Bengaluru",
        "SubRegion":"Bengaluru",
        "Region":"Karnataka",
        "Country":"IND",
        "PostalCode":"570245"
      }
    }
  ]
}